Note
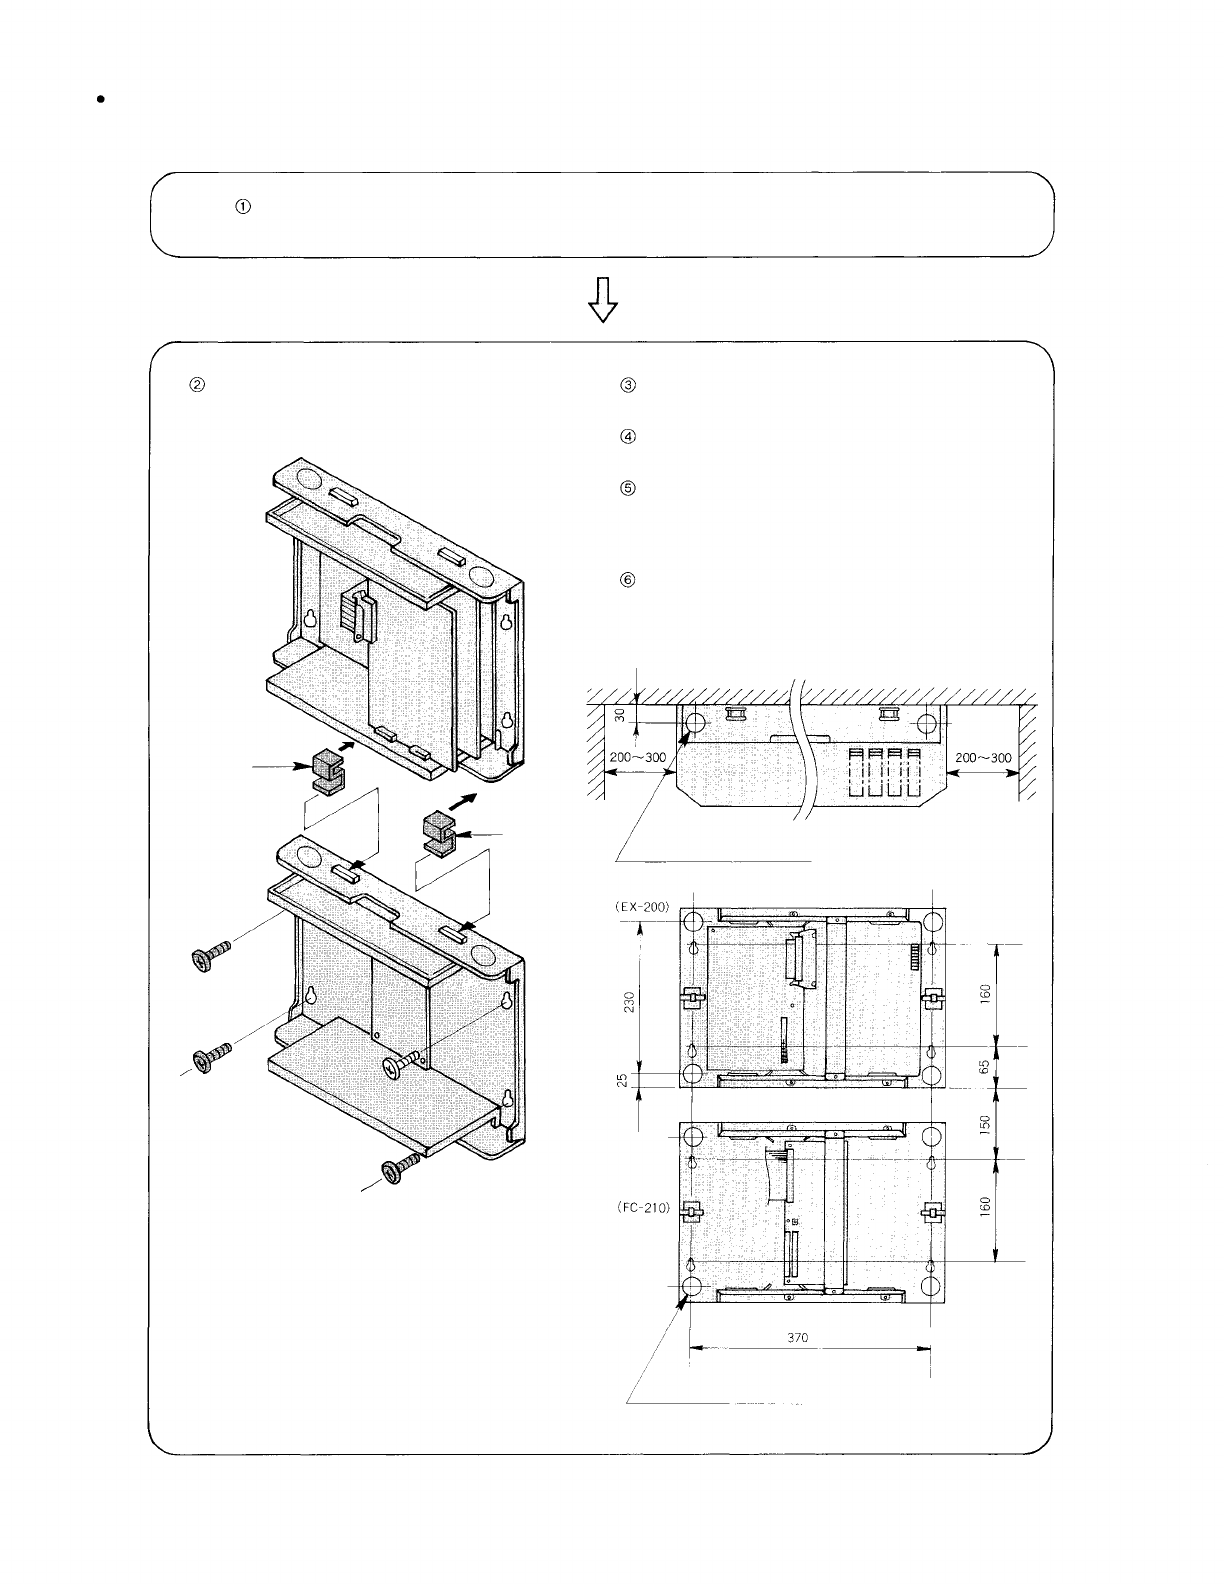
(1) Since the YR-820 and YR-821 cables are to be used
for connecting the FC-210 to the EX-200 exchange,
there is a limit to spacing between the two units. You
should allow for this limit and fix them according to
dimensions shown at right when they are mounted
on the wall.
(2) Allow for sufficient spacing for screwing and un-
screwing the top cover when mounting on the wall.
Unscrew screws that hold the top case to a chassis at 4 places
in the sides of a cabinet.
Insert attached brackets (2 pieces) into bracket
receptacles on the bottom case of the EX-200.
Fit bracket receptacles of the FC-210 into the
brackets.
Fix the cabinet on the wall through fixing holes
provided on its bottom case.
Connect the connector CN-5 on the CC-20 card
mounted in the EX-200 to the connector CN-4 on the
printed circuit board of the FC-210 using the
attached GND connector.
Remove a rubber membrane of 2 bushings on the
bottom case of the EX-200 and FC-210 to allow the
cable entry.
Follow the procedures below to install the FC-210 cabinet:
4-3 Installing FC-210 extension cabinet
(EX-200)
Bracket
Bracket
(FC-210)
Knock-out hole (for wiring)
Knock-out hole (for wiring)
Dimensions
– 6 –
