Recording and playback
29
GB
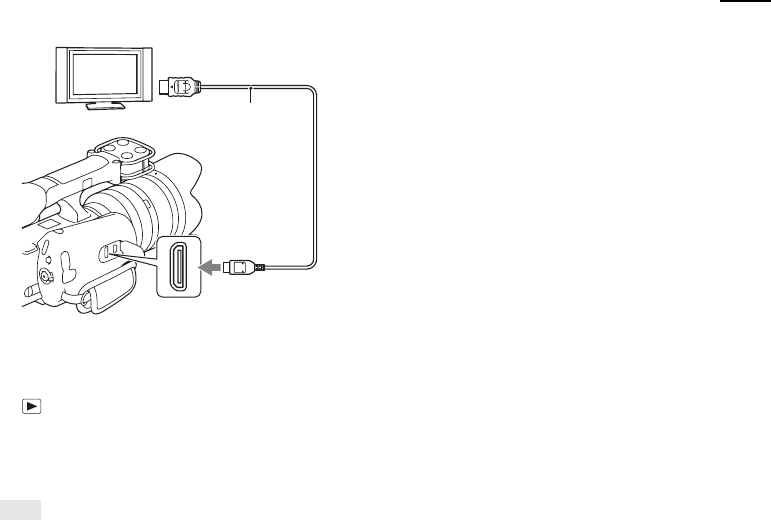
Playback on a TV
To view images recorded on the camcorder on a
TV, an HDMI cable (sold separately) and an HD TV
equipped with an HDMI connector are required.
Refer also to the operating instructions supplied
with the TV.
1 Turn off both the camcorder and the TV.
2 Connect the camera to the TV with an HDMI
cable (sold separately).
3 Turn on the TV and switch the input.
4 Turn on the camcorder, and press
(Playback).
Images recorded with the camcorder appear
on the TV screen.
Select the desired image with v/V/b/B and the
control dial.
Notes
• Use an HDMI mini connector on one end (for the
camcorder), and a plug suitable for connecting your TV on
the other end.
• No image is displayed on the viewfinder and LCD monitor
when signals are output via the HDMI terminal.
• Some devices may not work properly.
• Use an HDMI cable with the HDMI logo.
• Do not connect the output connector of the device with the
HDMI terminal on the camcorder. This may cause a
malfunction.
• Signals can be output from the camcorder to a TV only via
the HDMI terminal.
• This camcorder is not compatible with “BRAVIA” Sync.
On “PhotoTV HD”
This camcorder is compatible with the “PhotoTV
HD” standard.
By connecting Sony’s PhotoTV HD-compatible
devices using an HDMI cable (sold separately), a
whole new world of photos can be enjoyed in
breathtaking Full HD quality.
“PhotoTV HD” allows for a highly-detailed, photo-
like expression of subtle textures and colors. For
details, refer to the operating instructions supplied
with the TV.
1 To the HDMI connector
HDMI cable
2 To the HDMI
terminal
