MX-3114N MX-2314N/2614N/3114N (MAIN UNIT) 2 – 6
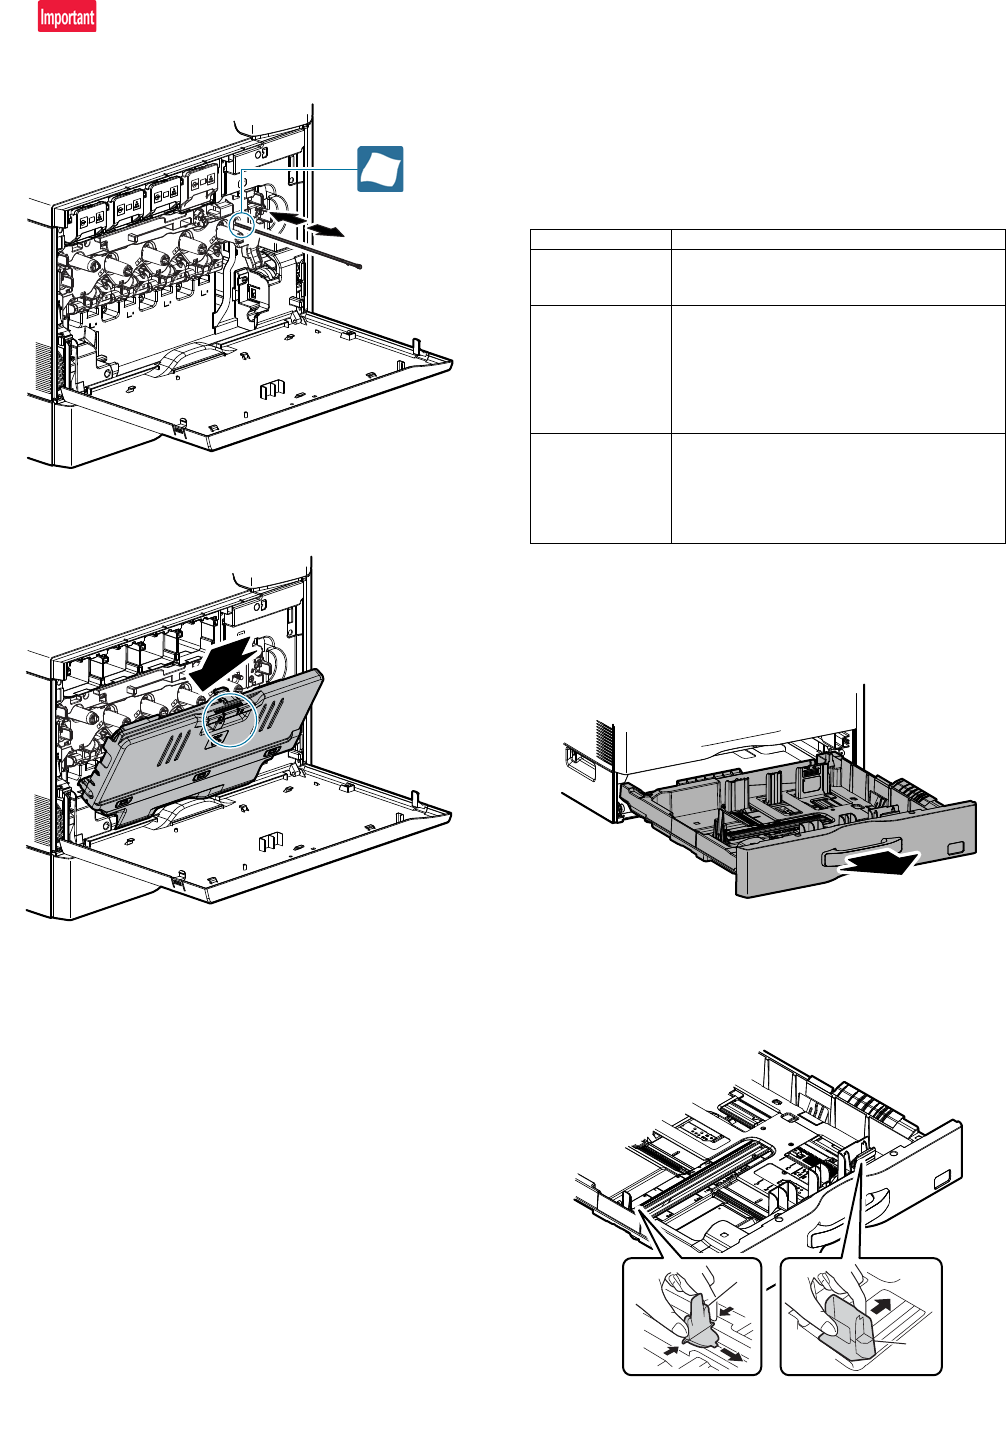
4) Move the PTC cleaning rod back and forth a few times to clean
the PTC wire.
After completion of cleaning, insert the cleaning rod completely
to the bottom.
5) Return the LSU cleaning rod to the front cabinet so that the felt
faces upward. Fit the boss, and fix it with three pawls.
6) Close the front cabinet.
D. Paper feed tray setup
(1) System setting
1) Press the [SYSTEM SETTINGS] key.
2) Touch the [Paper Tray Settings] key.
3) Touch the [Paper Tray Settings] key to configure the settings.
These settings specify the paper type, paper size, and func-
tions allowed for each paper tray. When the [Tray Settings] key
is touched, a list appears showing the trays and the current
settings.
4) Touch the [Change] key in the above screen to change the set-
tings. The following settings can be configured.
(2) Tray size setup
1) Pull out the paper tray.
Gently pull the tray out until it stops.
If paper remains in the tray, remove it.
2) Adjust the guide plates A and B by squeezing their lock levers
and sliding them to match the vertical and horizontal dimen-
sions of the paper to be loaded.
The guide plates A and B are slidable. Slide each guide plate
while squeezing its lock lever.
Item Description
Type Select the type of paper that is loaded in the tray.
The paper types that can be selected vary by paper
tray.
Size Select the paper size from the list. The paper sizes
that can be selected vary by tray. The sizes that
can be selected may also be restricted by the paper
type selected above.
If the desired size does not appear in the list, select
[Custom Size] and directly enter the size (only for
the bypass tray).
Feeding Approved
Job
Select the modes that can be used. If there is a
function that you do not wish to be used with the
selected tray, disable the function. When the "Type"
is other than plain paper, recycled paper, colored
paper, or a user type, [Fax] and [Internet Fax]
cannot be selected.
A
B
