3
English
TroubleshootingSetting/AdjustmentPrior to use Installation
Connecting Cables
Attention
• When replacing the current monitor with an S2411W-U monitor, be sure to change the PC settings for
resolution and vertical frequency to those which are available for the S2411W-U monitor referring to the
resolution table (back of cover page) before connecting the PC.
NOTE
• When connecting two PCs to the monitor, refer to the User’s Manual on the CD-ROM.
1
Check that the monitor and the PC are powered off.
2
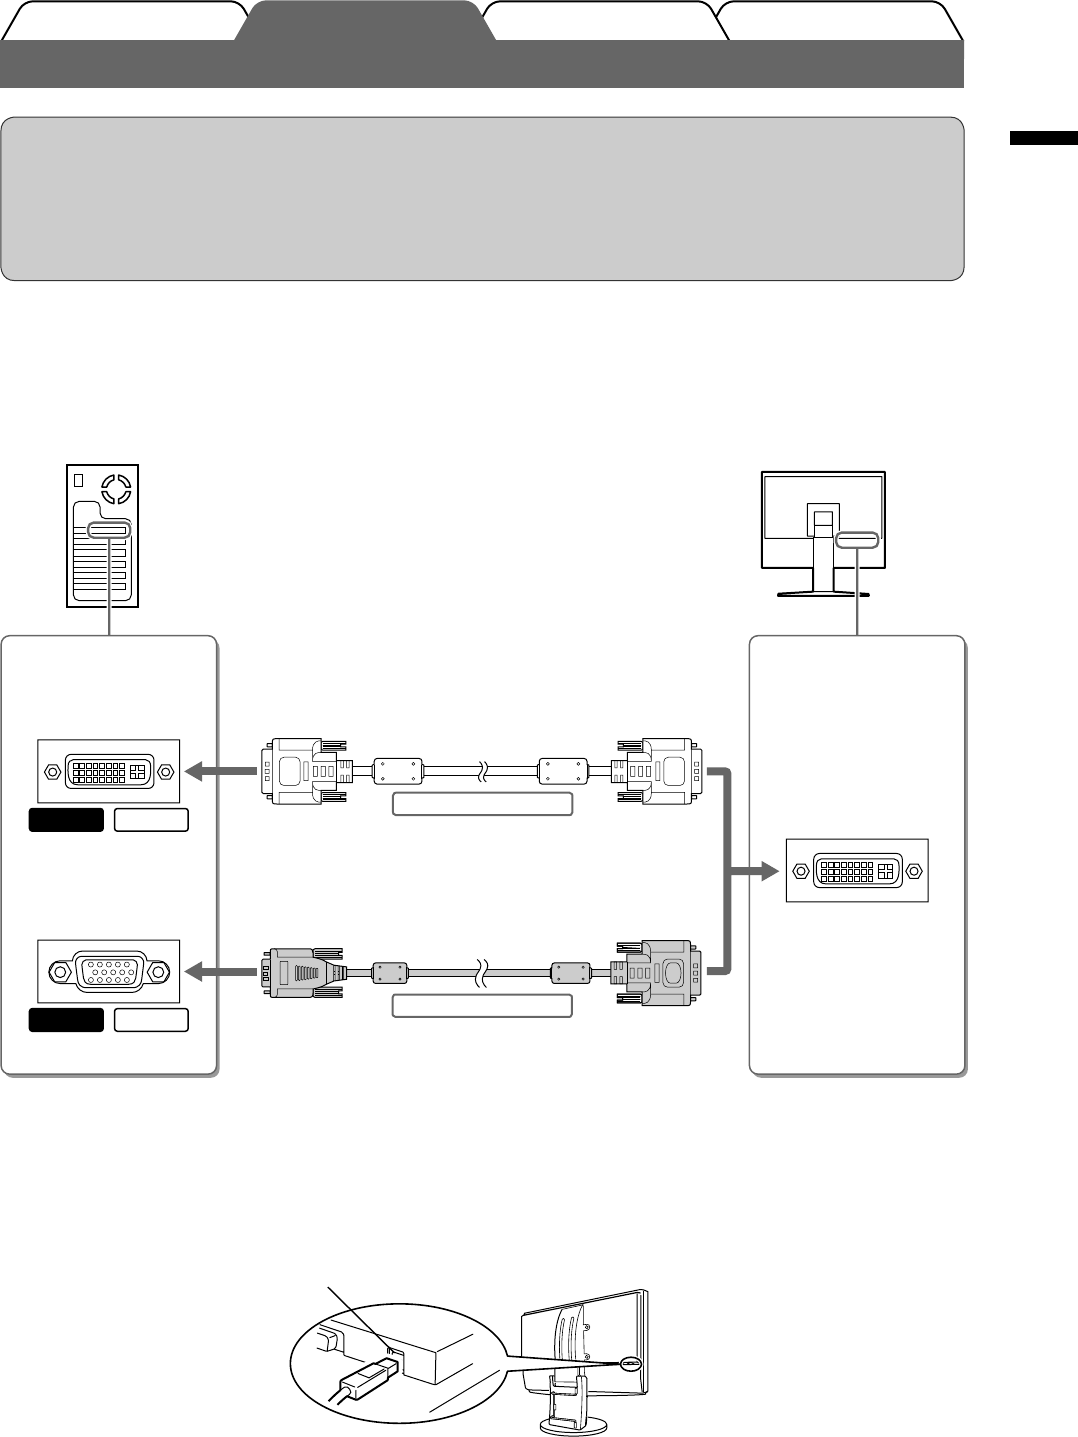
Connect the monitor to the PC with a signal cable that matches the connectors.
After connecting the cable connectors, tighten the screws of the connectors to secure the coupling.
3
Plug the power cord into a power outlet and the Power connector on the monitor.
4
Connect the USB port (downstream) of a USB compatible PC and the monitor’s
USB port (upstream) with the supplied USB cable.
MacintoshWindows
MacintoshWindows
Connectors on the
PC
DVI-I connector
D-Sub mini 15-pin
connector
Connectors on the
monitor
DVI-I connector
Signal cable FD-C39 (supplied)
Signal cable FD-C16 (supplied)
Digital connection
Analog connection
Upstream
SetupManual-9.indb 3SetupManual-9.indb 3 2007-4-12 18:51:582007-4-12 18:51:58


