4
MSSC, LLC Collinsville, IL USA Tel: 618-343-1006 Fax: 618-343-1016 55999 9 July 2008
www.msscllc.com
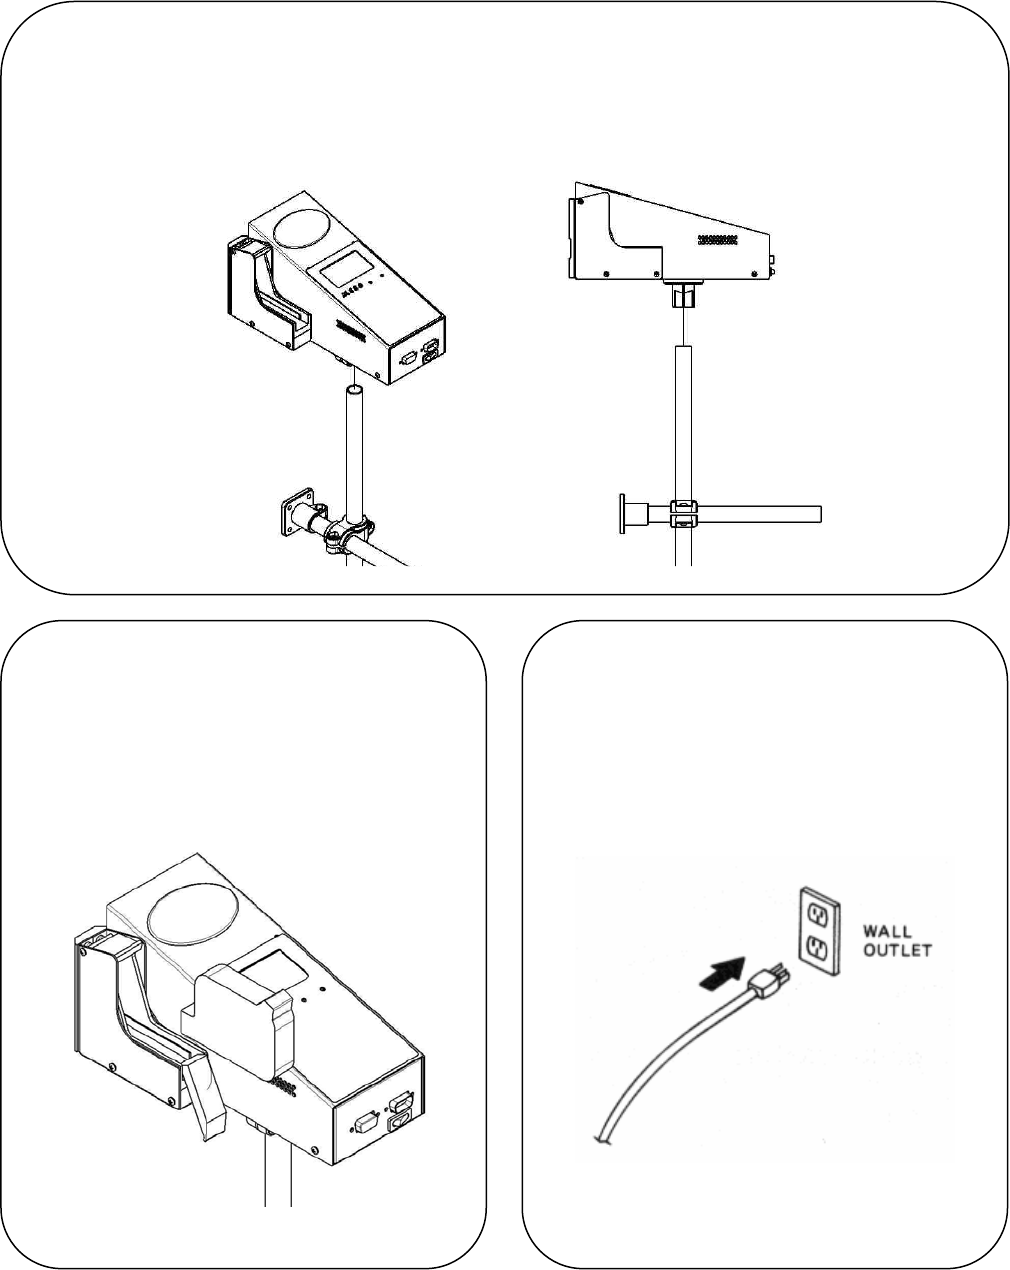
6. Plug in the QM2.
Plug the power cord into an appropriate voltage
power source. NOTE: Be sure the power source
for the QM2 is free from surges and spikes. Like
other computer equipment, the QM2 is sensitive to
surges and spikes. For best results, use a dedicated
receptacle on a direct line from the power panel.
5. Install a QM2 print cartridge.
Power must be off to install and remove the print
cartridge.
Please insert cartridge in horizontal direction to
avoid damage to contacts. For more detailed
instructions refer to pg. 14 of the QM2 Operation
Guide.
4. Mount the QM2 to the bracketry.
• Place the base clamp on the bottom of the QM2 over the end of the vertical tubing and tighten to secure the print head.
• Adjust the print head by loosening the cross clamp with a 5/32” or 4 mm allen wrench.
• The QM2 should be perpendicular to the product. If the print head is angled print quality will suffer.
• Once the QM2 is in position tighten all screws on the clamps


