Introduction
Front Panel
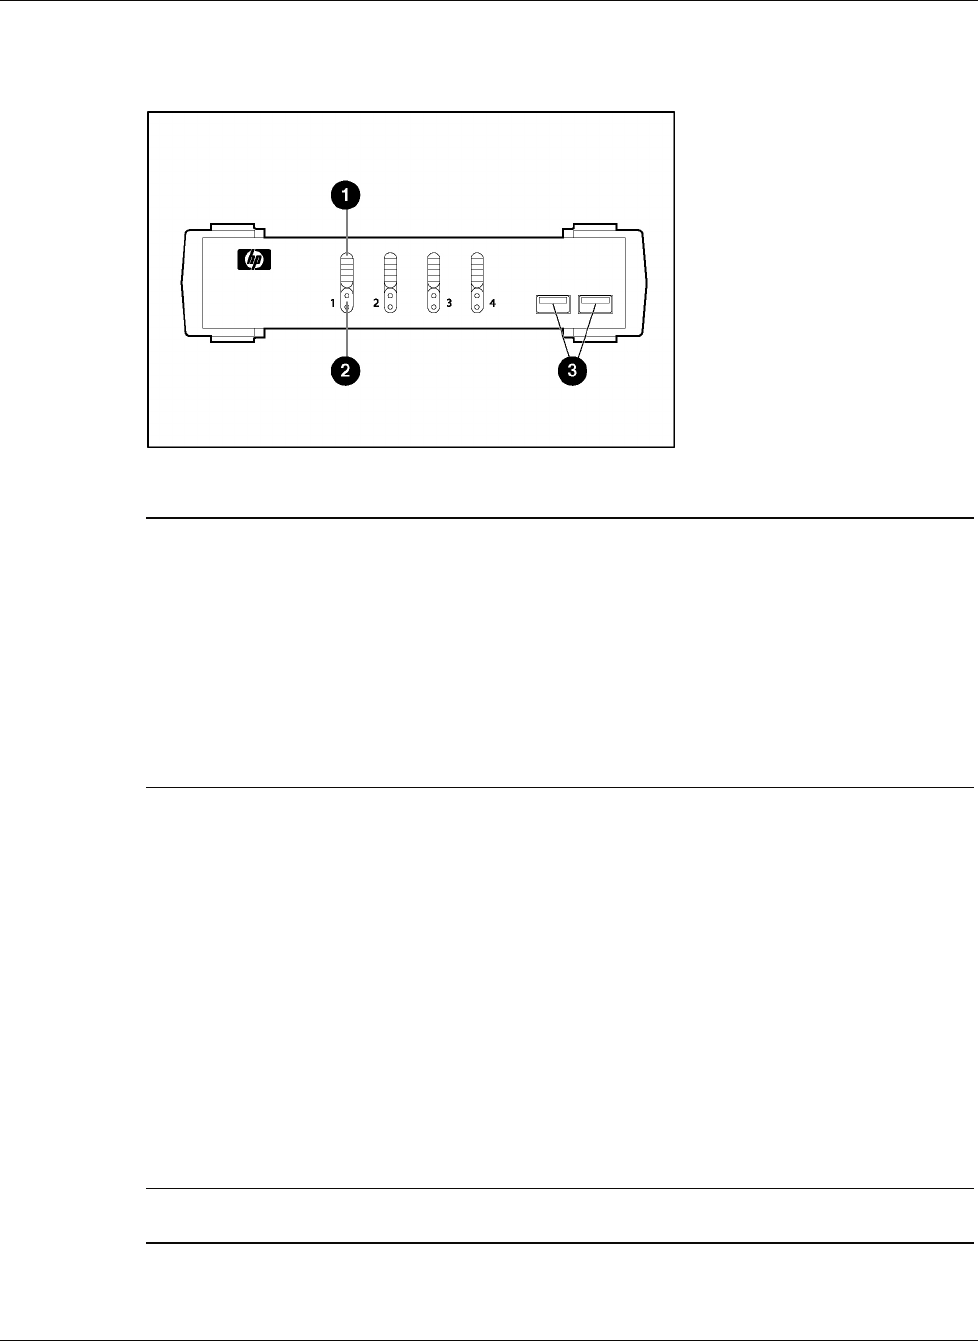
Figure 1-1: Front panel
Item Description Function
1 Port
selection
switches
• Press a switch for longer than 2 seconds to bring the KVM focus, USB
peripherals, and audio focus to the computer attached to the
corresponding port.
• Press a switch for less than 2 seconds to bring only the KVM focus to
the computer attached to the corresponding port.
• Press switches 1 and 2 simultaneously for 2 seconds to start Auto
Scan mode. For more information on Auto Scan mode, refer to “Auto
Scanning” in chapter 3 of this guide.
• Press switches 3 and 4 simultaneously for 2 seconds to perform a
keyboard and mouse reset.
2 Port LEDs The Port LEDs are built into the Port Selection Switches. The upper LEDs
are the KVM Port LEDs. The lower LEDs are the USB LEDs.
KVM Port LEDs
• Dim orange—I ndicates that the computer attached to the
corresponding port is currently online
• Bright orange—Indicates tha t the computer attached to the
corresponding port is selected for the KVM focus
• Flashing orange—Indic ates that the computer attached to the
corresponding port is being accessed under Auto Scan mode
USB LEDs
• Dim green—In dicates that there is a USB cable connection to the
computer
• Bright green—I ndicates that the computer attached to the
corresponding port has access to the USB peripherals
3 USB console
ports
Connectors used for attaching a USB keyboard and mouse or the
PS/2-to-USB interface adapter.
HP 1x4 USB/PS2 KVM Switch User Guide 1-3


