AVerMedia User’s Manual
EYES Pro/MP2016/MP3000/MP5000
115
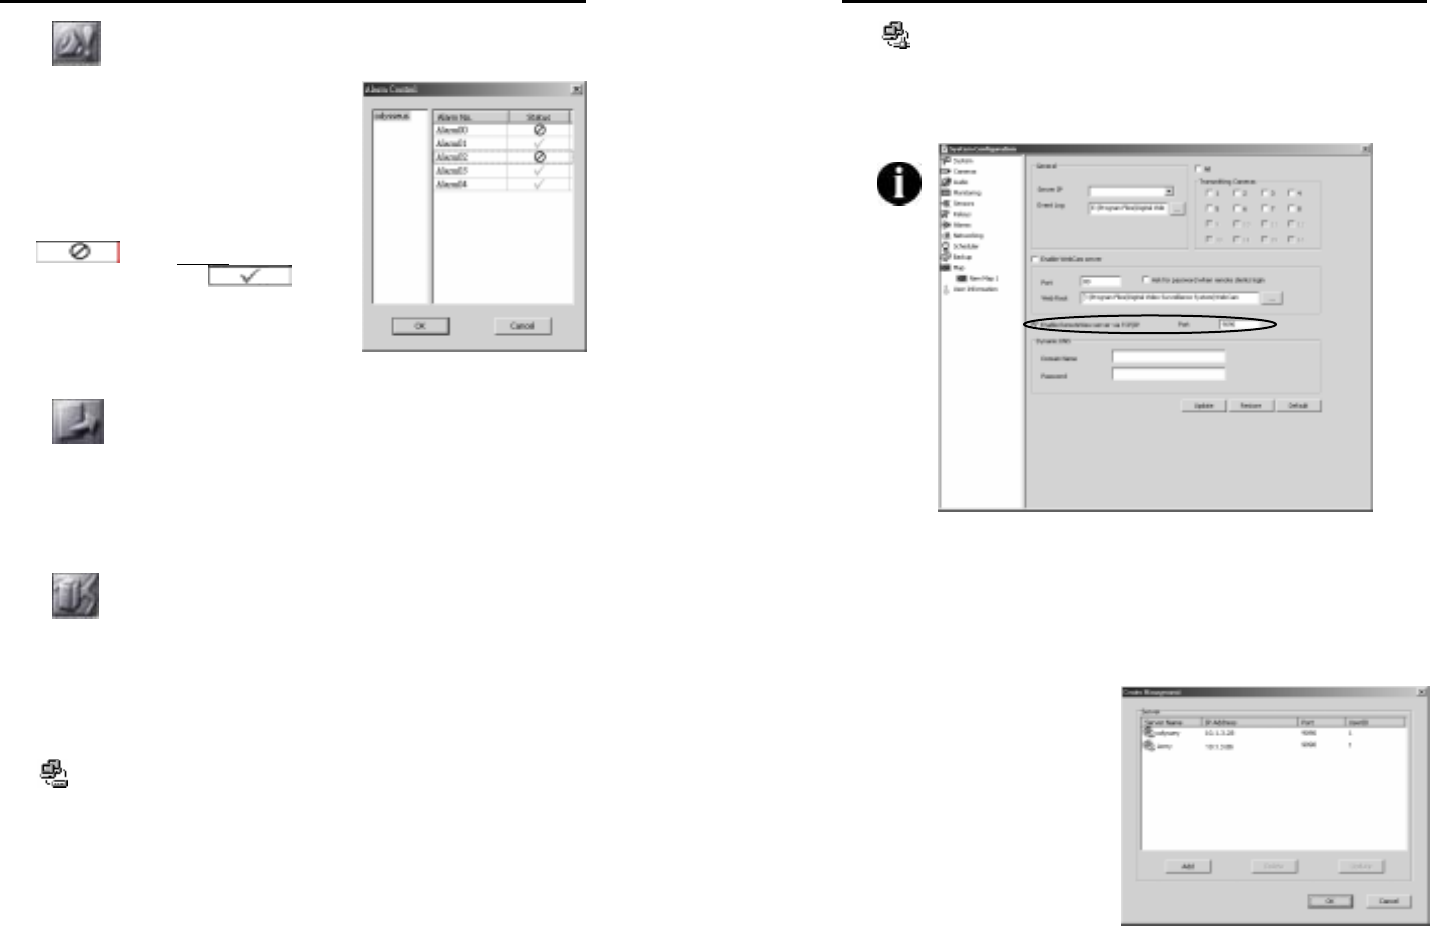
6.2.8 Alarm Control
It is available to choose the server and
decide to enable or disable the
corresponding alarms.
1. Click Alarm Control to see the
window for alarm status.
2. To enable an alarm, simply click on
in the Status column and
change the status to
.
3. Click the OK button to save the
setting.
6.2.9
Back to Main Menu
Back to the main menu by clicking this button.
6.3 Operating the RemoteManager
6.3.1
Center Management
Users can take advantage of this section to manage the connectable
servers’ detailed information. The setting should be placed before you
commence configuring the system at the first time.
There are two ways to connect server:
1.
Connection via Modem to Modem (refer to Appendix A for the
connection):
First you should connect to the server manually via modem before
accessing RemoteManager. Then, it is allowed to add a new server
as a dial-up server is installed by server and a dial-up networking
established by client.
AVerMedia User’s Manual
EYES Pro/MP2016/MP3000/MP5000
116
2. Connection via TCP/IP
Once the function “Enable Remote View server via TCP/IP” in
the setting of Networking section in system configuration has been
checked, you are allowed to add a new server via TCP/IP.
Before arranging center manager section, please make sure
RemoteView server enabled in networking section of
System Configuration.
To offer the complete information, finish the steps below:
1. Click Center Manager button and the following window appears:
2. Click Add to include an
available server to server
list. The Add Server
window will show as follows
or click Delete or Update
to modify the setting.
3. The multicast servers in
