


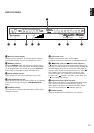


6 Play the source. (For detailed information on the tuning
operation, refer to page 32.)
7
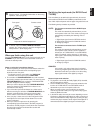
Adjust to the desired output level.
8 If desired, adjust the BASS, TREBLE, BALANCE
controls, etc. (refer to page 31) and use the digital sound
field processor. (Refer to page 36.)
When you finish using this unit
Press the STANDBY/ON switch on the front panel again or the
STANDBY key on the remote control transmitter to turn this
unit into the standby mode.
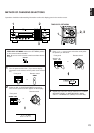
Notes on using the input selector buttons
●
Note that pressing on each input selector button selects the
source which is connected to the corresponding input
terminals on the rear panel.
* To select the source connected to the VIDEO AUX
terminals on the front panel, press VIDEO AUX.
●
The selection of TAPE/MD MONITOR cannot be canceled
by pressing another input selector button. To cancel it, press
TAPE/MD MONITOR again so that the “TAPE MONITOR”
indicator disappears from the display.
When you select a button other than TAPE/MD MONITOR,
make sure that the “TAPE MONITOR” indicator is not
illuminated on the display.
●
If you select the input selector button for a video source
without canceling the selection of TAPE/MD MONITOR, the
playback result will be the video image from the video
source and the sound from the audio tape (or MD etc.).
●
Once you play a video source, its video image will not be
interrupted even if the input selector button for an audio
source is selected.
●
When you select an input source by pressing the
corresponding input selector button, the DSP program (or
the state of no DSP program is used) which was used when
the same input source was selected the last time will
automatically recalled.
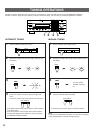
Switching the input mode (for DVD/LD and
TV/DBS)
This unit allows you to switch the input mode only for sources
connected to the DVD/LD and TV/DBS input terminals (on the
rear of this unit) that input two or three types of signals to this unit.
The following two input modes are provided.
AUTO: For the source connected to the DVD/LD input
terminals:
This mode is automatically selected when you turn
on the power to this unit. In this mode, input signal is
automatically selected by the following order of
priority.
1. Digital input signal from the OPTICAL terminal
2. Digital input signal from the COAXIAL terminal
3. Analog input signal
For the source connected to the TV/DBS input
terminals:
This mode is automatically selected when you turn
on the power to this unit if the “AUTO” position is
selected on “8. TV/DBS INPUT” in the SET MENU
mode. (For details, refer to page 27.) In this mode,
input signal is automatically selected by the following
order of priority.
1. Digital input signal from the COAXIAL terminal
2. Analog input signal
ANALOG:
In this mode, only analog input signal is selected
even though digital signal is input at the same time.
Select this mode when you want to use the analog
input signal instead of the digital input signal.
Notes on input mode selection
●
To play back a source with the Dolby Digital (AC-3) decoded,
set the input mode to “AUTO”.
●
For the TV/DBS source only, the input mode selected on the
function “8. TV/DBS INPUT” in the SET MENU mode is
selected when you turn on the power of this unit.
●
When you want to enjoy a source which has normal 2-
channel signals with a Dolby Pro Logic Surround program,
select the ANALOG mode.
●
In the AUTO mode, there may be a case depending on some
LD players or DVD players that when you make a search on a
source encoded with the Dolby Digital (AC-3) during the play
and then the play is restored, sound output is interrupted for a
moment because the digital input signal is selected again.
29
English
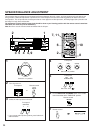
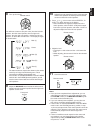
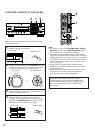
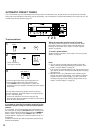
Front panel
or
Remote control
l6
20
28
40
60
l2
8
4
2
0
–dB
VOLUME
MASTER VOLUME
MUTE