


14
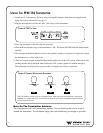
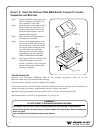
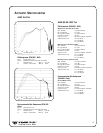
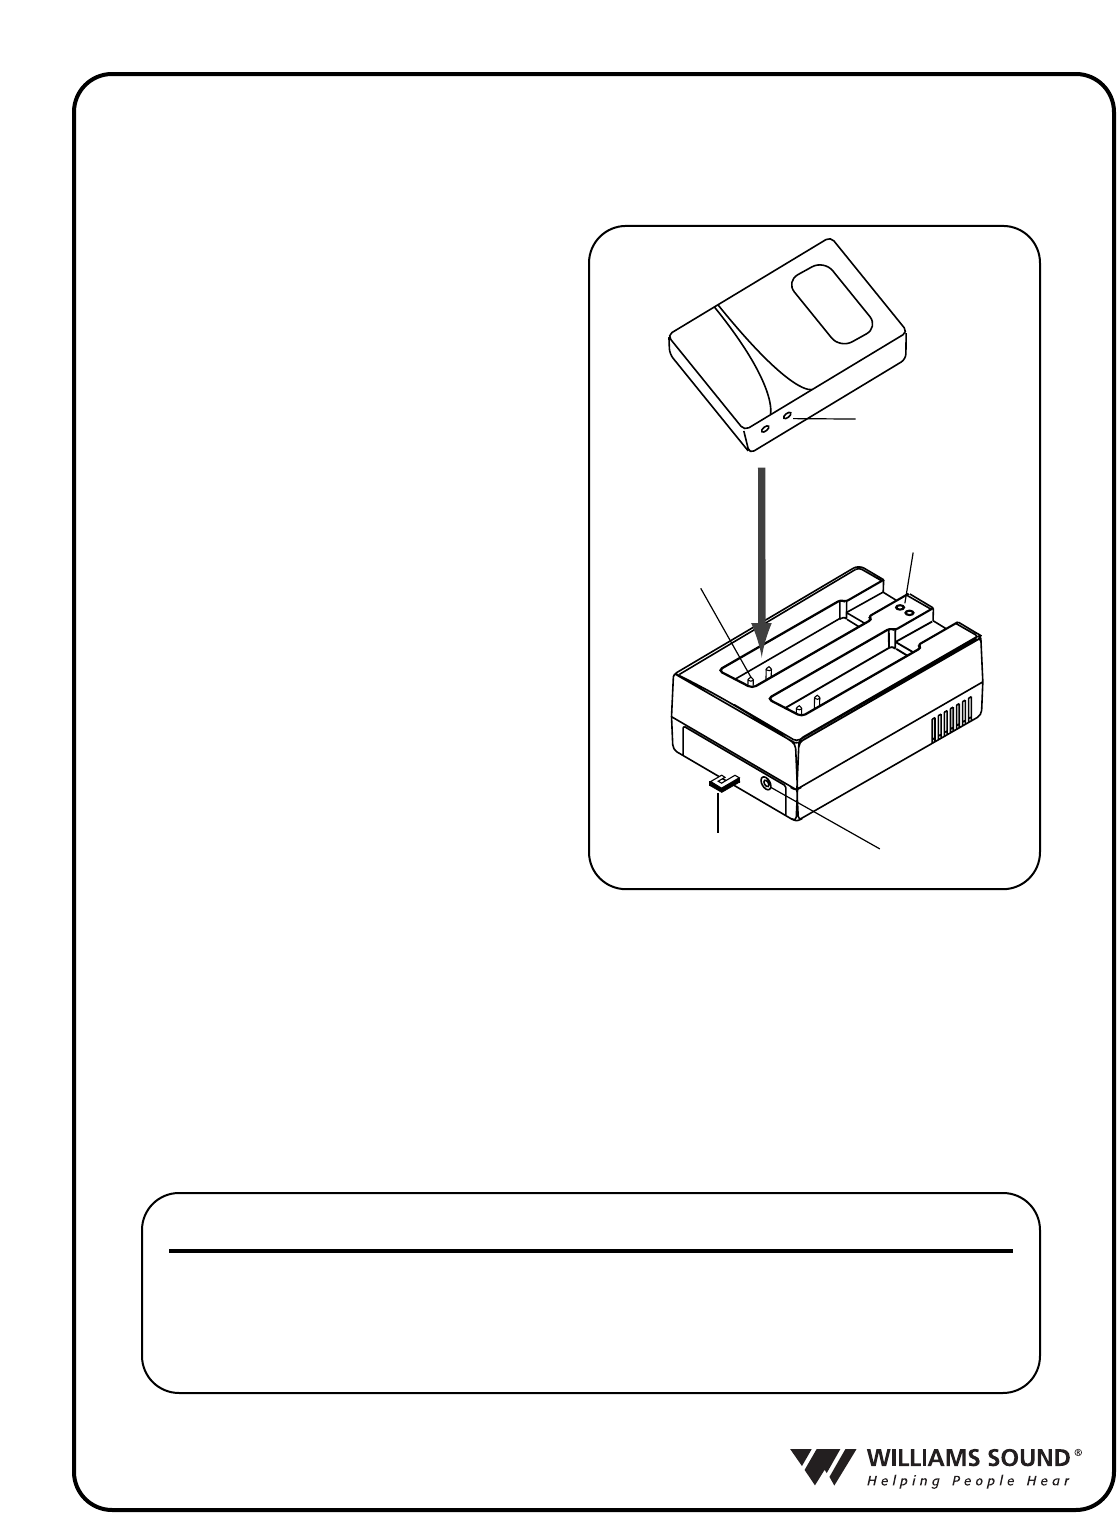
FIGURE 13: USING THE OPTIONAL CHG 200A BATTERY CHARGER TO CHARGE
TRANSMITTERS AND RECEIVERS
Step 1: Plug the CHG 200’s power supply into
the Power Input on the charger’s side
and a standard AC wall outlet.
Step 2: Route the power cord around the Cord
Hook (see figure at right). This will
minimize strain on the cord and jack
and insure that the power cord is not
detached during charging.
Step 3: Make sure the receivers/transmitters to
be charged are turned OFF.
Step 4: Place the receivers/transmitters in the
slots so that the CHG 200’s Charging
Pins and receiver’s side panel contacts
are coupled. Make sure that the charg-
ing contact holes line up with the
charging pins. The receivers should
drop easily into the slots. DO NOT
FORCE THEM IN BACKWARDS.
Step 5: The Charging Indicators will light, indi-
cating that charging is in process.
It takes 14–16 hours to fully charge the
batteries. Remove the receivers when
charging is completed.
FURTHER SUGGESTIONS
Receivers and Transmitters SHOULD NOT be left charging continuously when not in use.
Receivers should always be turned OFF while charging.
It’s best to allow the batteries to fully discharge before charging.
If the batteries are near end of life and the LED turns off while the receiver is operating, this is an indication to
change or recharge your batteries. Approximately one hour of battery life remains.
Repeatedly charging the batteries after short periods of use (1-2 hours) will shorten battery life.
Rechargeable batteries will need to be replaced after 1–2 years of use.
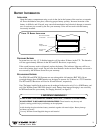
Charging
Indicators
Charging
Pins
Cord Hook
Power Input
Charging
Contact Holes
!! WARNING !!
DO NOT ATTEMPT TO RECHARGE DISPOSABLE BATTERIES!
The batteries may heat up and burst, causing possible injury and damage to the equipment.
Avoid shorting the plus and minus battery terminals together with metal objects. Battery damage and
burns can result!
Use only Williams Sound supplied chargers and batteries.