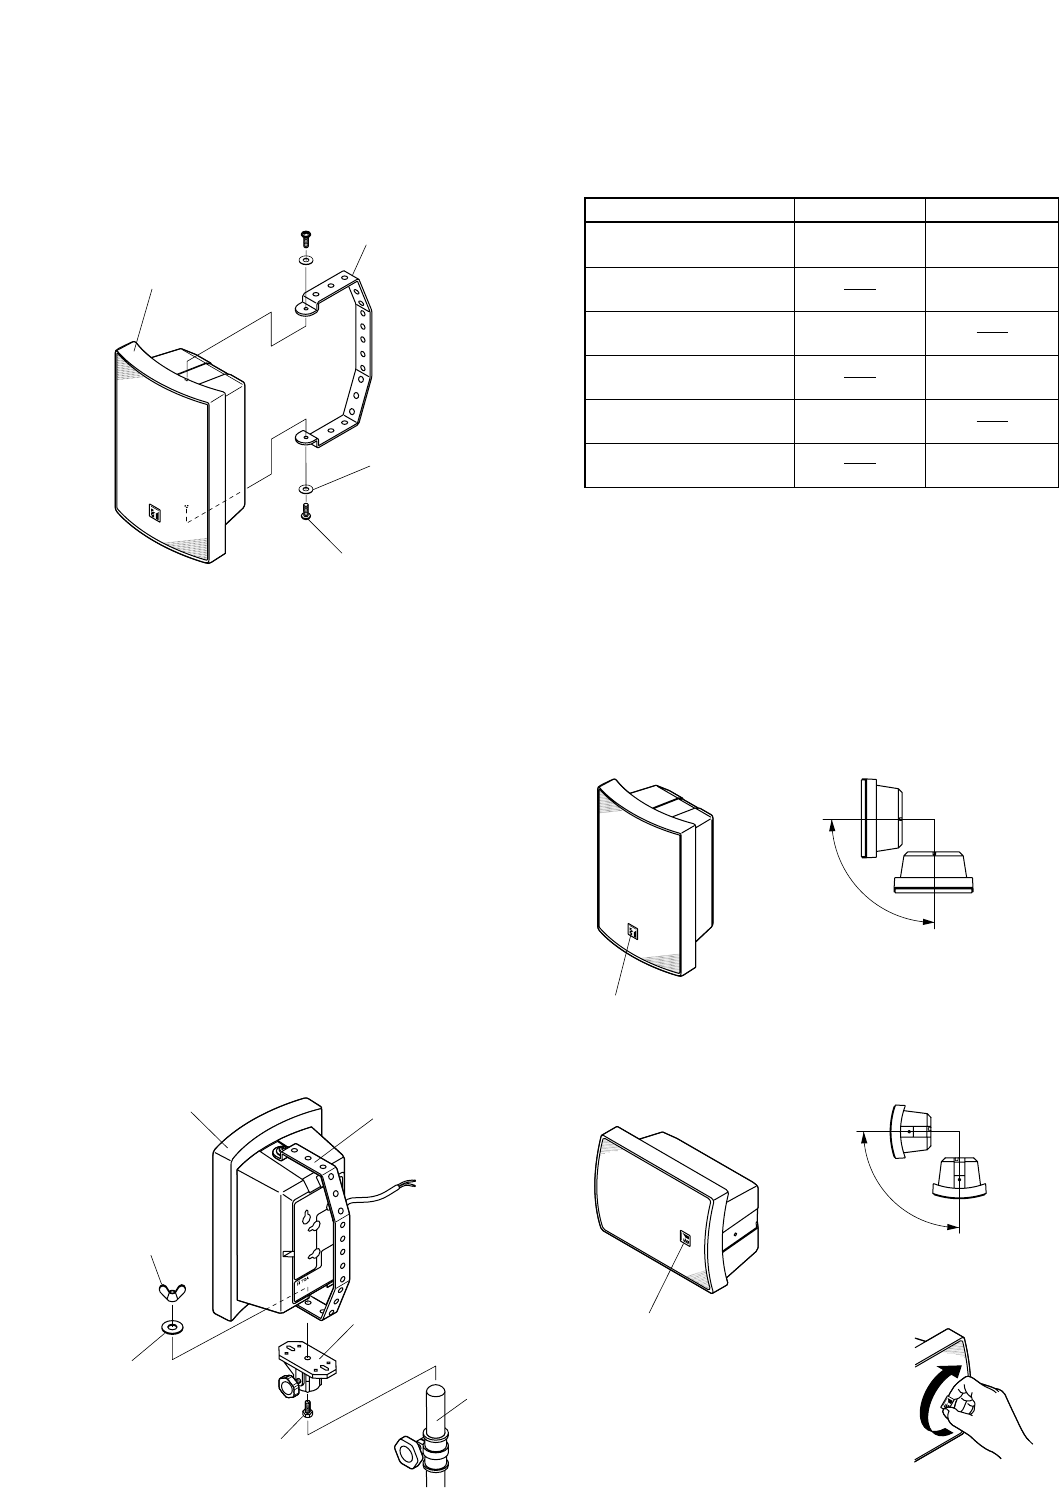
4.2. Wall Mounting – With Supplied Bracket
Step 1. Attach the bracket to the speaker using the
supplied hardware.
Step 2. Mount the speaker in the desired location using the
mounting holes made in the bracket.
Note
Bracket mounting hardware is not supplied with the unit.
Referring to the bracket's dimensional diagram, prepare
the correct type of screws or bolts appropriate to the wall
material.
4.3. Mounting on the Optional ST-16 Speaker Stand
Step 1. Attach the bracket to the speaker using the
supplied hardware. (Refer to Section "4.2. Wall
Mounting – With Supplied Bracket.")
Step 2. Mount the speaker to the speaker stand through
the bracket's mounting holes.
4.4. Mounting with Other Brackets
The following table shows the brackets that can be used for
the BS-1030 Series Speakers. When using these brackets,
refer to their corresponding instruction manuals.
Bracket
(standard accessory)
Speaker
Plain washer
(standard accessory)
Machine screw
(standard accessory)
Speaker
Bracket
(supplied with
the speaker)
Butterfly nut
(supplied with
the ST-16)
Washer
(supplied with
the ST-16)
Bracket
(supplied with the ST-16)
Hexagonal-head bolt
(supplied with the ST-16)
ST-16
(optional)
Usable Brackets
Speaker Mounting
Bracket SP-410
Speaker Mounting
Bracket SP-420
Wall/Ceiling Mounting
Bracket WCB-12
Wall/Ceiling Mounting
Bracket WCB-12W
Table Mounting
Bracket TMB-1
Table Mounting
Bracket TMB-1W
BS-1030B
BS-1030W
OK
OK
OK
OK
OK
OK
OK
5. OUTDOOR INSTALLATION
PRECAUTIONS
The speaker's splash-proof construction permits it to be
installed outdoors, such as under eaves and other locations
where the speaker is not directly exposed to the elements.
However, because the splash-proof feature is strictly
dependent on speaker orientation, follow the mounting
instructions below.
5.1. Vertical Installation
5.2. Horizontal Installation
Note
The splash-proof function will not work with any other
installation method than those referred to above.
Install with the logo mark located at the bottom
of the front panel.
Horizontal
Face-down
Install the speaker so that its front panel
orientation stays in the above range.
Horizontal
Face-down
Install the speaker so that its
front panel orientation stays in
the above range.
Install with the logo mark located
at the right of the front panel as
viewed from the front.
The logo mark can be changed
to correct its orientation.


