


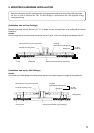
7
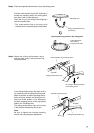
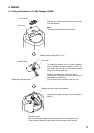
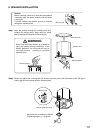
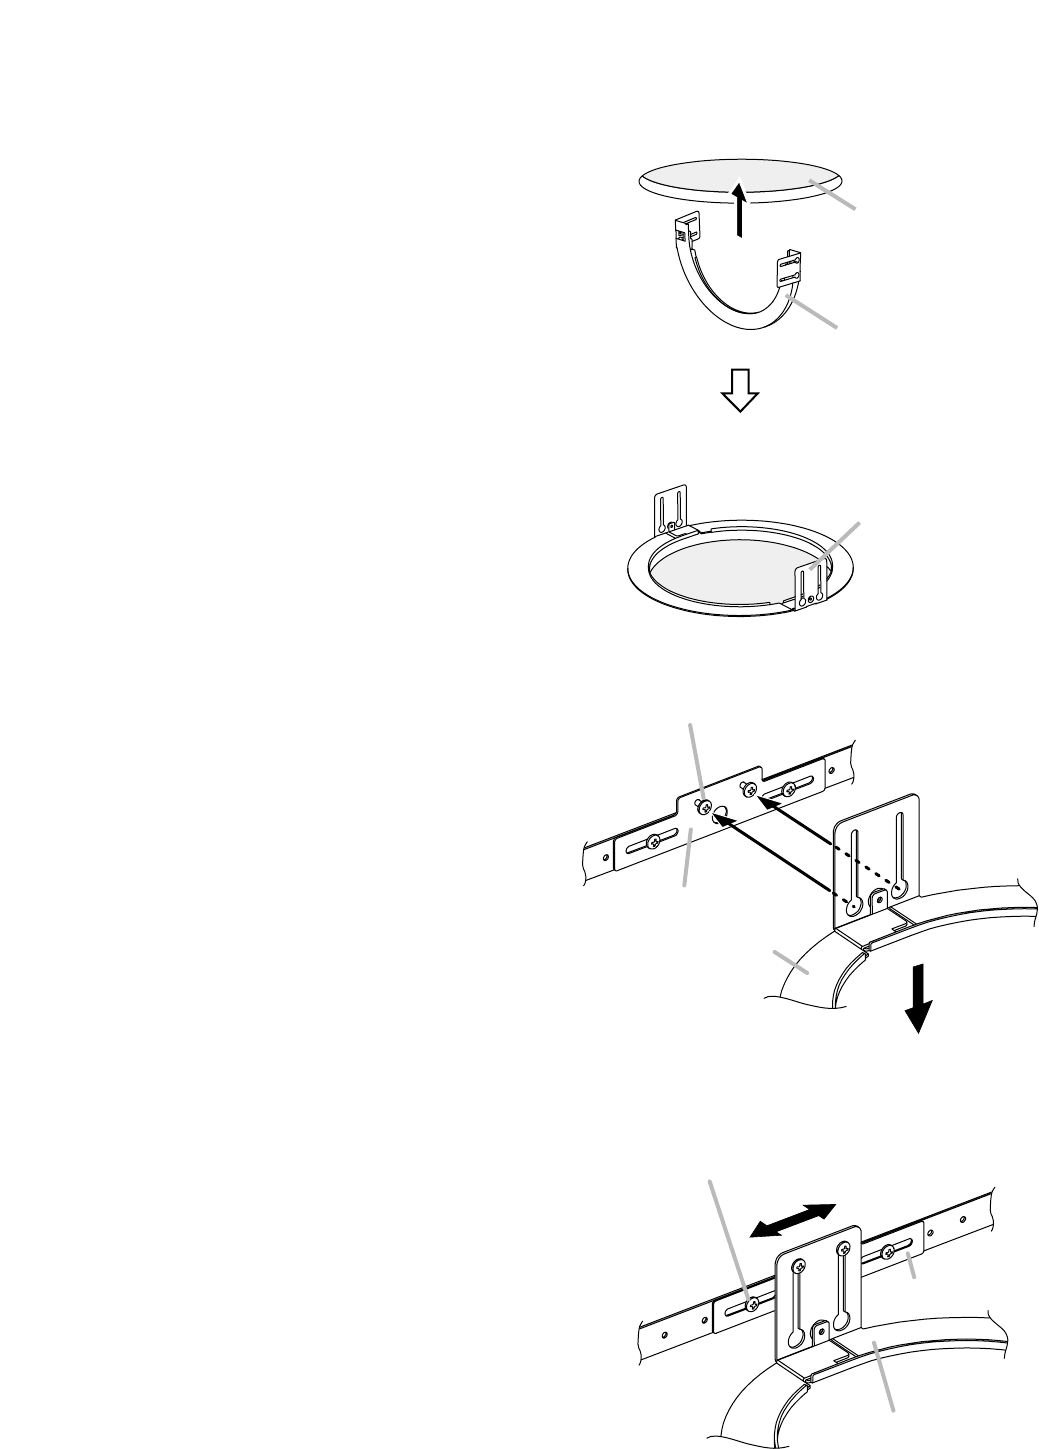
Step 4. Attach the ceiling reinforcement ring to
each tie-plate using 2 reinforcement ring
mounting screws.
Ceiling reinforcement ring
Reinforcement ring mounting screw
Tie-plate
Fit closely to the back surface
of the ceiling panel.
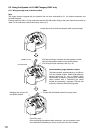
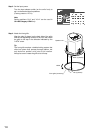
1
2
Ceiling reinforcement ring
Tie-plate mounting screw
Tie-plate
If the ceiling reinforcement ring does not line
up accurately with the ceiling mounting hole,
adjust its position by either loosening the tie-
plate mounting screws and sliding the tie-
plate into correct position, or by shifting the
tie-plate mounting screws to the appropriate
holes in the Tile Bridge rails.
The ceiling reinforcement ring can be moved
in the direction indicated by the arrows.
Note
Be sure to tighten the tie-plate mounting
screws after completing the adjustment.
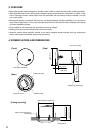
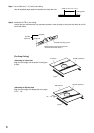
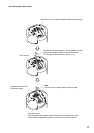
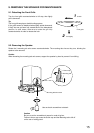
Fold the reinforcement ring in half* and insert it
through the mounting hole in the ceiling panel,
then open it with its tabs facing up.
Place the ring on the ceiling panel aligning it
with the mounting hole.
* The reinforcement ring is too large to be
inserted into the mounting hole unless folded.
Mounting hole
Ceiling reinforcement ring
(accessory)
Reinforcement ring placed on the ceiling panel
These tabs must
face upward,
away from the hole.
Step 3. Place the supplied reinforcement ring on the ceiling panel.