18
Listening to a CD
4
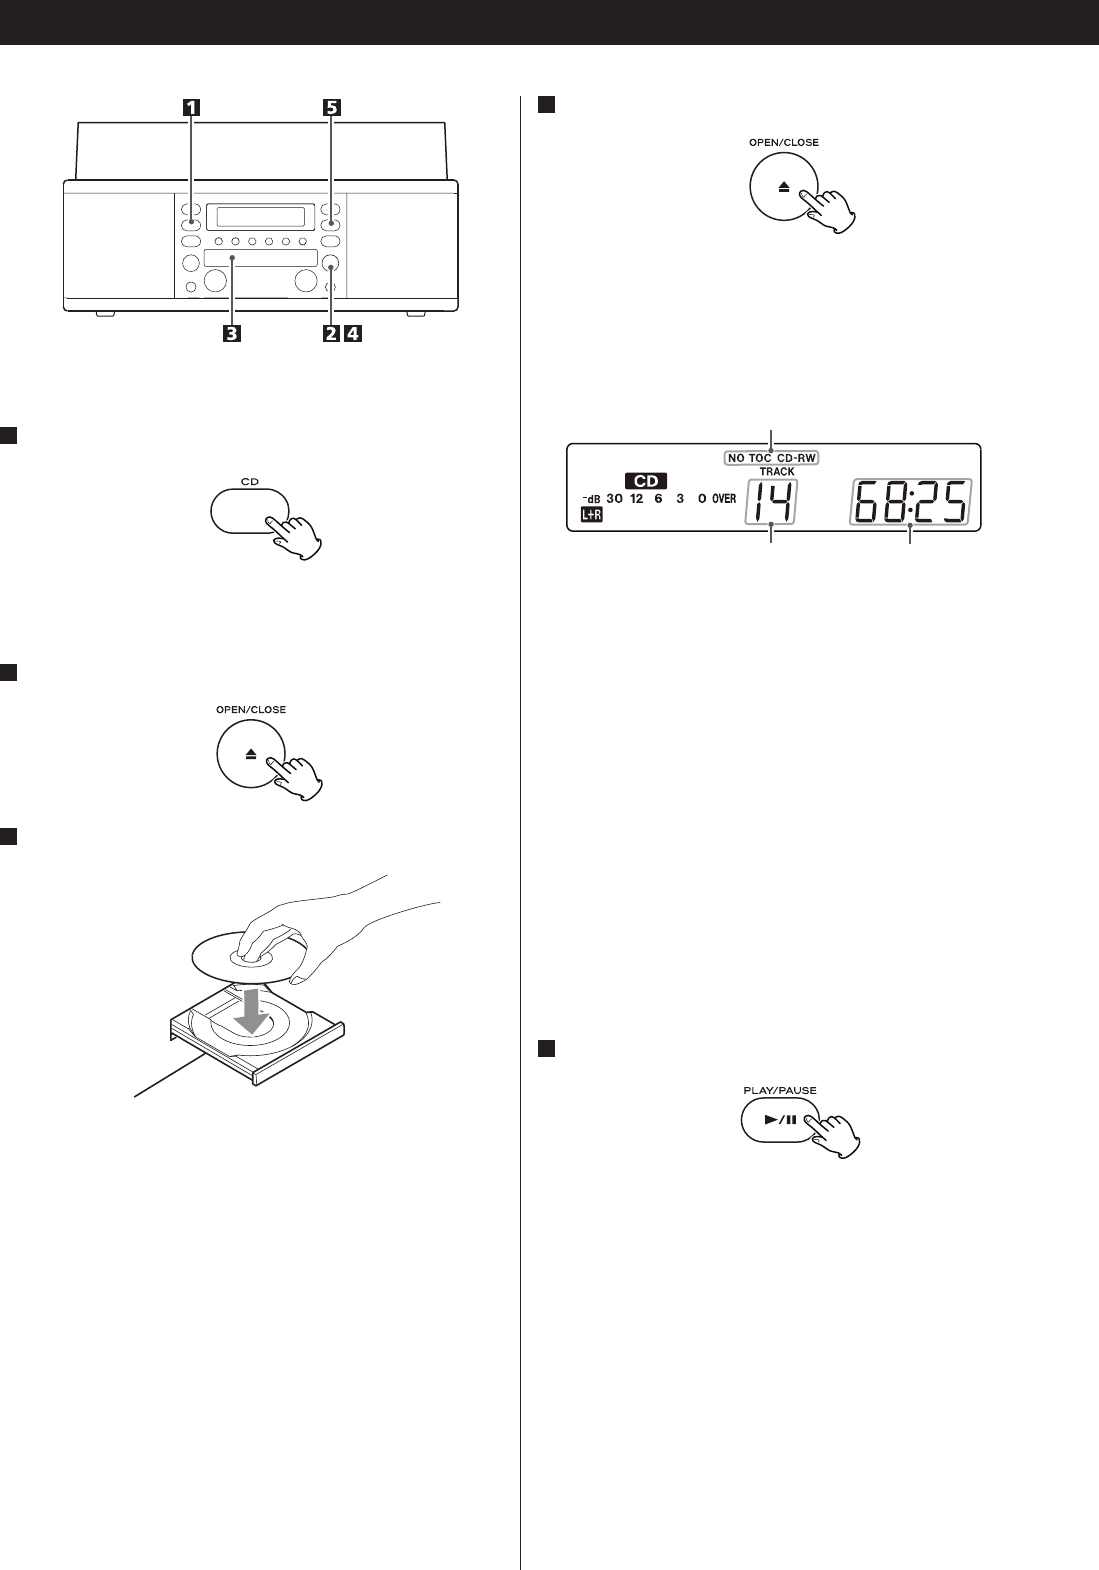
Press the OPEN/CLOSE button (L) to close the tray.
< Be careful not to pinch your finger.
< It takes a few seconds for the unit to load the disc. No buttons
will work during loading. Wait until the total number of the tracks
and the total play time of the disc are displayed.
1
Press the CD button.
“--” blinks for a few seconds.
When no disc is set, “no dISC” appears on the display.
2
Press the OPEN/CLOSE button (L) to open the tray.
3
Place a disc on the tray with the printed label face up.
< Never place more than one disc on the tray.
< The disc must be placed in the center of the disc tray. If the disc
is not correctly loaded, it may not be possible to open the tray
again once it has closed, so you should ensure the disc is always
centered on the tray.
< Do not force the tray by hand during opening and closing
operations.
< The disc type indicator shows the type of disc currently loaded.
CD:
A commercial pre-recorded CD
CD-R:
A finalized CD-R
CD-RW:
A finalized CD-RW
NO TOC CD-R:
A CD-R which has yet to be finalized
NO TOC CD-RW:
A CD-RW which has yet to be finalized
blank:
No disc or unreadable disc
When a non-audio disc is inserted, the unit may start playing
in order to read the data, however there will be no sound.
5
Press the PLAY/PAUSE button (y/J) to start playback.
Disc playback starts from the first track, and y lights on the
display.
< If you load the disc, and then press the PLAY/PAUSE button
(y/J) without having first closed the disc tray, the disc tray
closes and playback starts.
total play time of the disctotal number of the tracks
disc type indicator


