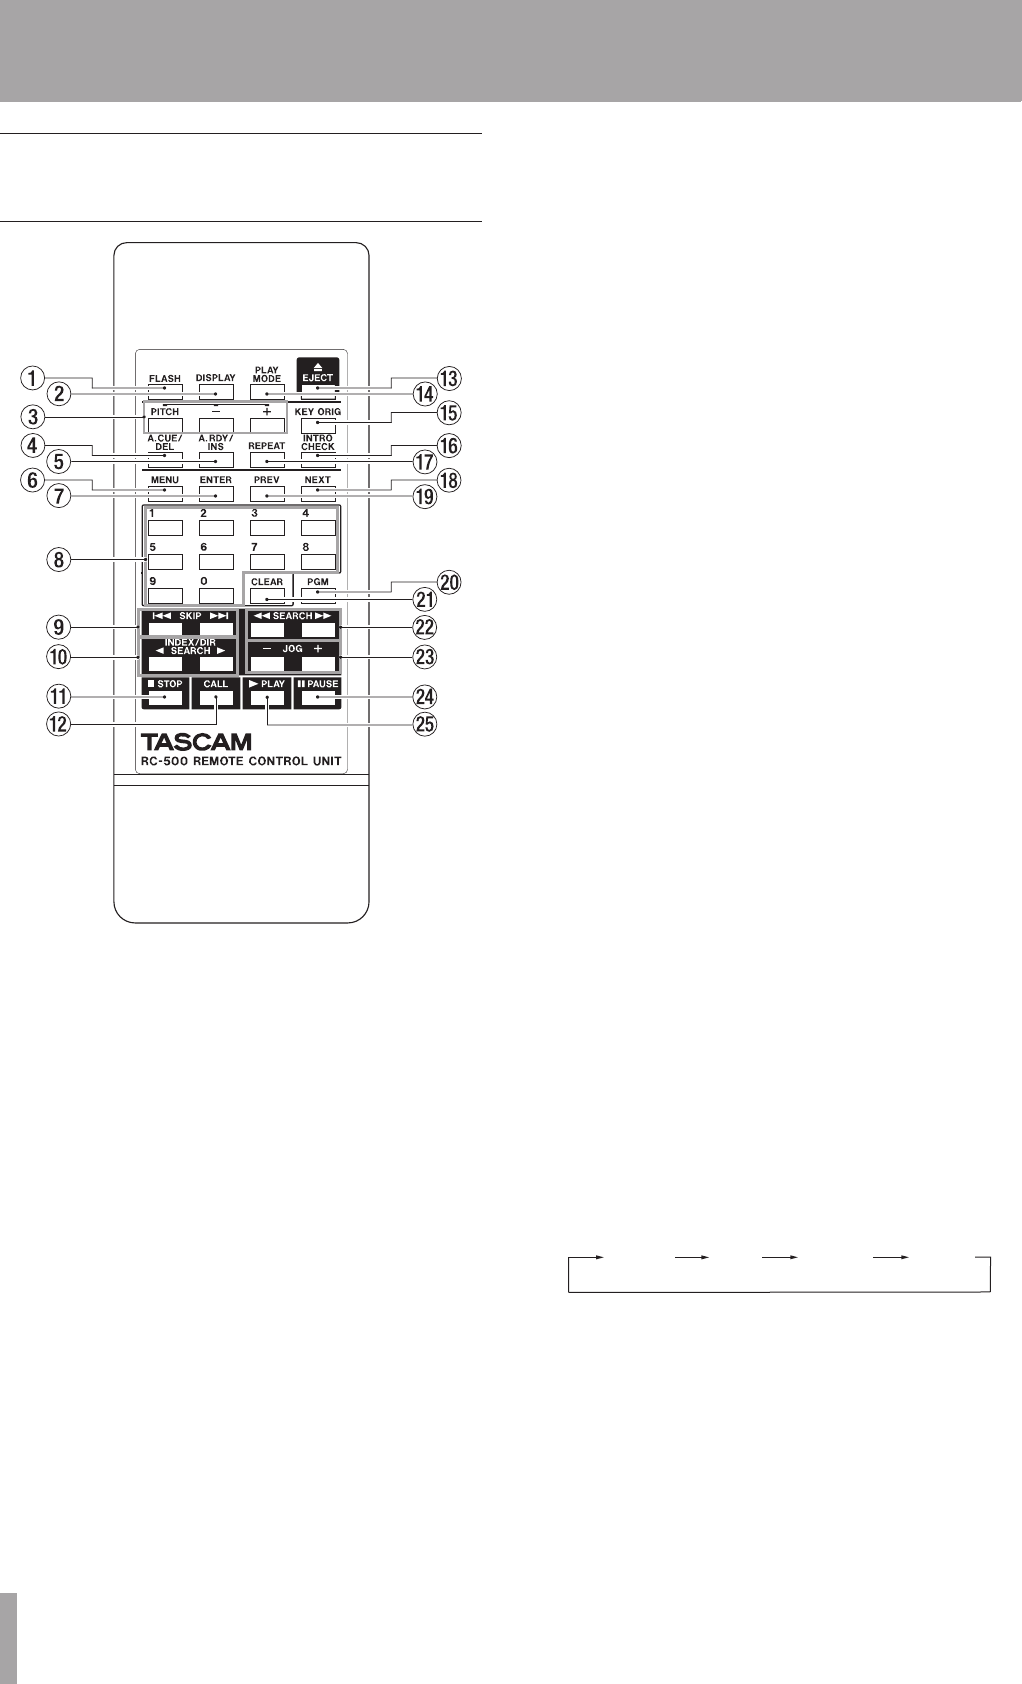
14 TASCAM CD-500/500B
Wireless remote control (TASCAM
RC-500)
1 FLASH button
Press to turn the flash start function on and off.
2 DISPLAY button
Press this button to change the playback time display
mode shown (track elapsed time, track remaining time
or remaining time). (See “Changing the playback time
display mode” on page 31.)
When in menu mode, press this button to exit menu
mode.
3 PITCH and −/+ buttons
Press the PITCH button to turn the pitch control
function on and off. Use the – and + buttons to set the
pitch control value. (See “Pitch control playback” on
page 26.)
4 A.CUE/DEL button
Press this to turn the auto-cue function on and off. (See
“Auto-cue function” on page 24.)
Use this also to delete program tracks. (See “Program
playback” on page 27.)
5 A.RDY/INS button
Press this to turn the auto-ready function on and off.
(See “Auto-ready function” on page 24.)
Use this also to add program tracks. (See “Program
playback” on page 27.)
6 MENU button
Press this button to enter menu mode. When in menu
mode, press this button to exit menu mode. (See “Menu
operation basics” on page 19.)
7 ENTER button
When in menu mode, press to confirm a menu item
selection or setting value. (See “Menu operation basics”
on page 19.)
When using the A-B repeat function, press this to set
the A and B points. (See “A-B repeat playback” on page
25.)
8 Number buttons
Use these number buttons to designate track numbers
to select songs. Input two digits for audio CDs and
three digits for data CDs. (See “Designating track
numbers” on page 22.)
9 SKIP (Â/¯) buttons
Use these buttons for track selection (skipping).
Set the auto-cue function to determine what happens
after selection. (See “Skipping to the next or previous
track” on page 21.)
In program setting mode, use these to select tracks for
the program. (See “Program playback” on page 27.)
0 INDEX/DIR SEARCH (Ó/Á) buttons
Use these to select indexes on an audio CD or
directories on a data CD. Set the auto-cue function
to determine what happens after selection. (See
“Selecting indexes and directories” on page 22.)
q ª STOP button
Press to stop playback. If the incremental play function
is activated, press this button during playback to pause
at the beginning of the next track. (See “Incremental
play function” on page 25.)
w CALL button
During playback or when paused, press this button
to return to the point where playback was last started
and pause. (See “Call function” on page 25.)
e EJECT button
Press this to eject a disc.
r PLAY MODE button
Press this button to cycle through the playback modes.
Choose from ordinary, single, program and random.
Ordinary
single
program
random
t KEY ORIG button
Turn the original key function, which changes the
speed without changing the pitch, on and off. (See
“Changing the playback speed without changing the
pitch (KEY ORIG)” on page 27.)
y INTRO CHECK button
When stopped, during playback or when paused,
press this button to activate intro check mode. When
in intro check mode, press the Á PLAY button to play
2 – Names and Functions of Parts


