


Operational Manual
Hooking Up
© Audient v1.0 10/2004 12
HOOKING UP
Before starting, it’s always a good idea to
make sure that your monitor speakers are
muted and/or turned off – this ensures
that nothing gets popped or blown up
when cables are being fiddled with and
while power is turned on.
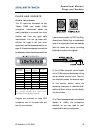
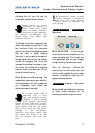
Analogue Connection
(see Figure 1, on next page)
1. Connect the outputs of your
DAW’s interface and any other
sources to Sumo’s inputs. If your
DAW’s interface can output at -
10dBV or +4dBu, select the latter.
This is the professional standard
and will allow you to make the
most of Sumo’s excellent
headroom.
2. Plug the Monitor Outputs of
Sumo into your monitor amplifier,
or directly into your powered
monitors. Make sure you have the
monitor volume right down at this
point, to protect the speakers
when you switch them on.
3. Attach Sumo’s main outputs to
your master recorder such as a
DAT machine or CD recorder, or
even right back into your DAW.
This stage is pretty important,
because you’re converting back
into the digital domain and the
quality of this conversion will
effect your overall mix, so make
sure to use the best converters you
have available. If you would like to
improve your AD conversion,
consider Sumo’s digital conversion
option, which produces top notch
AES/EBU and S/PDIF straight
out the back of the unit.
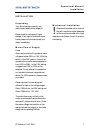
If you are connecting
straight back into your
DAW, you’ll have to make
sure that the track you
record on is either muted or not
routed to Sumo else you’ll get
feedback. And nobody likes
feedback.
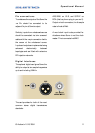
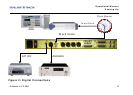
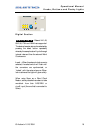
Digital Connection
(see Figure 2, below)
4. If using a word clock master,
connect the master source to the
BNC connector on the digital card
(see “Knobs, Buttons and Flashy
Lights” for details on setting up
your digital card).
5. Connect the digital outputs to
your digital master recorder or
DAW.
!