


Page 2 Eazy6 Owner’s Manual
Page 2 SLS Owner’s Manual
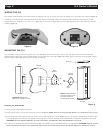
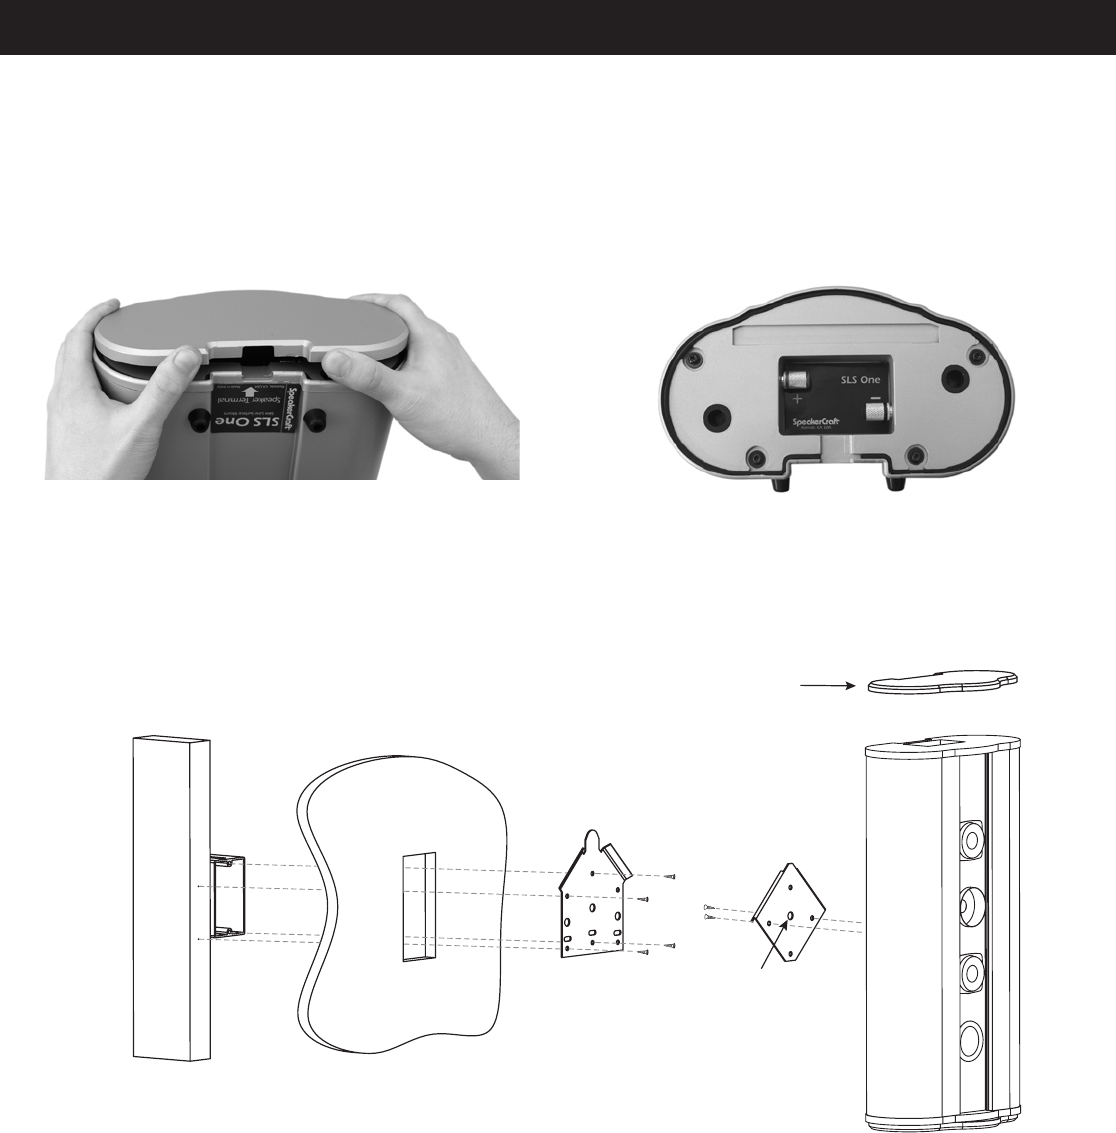
MOUNTING THE SLS
The SLS utilizes a unique mounting system. First, the Wall Bracket is mounted onto a stud in the wall. Next, the SLS with the attached
Speaker Bracket simply slips onto the Wall Bracket, securing the SLS to the wall.
(Figure 6) Rubber stops on the back of the speaker cabinet
keep it firmly in place while protecting the surface of the wall.
J-Box
Stud
Drywall
Wall
Bracket
Speaker
Bracket
SLS One
NOTE: Speaker Bracket
can be mounted to SLS
for either vertical or
horizontal placement
CAUTION: Wall Bracket
MUST be mounted to a stud
End Cap
Wire
Hole
Figure 6
Installing the Wall Bracket
1) Locate a stud to mount the bracket on.
2) Using drywall screws, mount the bracket to the stud.
(Figure 6) Note: When mounting the Wall Bracket, we recommend using a level.
3) If the far right or left mounting holes are used to mount the bracket into a stud, (Figure 6) you can align the middle holes with the J-box
to ensure a strong mounting of the speaker. Three large wire holes are available in the Wall Bracket to make routing speaker wire easier.
CAUTION:
DO NOT MOUNT BRACKET TO THE J-BOX ONLY. THE BRACKET MUST BE MOUNTED TO A STUD.
4) If a stud is not found in the desired mounting location, the speakers can be mounted directly onto the drywall. CAUTION: Regular drywall
screws should NOT be used for this application. We HIGHLY recommend using anchors specifically designed to withstand 15-25 lbs.
WIRING THE SLS
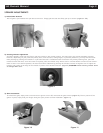
The speaker cable terminals are located under the bottom end cap. To remove the end cap, simply pry it open with your fingers. (Figure 4)
Familiarize yourself with the underside panel of the SLS. Attach the speaker cable to the speaker cable terminals, observing the proper
polarity with your amplifier, + to + and – to –. Make sure to connect the right channel to the right speaker and the left channel to the left
speaker.
(Figure 5)
Figure 4 Figure 5