


Page 2 Eazy6 Owner’s Manual
Page 2 DT8 Zero Owner’s Manual
5. Add insulation. If the area in the ceiling is not already insulated, add an
adequate amount insulation material to loosely cover the back of the
speaker. If the insulation material used is faced with foil or paper, position
the foil or paper away from the speaker.
SPEAKER INSTALLATION
The unique integral four foot mounting system incorporated into your AIM DT
speaker allows for a quick installation by following these easy steps.
1. Remove the grille. It may be necessary to push one or two of the mount-
ing screws, and its attached foot, towards the baffle and against the inside
surface of the grille to force the grille out of its retaining groove.
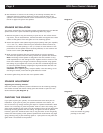
2.
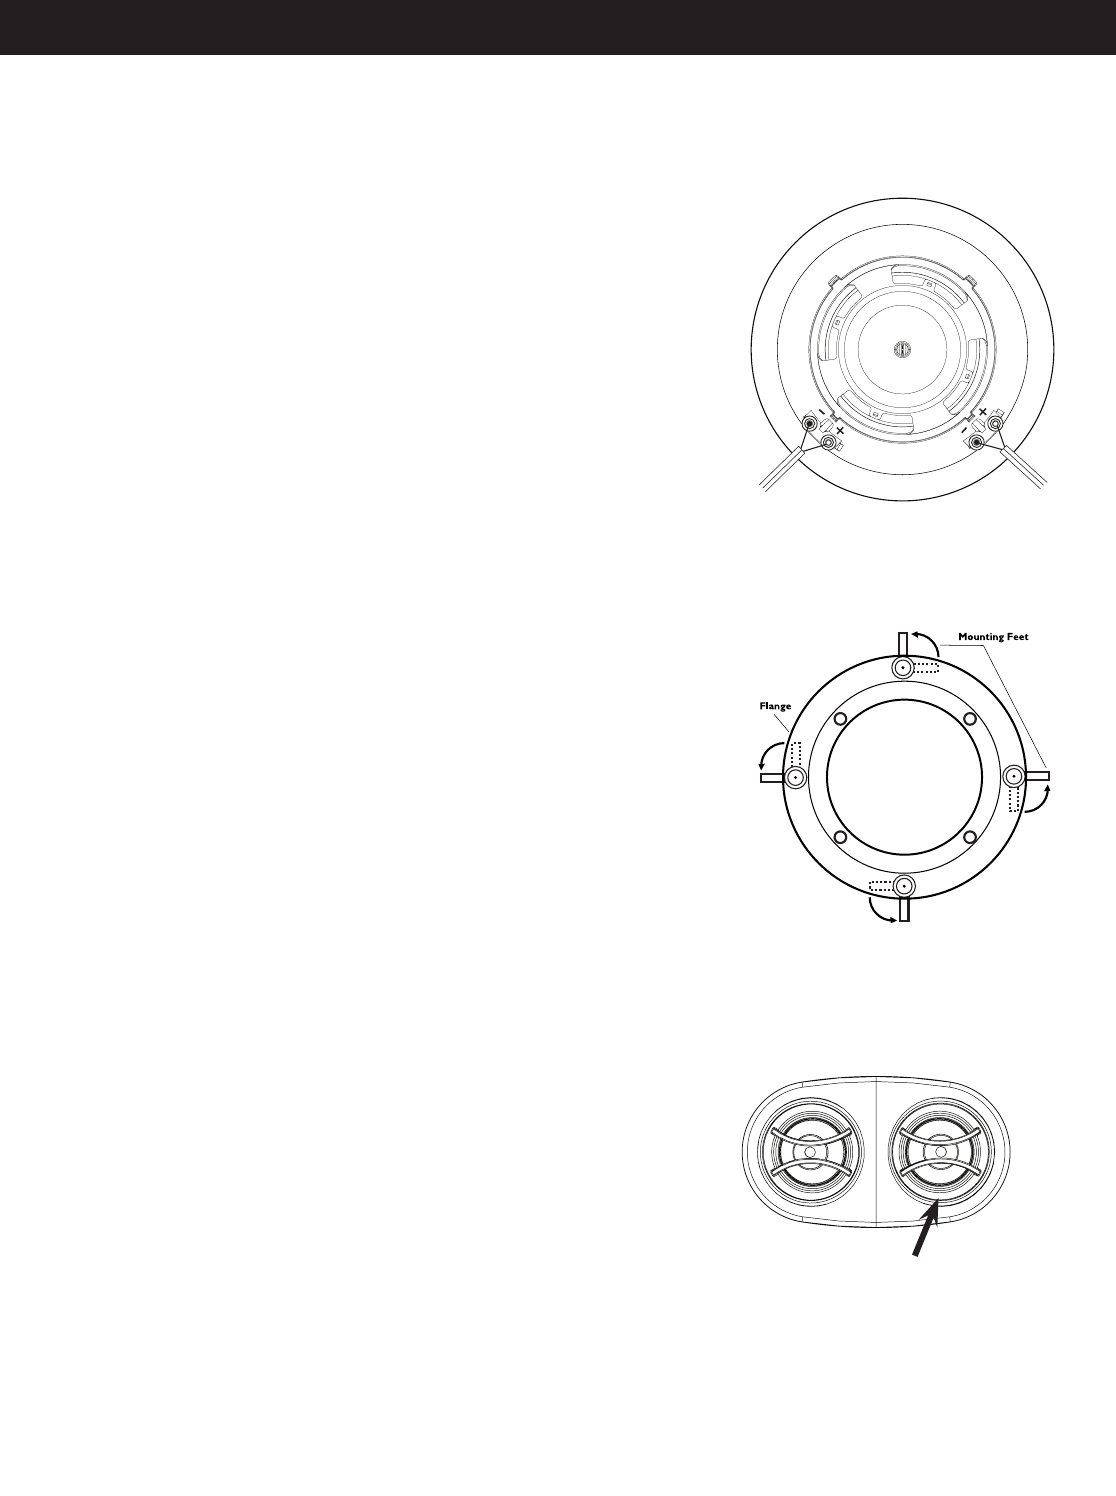
Attach the speaker cable (observing the proper polarity with your amplifier,
+ to + and - to -). Either channel may be attached to either terminal set,
however, be sure that polarity (+ and -) is correct on each channel or the
performance of the speaker will be seriously affected, as one channel will
cancel out the other. (See Diagram 2)
3.
Make sure the mounting feet are turned inward to clear the opening,
and insert the speaker into the ceiling. Position the speaker into the hole.
Note: The flange of the speaker is designed to flex and conform to any
small imperfections in the ceiling’s surface. Tighten the four screws on the
front of the baffle only enough to make the flange become snug against
the ceiling. As you tighten the screws, the feet will automatically flip into
an outward position thereby clamping the drywall between the feet and
the flange. (See Diagram 3)
CAUTION: Over tightening may warp the baffle, crack the ceiling, cause
the flange to distort, and make the grille difficult to install.
4.
Push the grille firmly into the slot in the speaker baffle.
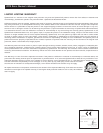
SPEAKER ADJUSTMENT
Adjusting the Pivoting Tweeters
Once the woofer is positioned, further refinement can be made by pointing
the tweeter towards the listener. Gently pivot the tweeter to point it in the
desired direction (See Diagram 4).
PAINTING THE SPEAKER
If you plan to paint your speaker, we recommend that it be done prior to
installation. If you plan to paint your speaker sometime in the future, it is
best to remove it by simply reversing the steps for “Speaker Installation” listed
above. If it is necessary to paint the speaker while it is still in the ceiling, the
paint mask provided in the carton must be installed in place of the grille while
the flange is being painted with the ceiling. The grille can also be painted,
however, great care should be taken not to clog the holes as this will greatly
reduce the sound quality of the speaker. SpeakerCraft recommends only light
spray painting using 5 parts thinning agent to 1 part paint. Do not paint the
grille while it is attached to the speaker.
PRINTER'S INSTRUCTIONS:
INSTR,INSTL,6.XDT • LINEINSTR,INSTL,AIM DT • INK: BLACK • MATERIAL: 70LB GLOSS PAPER • SIZE: 8.500" X 11.000" • SCALE: 1-1 • FOLDING: HALF FOLD
Diagram 3
Diagram 2
Diagram 4
Pivot the Tweeter by gently
pushing on the sides