


Cinema Sub Installation – New Construction
Mounting the Cinema Sub subwoofer requires that you first run speaker wire (minimum 14 gauge) to the Bass Power
amplifier’s location. For greatest flexibility of connection, use four conductor, 14 gauge wiring. After pulling the speaker
wire from the Bass Power amplifier location, you can now hang the drywall. Carefully mark and cut out the hole for the
subwoofer before mounting the drywall.
NOTE: It is critical to insure that the drywall (or any wall material) is well dampened and tight to avoid vibrations.
Cinema Sub Installation – Retrofit
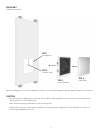
Find the location of the studs in the wall by using a good stud finder. Locate the exact center between the studs by
drilling a small hole as close to the center as can be determined, then, using a stiff wire (a metal coat hanger works
well) bent to 90º, feel for both studs through the hole. By turning the wire around you should be able to determine the
exact center between the studs.
Once the center has been determined, use the cut-out template supplied with the subwoofer to mark and cut out the
hole in the drywall, being sure that it is level.
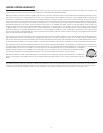
Connect Wiring:
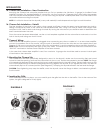
Make sure that the amplifier's power is unplugged when connecting any wires or cables to it. In a mono bass amplifier,
connect the speaker wire to the woofer, using the pair of terminals that has the white dot on the support piece (see
Diagram 2). Be sure to connect the positive wire to the red terminal (+) and the negative wire to the black terminal (-).
NOTE: Make sure the connections are tight or they may rattle. The other end of the wire should be connected to the
“SUB OUT” terminals on the Bass Power amplifier in the same manner.
In the case that a stereo bass amplifier is used, four conductor 14 gauge wire should be used to connect to both pairs
of terminals on the subwoofer.
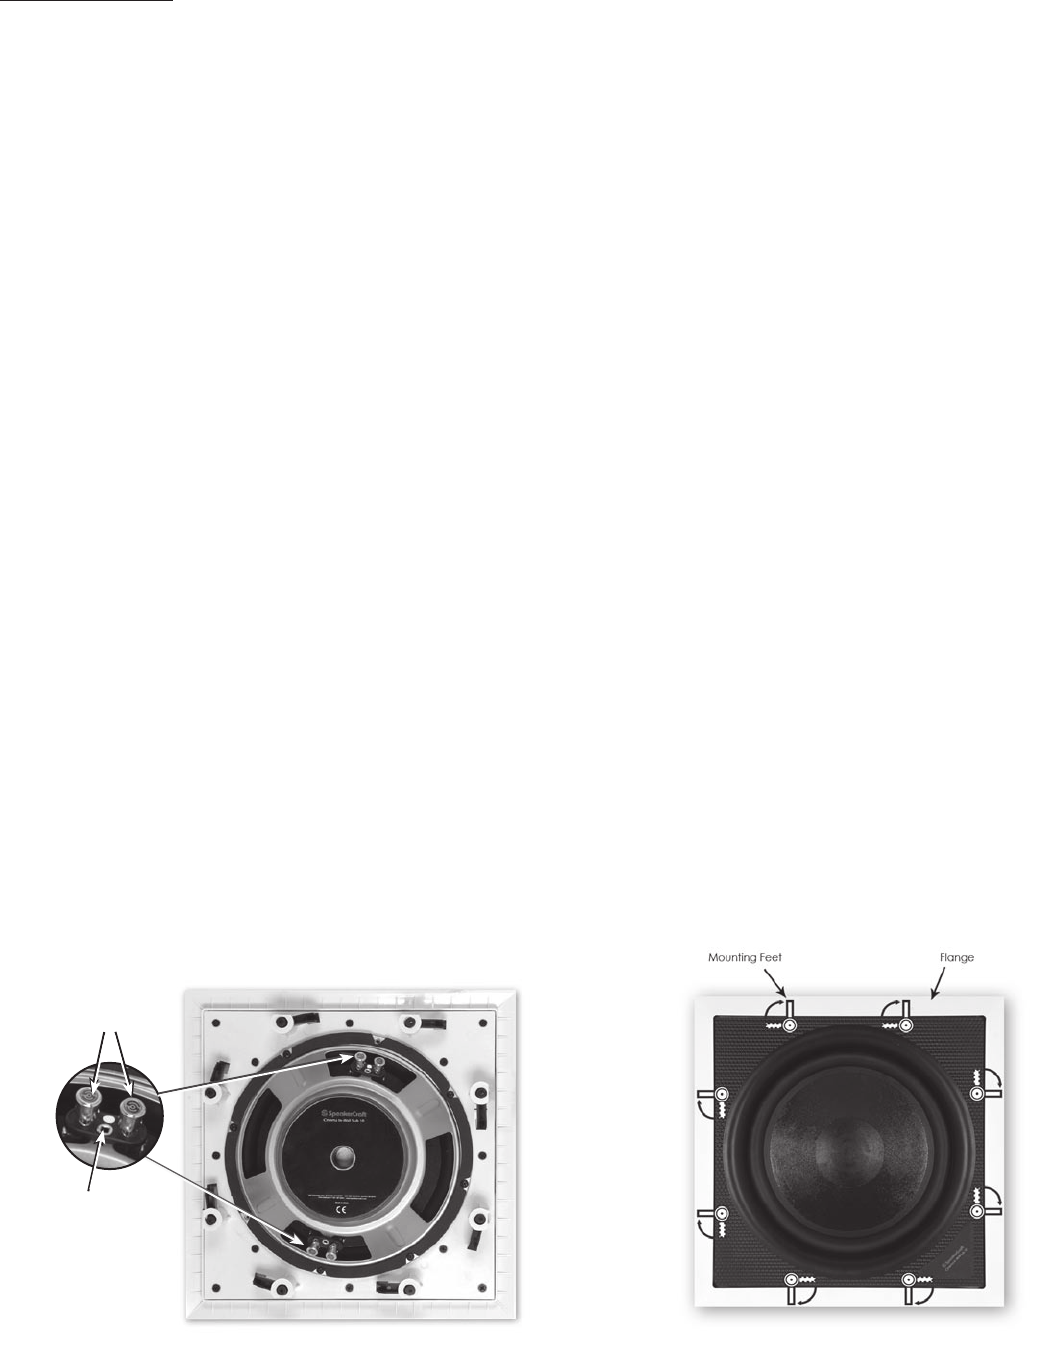
Mounting the Cinema Sub
The Cinema Sub has been specifically designed to mount to the drywall. Make sure the mounting feet are turned
inward to clear the opening, and insert the subwoofer into the cut-out. Position the speaker in the hole. NOTE: The flange
of the speaker is designed to flex and conform to any small imperfections in the wall surface. Tighten the 8 screws on the
front of the baffle enough to make the flange become snug against the drywall. As you tighten the screws, the feet will
automatically flip into an outward position (see Diagram 3), clamping the drywall between the feet and the flange.
CAUTION: Over tightening may warp the baffle, crack the drywall, cause the flange to distort, and make the grille dif-
ficult to install.
Inserting the Grille
Once the Cinema Sub is in place, you can carefully push the grille into the slot on the baffle. Due to the nature of the
system, the grill is designed to fit very tightly.
4
DIAGRAM 3
DIAGRAM 2
INSTALLATION
1a.
1b.
2.
3.
4.
Terminals
Support Piece