


LOCATION
AND
MOUNTING
3
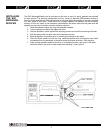
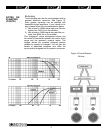
The first step in a successful installation is thorough planning. Choose the location for
your speaker components carefully. Follow these suggestions to ensure proper imaging
and the best performance:
• Select a location where each tweeter and midrange/woofer can be mounted close to
each other. A good rule of thumb is a maximum of one foot from midrange/woofer to
tweeter.
• Choose a location that offers the least amount of sound obstruction.
• Try to mount the components on the same plane.
• Always check behind the chosen mounting locations to make sure that there are no
obstructions (e.g., trunk springs, gas tank, window track) or wires in the way, as well
as to make sure that there is ample support on which to mount the components.
INSTALLING
THE EXC
TWEETER
The EXC tweeter can be installed in a variety of ways: a simple yet elegant installation
cup is provided for flush mounting; or the tweeter may be easily disassembled fo
r
custom applications, such as installation in vents, custom painting, or mounting behind a
factory grille. Hardware is provided for each mounting configuration.
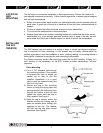
For surface mounting, locate a flat mounting surface for the EXC tweeter. A direct "on--
axis" location is not necessary, as the EXC tweeter provides extraordinary "off-axis"
response.
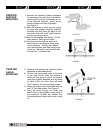
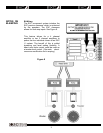
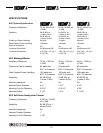
FIGURE 1
Flush Mounting
1) Cut a 1 7/8" diameter hole through
the mounting surface. If the surface
is covered with cloth or carpet, be
careful not to tear or pull the
material. Sometimes it is a good
idea to peel the material away and
then trim it by hand.
2) Secure the cup in the mounting
cutout by using the spring clips and
screw provided. Slip the spring clips
through the bottom of the cup and
tighten the screw until the cup is
firmly seated. See Figure 1.
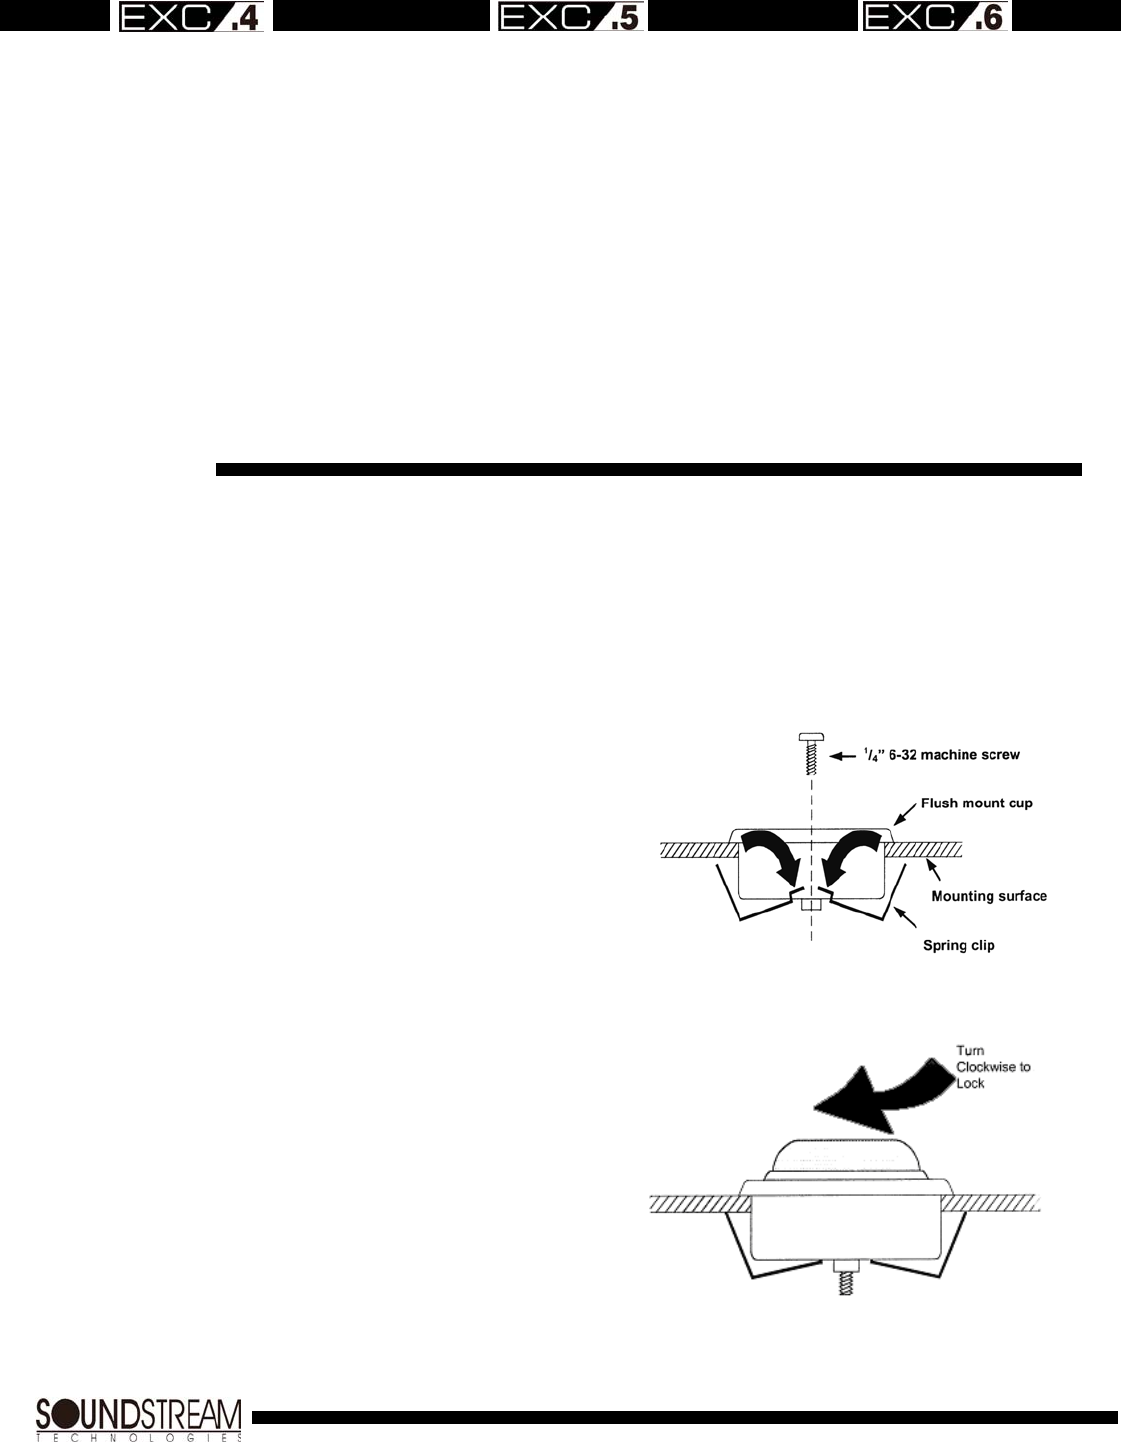
3) Once the cup is secure, mount the
tweeter into the cup making sure to
pass the tweeter wires through the
openings in the cup. The tweete
r
will lock into the cup when turned
clockwise. See Figure 2.
FIGURE 2