


Changing the display
mode and settings
To change the display mode
Press DISPLAY.
e display changes as follows:
When an analog radio station is received
FM
x
FM
A Field strength level indicator
B Preset number*
C Band
D Frequency
E Current time
* When you tune in a station by selecting a preset
number.
When an analog FM broadcast that supports RBDS
(Radio Broadcast Data System) is received
FM
x
FM
x
FM
A Field strength level indicator
B Preset number*
C Band
D Station name
Name of station currently tuned in.
E Frequency
F Current time
G Text information
Text information transmitted from station.
* When you tune in a station by selecting a preset
number.
Note
e display item diers depending on the content of a
broadcast or the station.
When an HD Radio station is received
FM
x
FM
x
FM
A HD indicator
HD indicator Reception status
Stays lit
Strong HD signal, digital reception*
Flashes
Weak HD signal, analog reception
Not displayed
No HD signal, analog reception
* e HD indicator ashes momentarily at rst, and
then stays lit.
B Field strength level indicator
C Preset number*
D Call sign
E Band
F Song title/artist name
G Channel number (FM only)
Appears when HD Radio broadcasts multiple
program.
Press
TUNE + or – to select a sub channel.
H Frequency
I Current time
J Station name
K Text information
* When you tune in a station by selecting a preset
number
Note
e display item diers depending on the content of a
broadcast or the station.
To change the display settings
(BRIGHTNESS/CONTRAST)
1 Press MENU to show the menu display.
2 Press SELECT or to select
“BRIGHTNESS” or “CONTRAST,” then press
ENTER.
3 Press SELECT or to select the setting or to
adjust the level, then press ENTER.
BRIGHTNESS:
e brightness of the display is selected from
“HIGH,” “MIDDLE” or “LOW.”
CONTRAST:
e contrast of the display can be adjusted by
11 levels.
Note
If you do not set the menu within 10 seconds, the setting
mode is o.
Tip
You can adjust “BRIGHTNESS” directly by pressing
BRIGHT on the remote commander.
A
B
Setting the sleep timer
You can enjoy falling asleep to the radio using the built-
in sleep timer that turns o the radio automatically aer
a preset duration.
1 Press SLEEP on the remote commander.
“SLEEP” and the digits for the sleep timer duration
appear.
FM
SLEEP
If you press SLEEP while the unit is turned o, the
unit is turned on.
2 Press SLEEP repeatedly to select the desired
sleep timer setting.
Each press changes the setting time as follows:
60 45 1530 OFF
Aer about 4 seconds, “SLEEP” lights in the display
when the duration time is set.
e unit automatically turns o when the duration time
is passed.
To change the sleep timer setting
You can press SLEEP repeatedly to select the desired
sleep timer setting even aer the sleep timer has been
activated.
To deactivate the sleep timer
Press / to turn o the unit before the setting time has
elapsed, or press SLEEP repeatedly to set the sleep timer
to “SLEEP OFF” in step 2.
Note
ese operations are available only when using the
remote commander.
Resetting the unit
e RESET button is located on the rear of the unit.
Press this button with a pointed object if the radio fails
to function properly. e clock settings and stations you
have preset, etc., will revert to the factory preset.
Using the remote
commander
Buttons shared on both the remote commander and the
unit control the same functions.
HD SCAN button
e selected band is scanned, and receivable HD Radio
stations are received for 3 seconds in order of frequency.
SCAN button
e selected band is scanned, and receivable radio
stations are received for 3 seconds in order of frequency.
BRIGHT button
To adjust the brightness of the display.
Specications
Time display
12-hour system
Frequency range
FM : 87.5 – 108 MHz
AM : 530 – 1,710 kHz
Audio output
Output level 0.7 Vrms at 47 kΩ
Recommended load impedance over 10 kΩ
Antenna terminal
75 Ω antenna terminal for FM
Antenna terminal for AM
Power requirements
120 V AC, 60 Hz
Dimensions
Approx. 180 × 60 × 160 mm (w/h/d)
(7
1
/
8
× 2
3
/
8
× 6
3
/
8
inches) not incl. projecting parts and
controls
Mass
Approx. 1.1 kg (2 lb 6.8 oz)
Supplied accessories
Remote commander (1)
FM dipole antenna (1)
AM loop antenna (1)
Design and specications are subject to change without
notice.
4 Press SELECT or until current hour
appears in the display, then press ENTER.
e hour is set and the minutes start to ash.
5 Repeat step 4 to set the minute.
Note
If you do not set the menu within 65 seconds, the setting
mode is canceled.
To change the display to the
daylight saving time (summer
time) indication
1 Press MENU to show the menu display.
2 Press SELECT or to select “DST,” then
press ENTER.
3 Press SELECT or to select “ON,” then
press ENTER.
“
” appears and the time indication changes to
summer time.
To deactivate the DST function, select “OFF” in step 3.
Playing the radio
–Manual tuning
1 Press / to turn on the radio.
2 Press BAND to select the band AM or FM.
3 Press TUNE + or – to tune in to a desired
frequency.
Note
e frequency cannot be input with the number buttons
of the remote commander.
–Preset tuning
You can preset 20 stations each for AM and FM.
Presetting a station
1 Follow steps 1 to 3 in “Manual tuning” to tune
the frequency you wish to preset.
2 Press and hold ENTER for a few seconds.
e display changes as follow:
FM
3 Press PRESET + or – to select the preset
number, then press ENTER.
e frequency is stored in the selected preset
number.
To preset another station, repeat these steps.
Note
If you try to store another station in the same preset
number, the previously stored station will be replaced.
Tuning in to a station
1 Press / to turn on the radio.
2 Press BAND to select the band AM or FM.
3 Press PRESET + or – to select the desired
preset number.
Tip
e preset can be selected by pressing the number button
of the remote commander. Press ENTER aer the preset
number is selected.
–Scan tuning
e unit will automatically scan the selected band.
In HD scan, HD Radio stations are scanned.
1 Press / to turn on the radio.
2 Press BAND to select the band AM or FM.
3 Press SCAN or HD SCAN on the unit or
remote commander.
Scanning of the selected band starts.
When a station is received, scanning pauses for 3
seconds and then continues.
4 When the unit tunes in to the desired station,
do any of the following operations to stop
scanning.
– Press ENTER on the unit or remote commander.
– Press
SCAN or HD SCAN.
5 If necessary, press TUNE + or – to tune in to
the station more precisely.
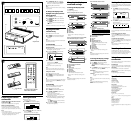
ANTENNA
AUDIO OUT
AM
RESET
L
R
FM
AM FM
SLEEP
HD SCAN
SELECT
BAND
PRESET PRESET
SCAN
DISPLAY
MENU ENTER
TUNE TUNE
AC power cord
/
SLEEP
1 2 3
4 5 6
7 8
0
9
BRIGHTMENU
BAND
HD SCAN
SCAN
DISPLAY
PRESET
TUNE/
SELECT
ENTER
The number 5 and the PRESET +
buttons have a tactile dot.
Size AAA (R03)
× 2
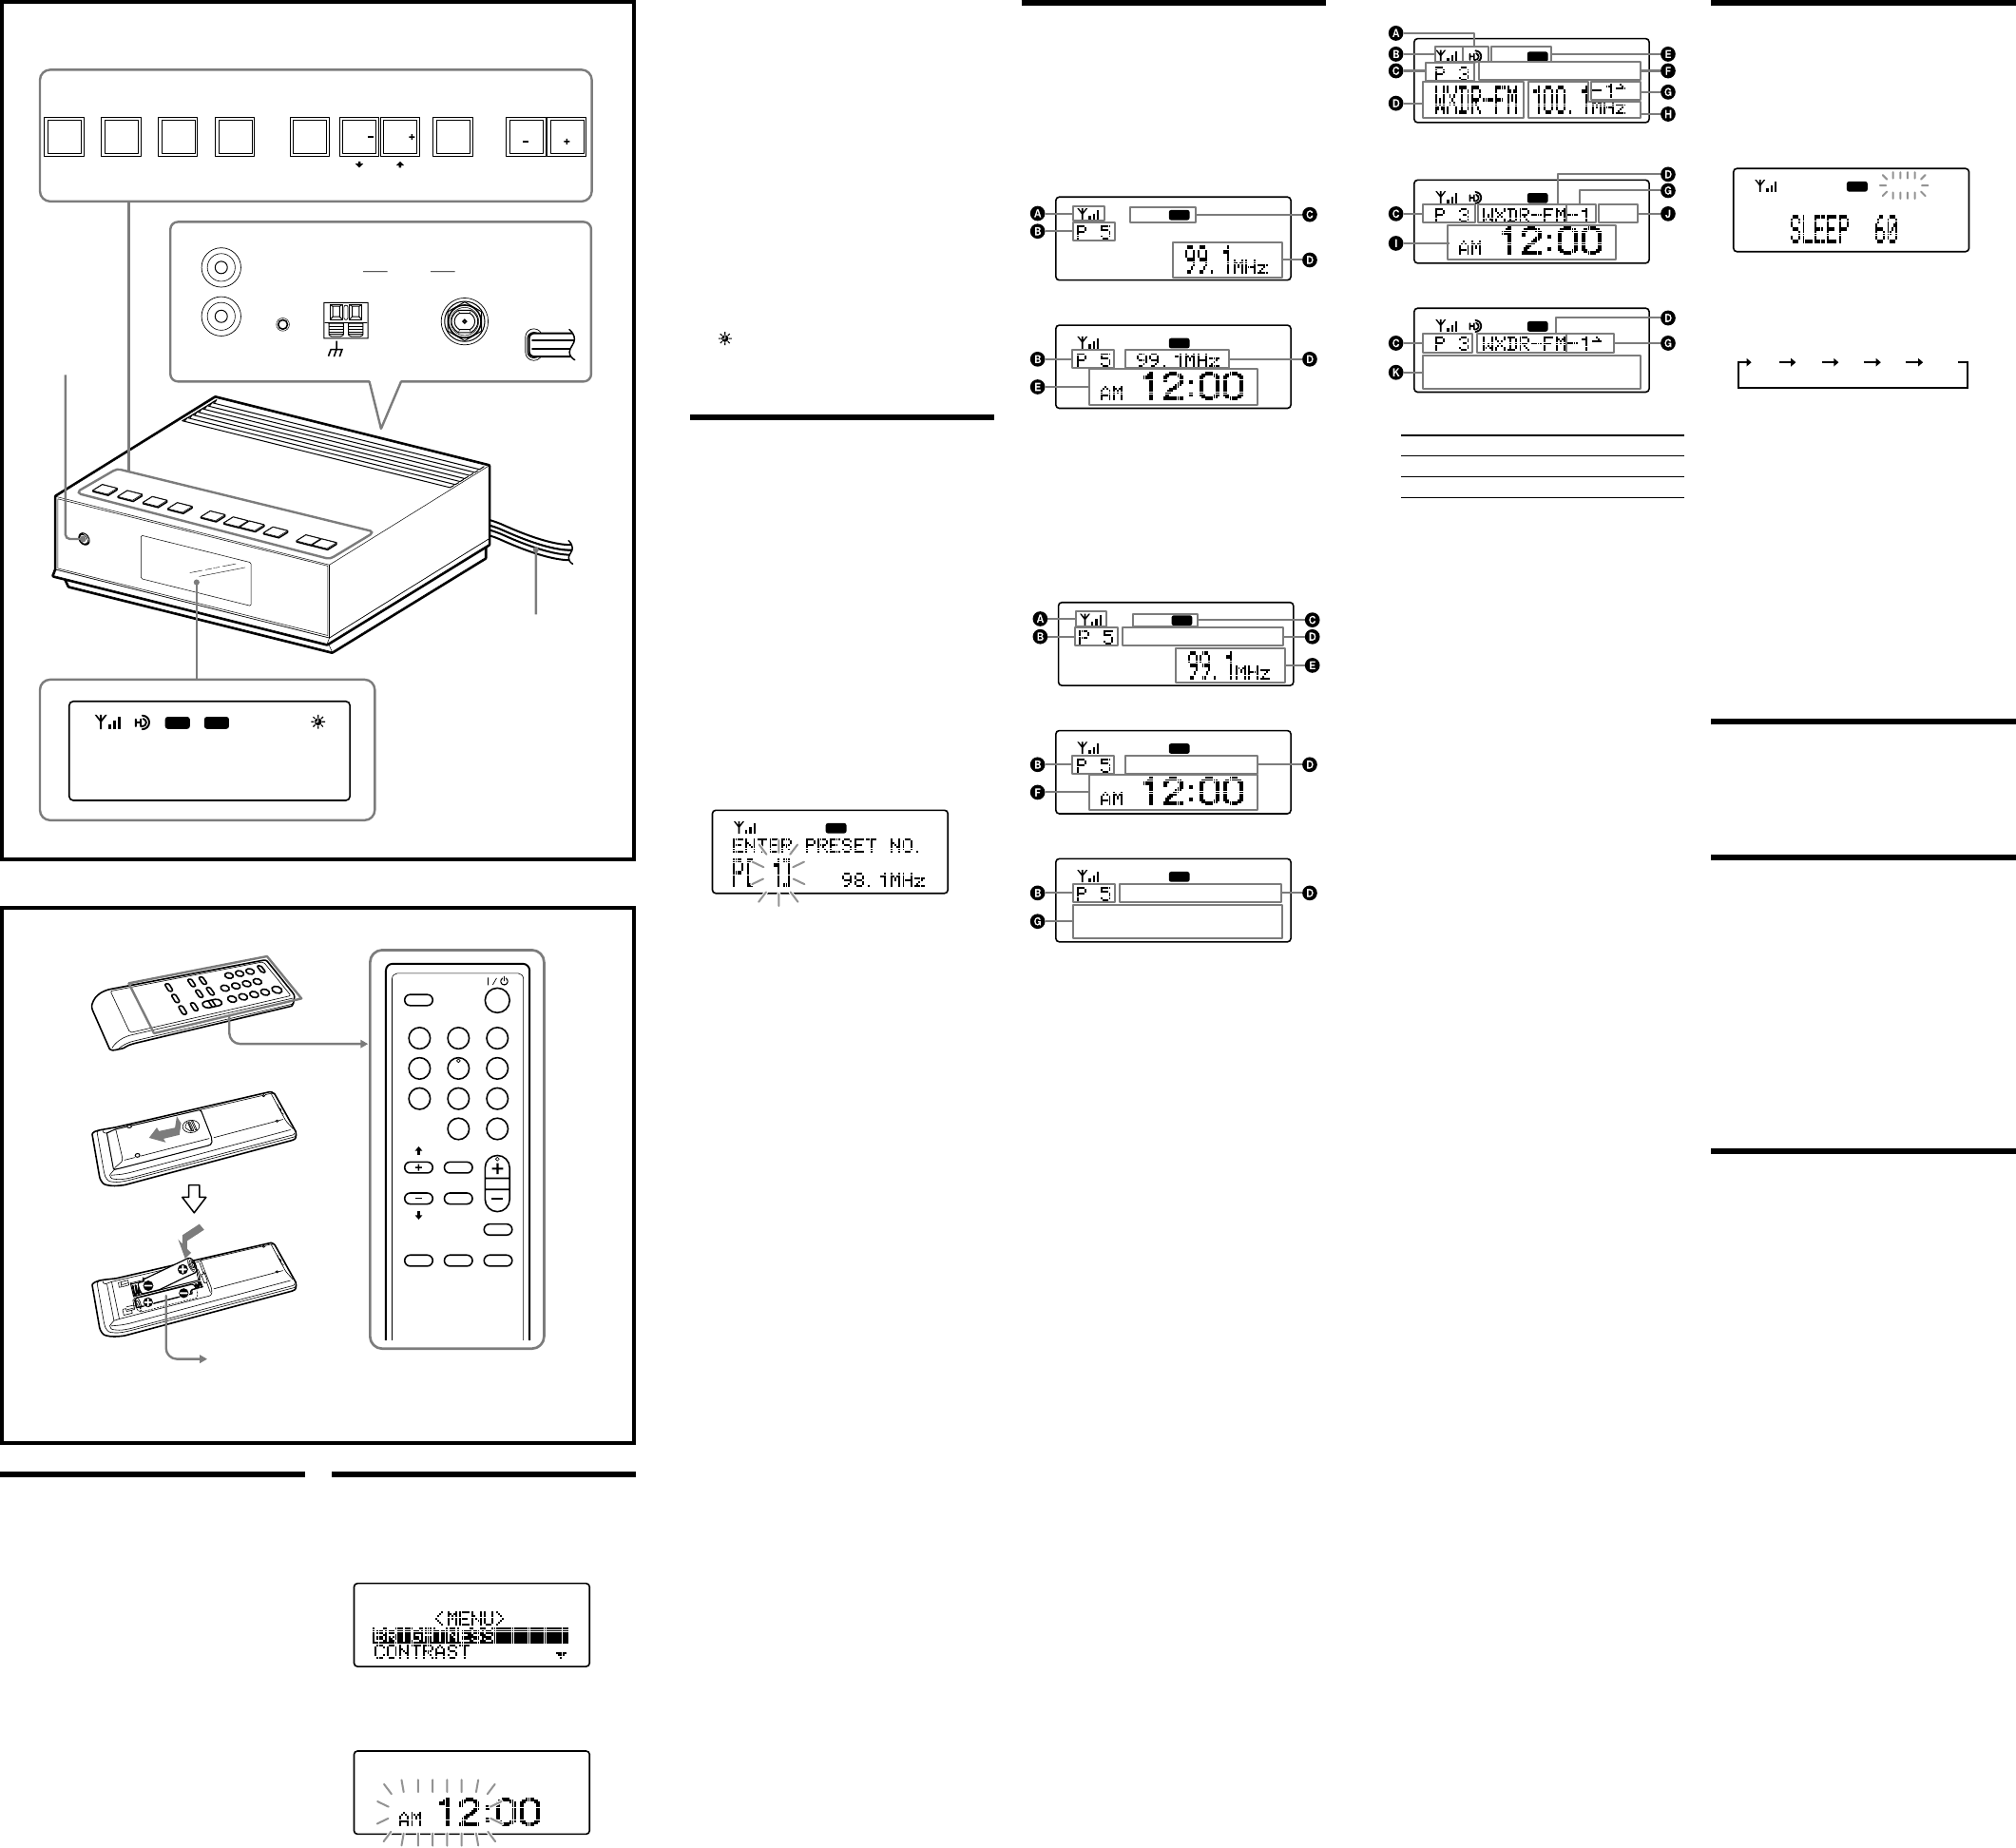
Preparing the remote
commander
Installing the batteries into the remote com-
mander (See Fig. B)
Insert two size AAA (R03) batteries (not supplied).
When to replace the batteries
With normal use, the batteries should last for about
six months. When the remote commander no longer
operates the unit, replace all the batteries with new ones.
Notes
• Do not charge dry batteries.
• When you are not going to use the remote commander
for a long time, remove the batteries to avoid any
damage caused by leakage and corrosion.
Setting the clock
1 Plug in the unit.
e display will ash “AM 12:00.”
2 Press MENU to show the menu display.
3 Press SELECT or to select “TIME SET,”
then press ENTER.
e hour will start to ash in the display.