


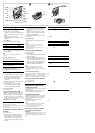
NPLAY
M
m
VOLUME
xSTOP
PRESET +/–
C
FM
AM
B
FWD
REV
MODE•
s/d
DIR•Y
i
TUNING +/–
ENTER
FM
AM
RADIO OFF
HOLD
MENU
SET
English
Playing a Tape B
1 Insert a cassette and press MENU
repeatedly to set the cursor to TAPE in the
display. Then press SET to select the tape
type.
No message: normal (TYPE I)
METAL: High-position (TYPE II) or metal
(TYPE IV)
2 Press NPLAY.
Adjust the volume with VOLUME.
To Press
Stop playback xSTOP
Wind rapidly* M or m
* If you leave the unit after the tape has been wound or
rewound, the batteries will be consumed rapidly. Be
sure to press xSTOP.
Note
•Do not open the cassette holder while the tape is
running.
To select playback mode
Switch MODE to select the desired mode.
To play Select
Both sides repeatedly s
Both sides once from the side facing d
the cassette holder (FWD)
To select the tape direction
Switch YDIR to select the desired direction.
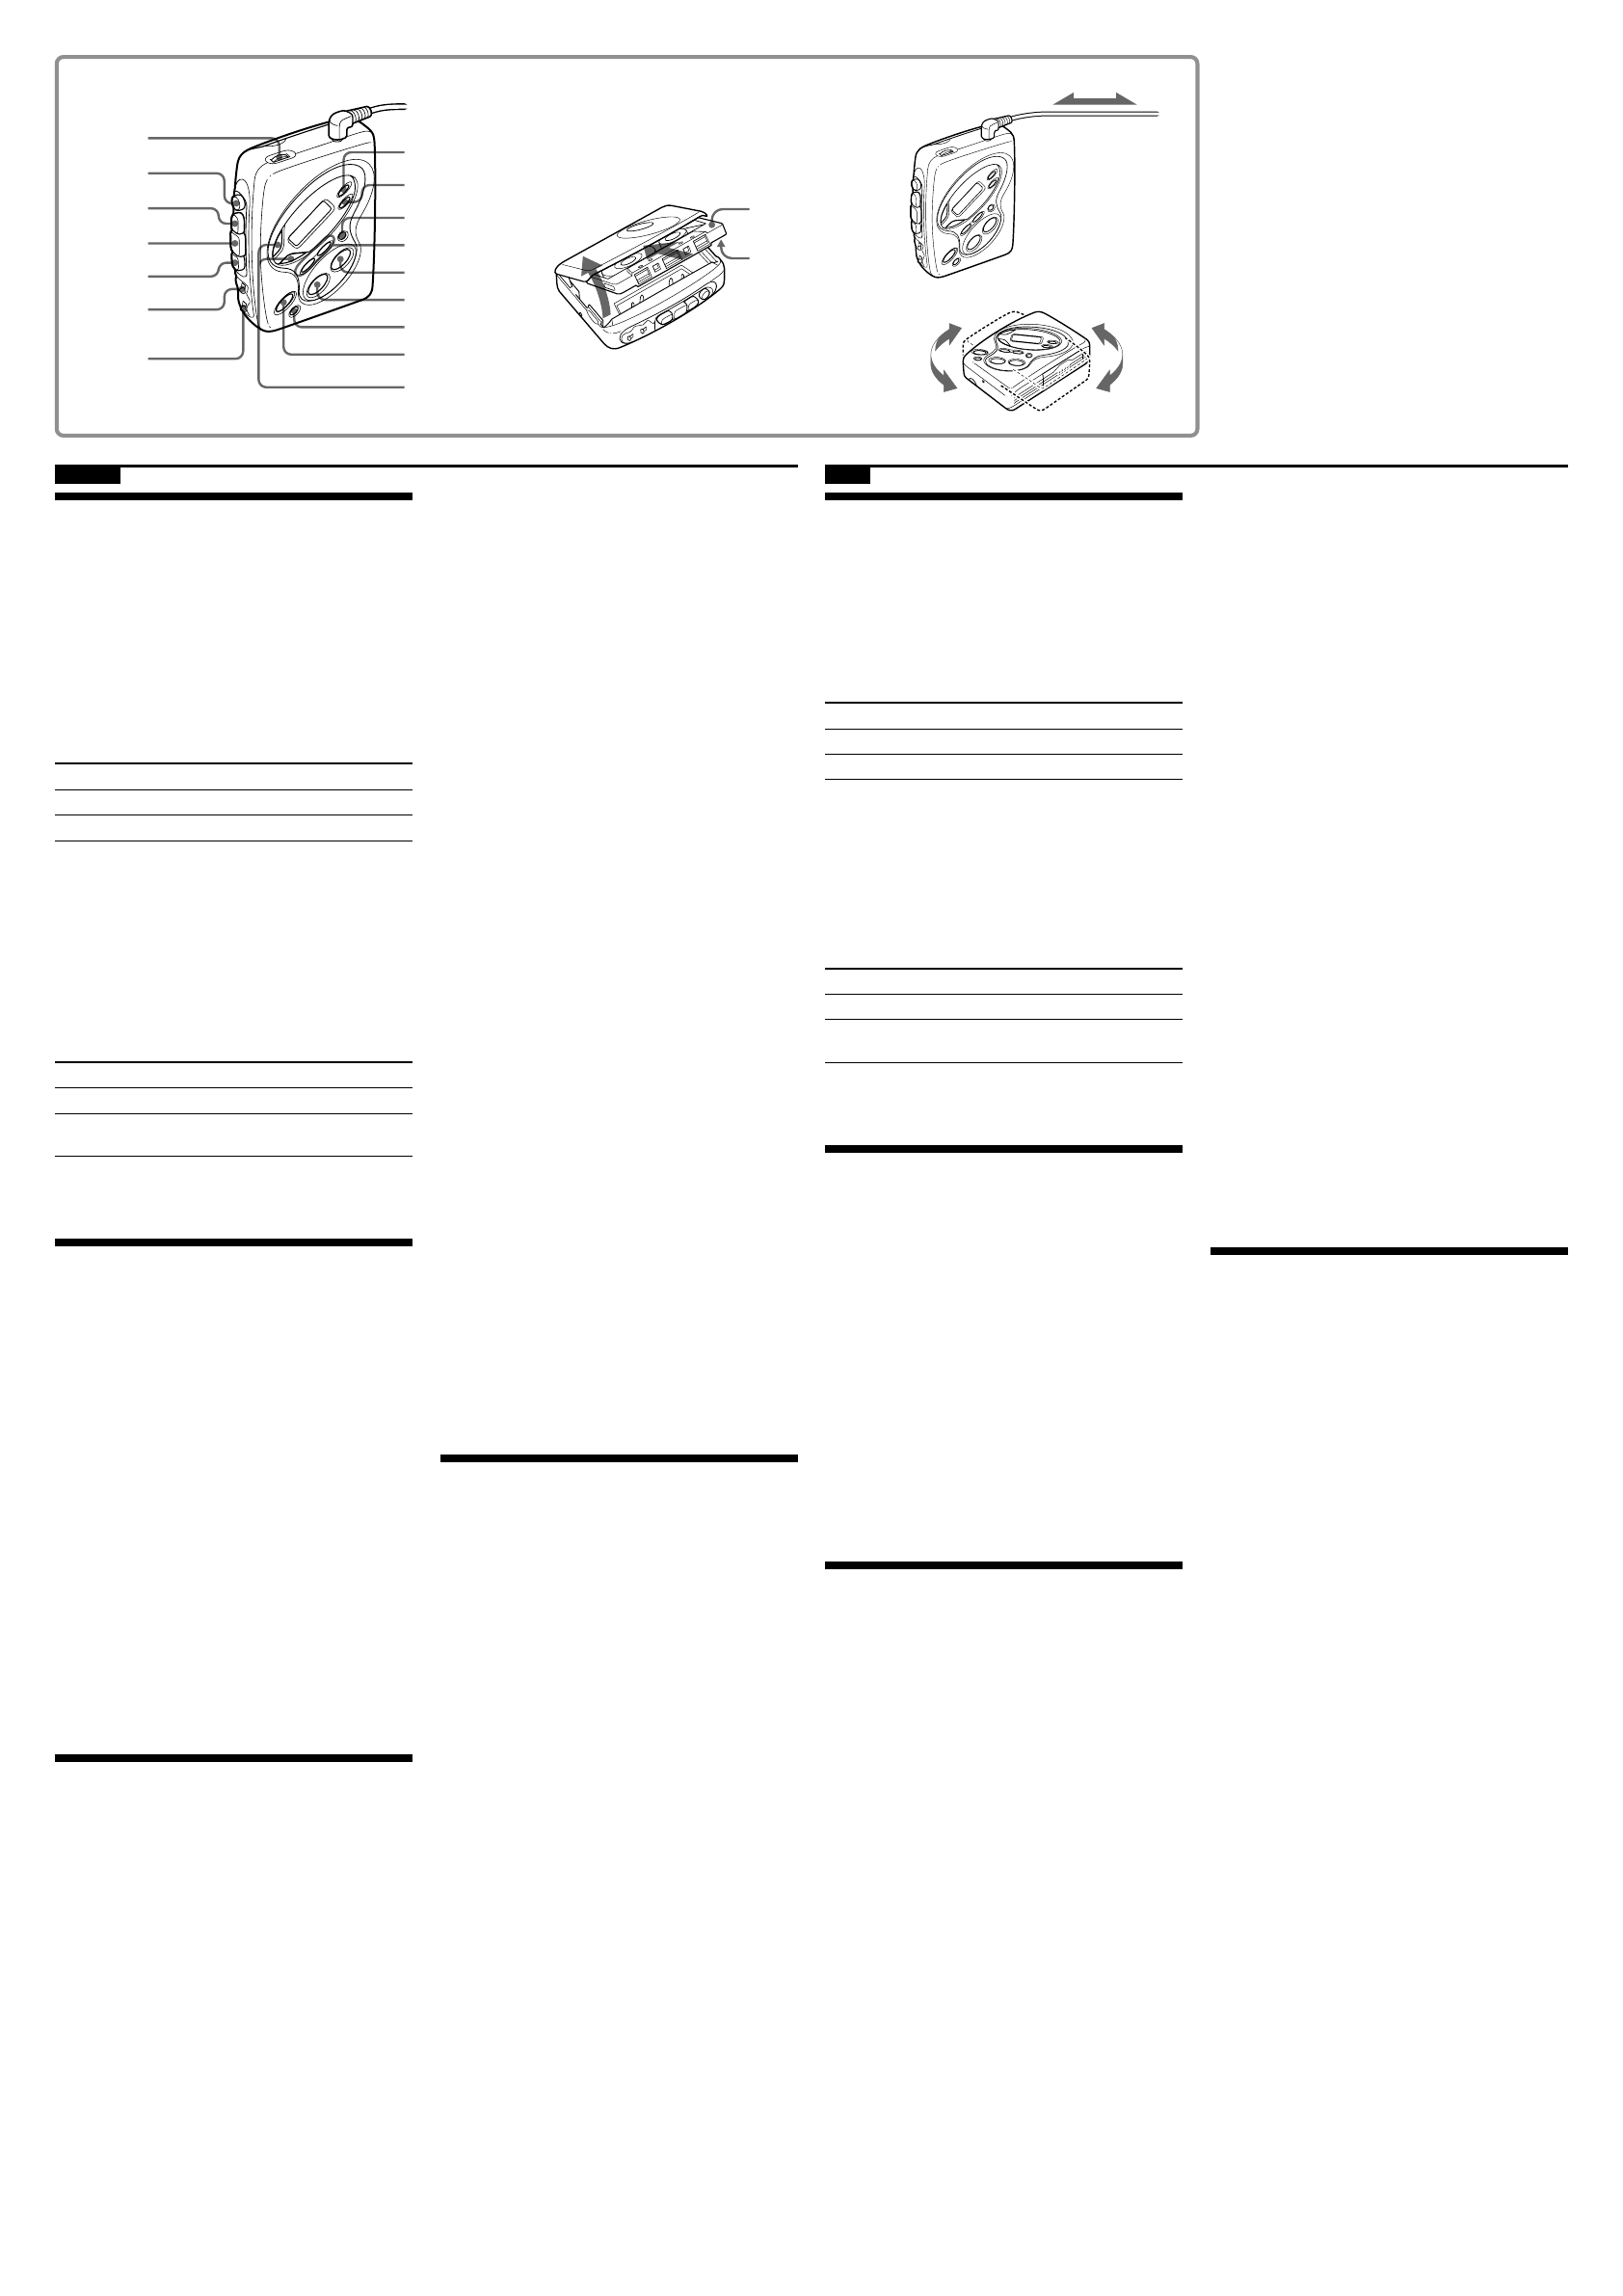
Listening to the Radio
1 If the HOLD function is turned on, set the
HOLD switch in the opposite direction of
the G mark to unlock the controls.
Make sure that the tape has stopped
completely.
2 Press FM or AM to select the desired band
and turn on the radio.
3 Press TUNING +/– to tune in to the
desired station. Hold down TUNING +/–
for a few seconds to scan for stations.
To turn off the radio
Press RADIO OFF.
To improve broadcast reception C
•For FM: Extend the headphones/earphones cord
(antenna). If the reception is still not good, press
MENU repeatedly to set the cursor in the display
to FM MODE. Then press SET to switch between
“LOCAL” and none (DX), or ”MONO” (monaural)
and none (stereo) for best reception.
•For AM: Reorient the unit itself.
Presetting Radio Stations
You can preset up to 40 stations.
For Canada and Central/South America: 30 for FM
and 10 for AM.
For other countries: 35 for FM and 5 for AM.
Presetting Automatically Scanned
Stations
1 Press FM or AM.
2 Press ENTER for more than 3 seconds.
Preset number 1 will flash in the display
and the Walkman starts scanning the
stations from the lower frequencies and
stops for about 3 seconds when a station is
received.
3 If you wish to preset the received station,
press ENTER while the preset number is
flashing.
The received station is preset on preset
number 1 and the unit starts scanning for
the next receivable station.
4 Repeat Step 3 until all receivable stations
are preset.
To stop scanning
Press RADIO OFF. The radio is turned off at the
same time.
Notes
•If stations are already stored, the newly preset
stations replace the old ones when the above
procedure is completed.
•If stations cannot be preset automatically, preset
stations manually.
Presetting Stations Manually
1 Press FM or AM.
2 Press ENTER.
The frequency digits and a preset number
flash in the display.
3 While the frequency digits and the preset
number are flashing, tune in to a station
you wish to store using TUNING +/–, and
select a preset number using PRESET +/–.
4 While the frequency digits and the preset
number are flashing, press ENTER.
Notes
•If you cannot complete step 3 or 4 while the
indications are flashing, repeat from step 2.
•If a station is already stored, the new station replaces
the old one.
To cancel the stored station
Follow the procedure above and in step 3, press and
hold TUNING +/– until “- - - -” is displayed and
select the preset number you want to cancel using
PRESET +/–. Press ENTER while “- - - -” is flashing.
Playing the preset radio stations
1 Press FM or AM.
2 Press PRESET +/–.
Using Other Functions
Locking the controls
Set the HOLD switch in the direction of the G mark
to lock the controls.
The hold function only locks the radio operation
buttons, MENU button and SET button.
Emphasizing bass sound
Press MENU repeatedly to set the cursor to MEGA
BASS in the display. Then, press SET to turn MB
(mega bass) on. With each press, the indications
change as follows.
MB (mega bass) : emphasizes bass sound
No message: off (normal)
Notes
•If the sound is distorted with the mode “MB”, turn
down the volume or select normal mode.
•Bass emphasis may not show great effect if the
volume is turned up too high.
Protecting your hearing—AVLS
(Automatic Volume Limiter
System)
Press MENU repeatedly to set the cursor to AVLS in
the display. Then press SET to show “AVLS”.
The maximum volume is kept down to protect your
ears.
B
1
2 N
x
M m
x
•
s
d
Y
1 G
2
3
C
•
•
1
2
3
4
•
•
1
2
3
4
•
•
1
2
G
•
•