


E
C
D
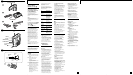
MIC (PLUG IN POWER)
SPEED CONTROL
( PLAY
VOL
p STOP
0 REW/REVIEW
) FF/CUE
PAUSE
English
Recording from
Various Sound
Sources
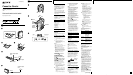
(see Fig. C)
Recording with the
supplied Microphone
(see Fig. C-
) (Supplied
to TCM-23DV only)
Connect the supplied “Super-
directional microphone”
(monaural) to the MIC jack and
direct the microphone to the sound
source.
Note
The supplied microphone will pick up
noise if it is hand held while
recording. Place the microphone on a
flat surface.
To use the stand (see Fig. C- )
If the stand gets detached
(see Fig. C- )
Attach the stand as shown.
Recording with an
External Microphone
Connect a microphone to the MIC
jack. The raised bar near the MIC
jack identifies as the jack for a
microphone not an earphone. For
TCM-21DV/23DV: Use the
supplied microphone. For other
models: Use a microphone of low
impedance (less than 3 kilohms)
such as ECM-T115 (not supplied).
When using a plug-in-power
system microphone, the power to
the microphone is supplied from
this unit.
Note
When recording with an external
microphone, the VOR system may not
work properly due to difference in
sensitivity.
Recording from Another
Equipment
Connect another equipment to the
MIC jack using the RK-G64HG
connecting cord (not supplied).
Playing a Tape (see
Fig. D)
1 Insert a cassette with the side to
start playing facing the cassette
holder.
2 Set REC TIME to the same
position as that used for
recording.
To playback commercially sold
tapes, select NORMAL.
3 Press N PLAY and then adjust
the volume. There is a raised
dot beside VOL to show the
direction to turn down volume.
4 Adjust the tape playback speed.
Set SPEED CONTROL to:
SLOW (slow) to play back a
tape slower.
Center position to play back a
tape at normal speed.
FAST (fast) to play back a tape
faster speed.
At the end of the tape, playback
stops and the unit turns off
automatically.
If you plug in headphones (not
supplied) to the EAR jack, you will
get monaural output from both left
and right channels.
To
Stop playback/
stop fast
forward or
rewind
Pause playback
Search forward
during
playback (CUE)
Search
backward
during
playback
(REVIEW)
Fast forward**
Rewind**
Start recording
during
playback
Take out
a cassette
* PAUSE . will also be
automatically released when
x STOP is pressed (stop-pause-
release function).
** If you leave the unit after the tape
has been wound or rewound, the
batteries will be consumed rapidly.
Be sure to depress x STOP.
If the tape runs too fast or too
slowly, check SPEED CONTROL.
BAdditional
Information
Precautions
On power
•Operate the unit only on 3 V DC.
For AC operation, use the AC
power adaptor recommended for
the unit. Do not use any other
type. For battery operation, use
two size R6 (AA) batteries.
•The nameplate indicating
operating voltage, etc. is located
on the bottom of the unit.
On the unit
•Do not leave the unit in a location
near heat sources, or in a place
subject to direct sunlight,
excessive dust or mechanical
shock.
•Should any solid object or liquid
fall into the unit, remove the
batteries or disconnect the AC
power adaptor, and have the unit
checked by qualified personnel
before operating it any further.
•Keep personal credit cards using
magnetic coding or spring-wound
watches etc. away from the unit to
prevent possible damage from the
magnet used for the speaker.
•If the unit has not been used for a
long time, set it in the playback
mode to warm it up for a few
minutes before inserting a tape.
Press or slide
x STOP
PAUSE . in the
direction of the
arrow
To release pause
playback, release
PAUSE .*.
Press and hold
M FF/CUE and
release it at the point
you want
Press and hold
m REW/REVIEW
and release it at the
point you want
M FF/CUE during
stop
m REW/REVIEW
during stop
z REC
Press x STOP and
open the cassette
compartment lid by
hand.
On tapes longer than 90
minutes
We do not recommend the use of
tapes longer than 90 minutes except
for a long continuous recording or
playback. They are very thin and
tend to be stretched easily.
On rechargeable battery
Certain countries may regulate
disposal of the battery used to
power this product.
Please consult with your local
authority.
If you have any questions or
problems concerning your unit,
please consult your nearest Sony
dealer.
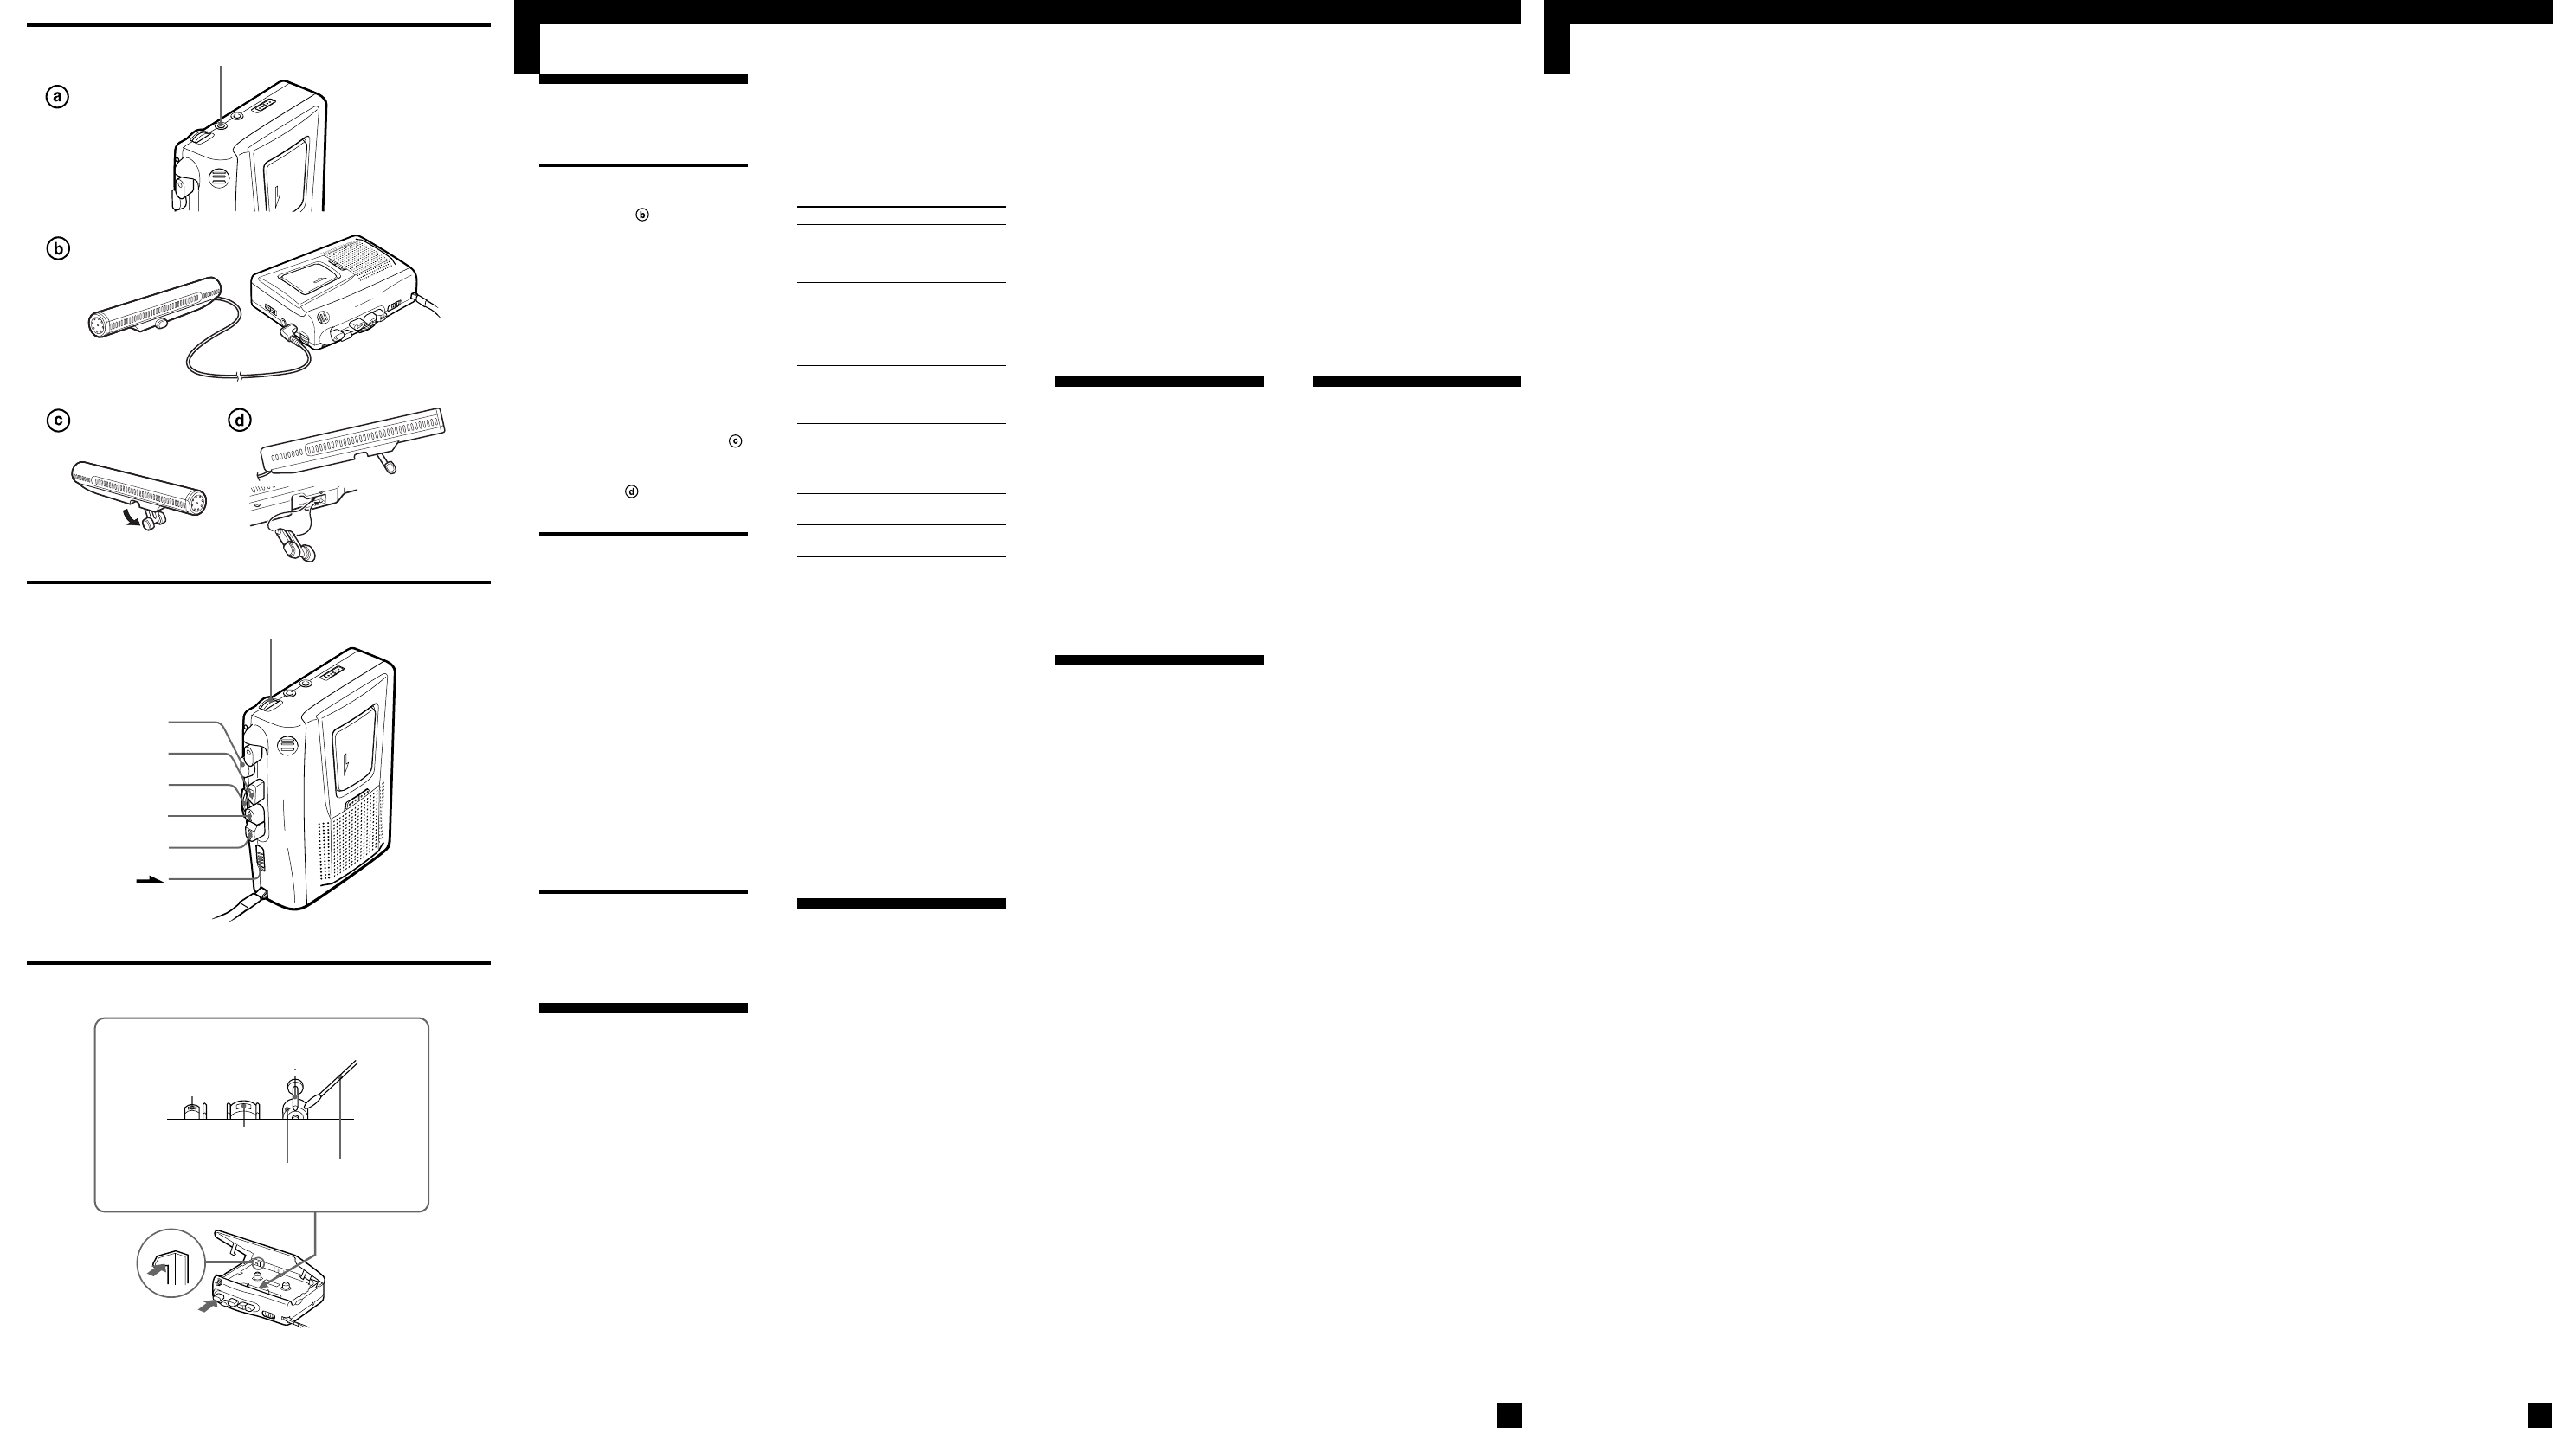
Maintenance (see Fig.
E)
To clean the tape heads and
path
Depress z REC while pushing the
lever.
Wipe the heads, pinch roller, and
the capstan with a cotton swab
moistened with alcohol after every
10 hours of use.
To clean the exterior
Use a soft cloth slightly moistened
in water. Do not use alcohol,
benzine or thinner.
Troubleshooting
Should any problem persist after
you have made these checks,
consult your nearest Sony dealer.
You cannot press z REC.
•The tab on the tape has been
removed.
You cannot press N PLAY.
•The tape has reached the end.
Rewind the tape.
The unit does not operate.
•The batteries have been inserted
with incorrect polarity.
•The batteries are weak.
•PAUSE . is slid in the
direction of the arrow.
•The AC power adaptor is not
firmly connected.
•When trying to run on dry
batteries, the AC power adaptor
has been left plugged in to the DC
IN 3V jack, but not to the power
source.
No sound comes from the
speaker.
•The earphone is plugged in.
•The volume is turned down
completely.
Tape speed is too fast or too slow
in the playback mode.
•Improper setting of the REC TIME
switch. Set it to the same speed as
that used for recording.
•SPEED CONTROL is set at a point
other than the center.
The sound drops out or comes
with excessive noise.
•The volume is turned down
completely.
•The batteries are weak.
•The heads are contaminated. See
“Maintenance.”
CT
Lever
Xxxx
Record/playback head
Xxxx
Pinch-roller
Xxxx
Cotton swab
Xxxx
Capstan
Xxxx
Erase head
Xxxx
Recording cannot be made.
•Connection is made incorrectly.
•The batteries are weak.
•The record/playback head is
contaminated.
•VOR has been set to the improper
position when VOR function
works.
Recording is interrupted.
•VOR is set to H or L. When you
do not use VOR, set it to OFF.
Recording cannot be erased
completely.
•The erase head is contaminated.
•Recording or erasing is being
made using a High-position
(TYPE II) or metal (TYPE IV) tape.
Specifications
Recording system
2-track 1 channel monaural
Tape speed
4.8 cm/s or 2.4 cm/s
Frequency range
250 - 6,300 Hz using nomal (TYPE
I) cassette (with REC TIME switch
at “NORMAL”)
Speaker
Approx. 3.6 cm dia.
Power output
250 mW (at 10 % harmonic
distortion)
Input
Microphone input jack (minijack)
sensitivity 0.2 mV for 3 kilohms or
lower impedance microphone
Output
Earphone jack (minijack) for 8 -
300 ohms earphone
Variable range of the tape speed
From approx. +30% to –15% (with
REC TIME switch at “NORMAL”)
Power requirements
3 V DC batteries R6 (AA) x 2/
External DC 3 V power sources
Dimensions (w/h/d) (incl. projecting
parts and controls)
Approx. 112 × 36.6 × 90.3 mm
Mass
Approx. 175 g
Design and specifications are subject
to change without notice.