En
ENGLISH
9
STORING THE NEW EQUALIZATION
CURVES
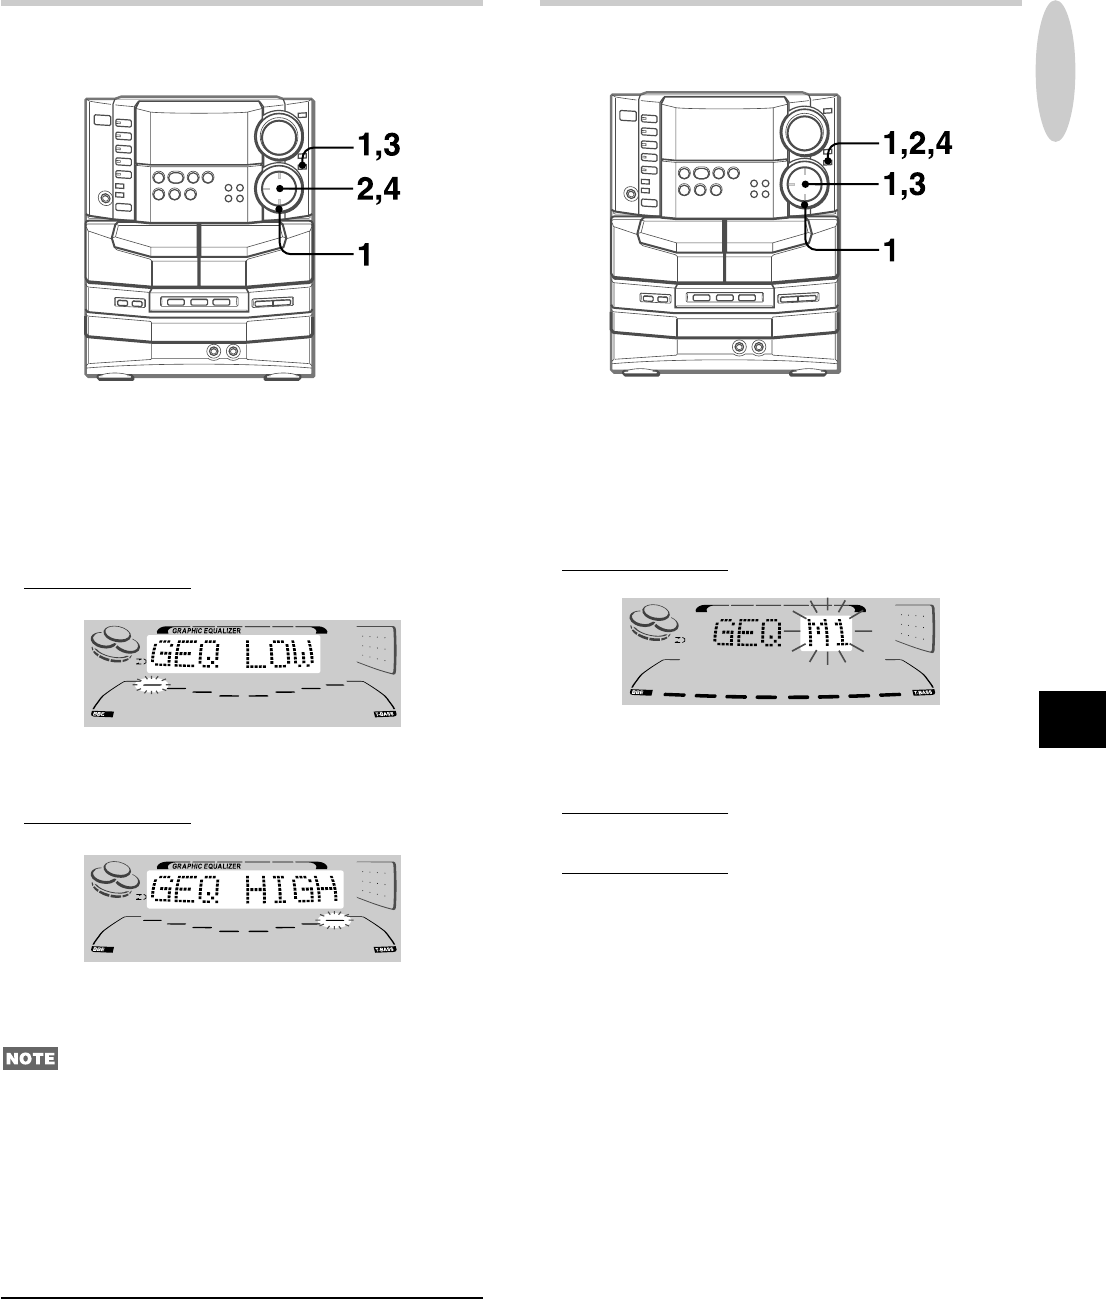
Up to 5 customized equalization curves can be stored as the
manual modes M1 - M5.
1
Go through steps 1-4 of “Setting a New
Equalization Curve Manually”.
The created curve is displayed for 8 seconds.
2
Within 8 seconds, press ENTER.
“M 1” flashes on the display for 8 seconds.
• If this step is not completed within 8 seconds, press GEQ
first to display “GEQ ON”. Then within 4 seconds press
ENTER repeatedly until “M1” flashes.
3
Within 8 seconds, turn MULTI JOG to select one
of the manual modes M1 - M5 to store the curve.
4
Within 8 seconds, press ENTER.
The new equalization curve is stored.
To select the stored equalization curve
Press GEQ, and turn MULTI JOG to select one of the manual
modes M1 - M5 within 4 seconds.
SETTING A NEW EQUALIZATION CURVE
MANUALLY
The equalization curve can be customized to suit your preference.
1
Press GEQ, followed by ENTER within 4 seconds.
Your customized setting will be based on the currently selected
curve. To select a different curve to work on, turn MULTI JOG
before pressing ENTER.
The display will be switched to read “GEQ LOW.”
2
Within 8 seconds, turn MULTI JOG to adjust the
level of the lowest frequency.
3
Press ENTER to let “GEQ HIGH” show.
The highest level frequency indicator flashes for 8 seconds.
4
Within 8 seconds, turn MULTI JOG to adjust the
level of the highest frequency.
The frequency level indicators of between the lowest and the
highest are adjusted accordingly.
If you do not store your customized equalization curve, it will be
lost when you switch to a different curve or press GEQ. To store
the new curve, see below.
Using the headphones
Connect headphones to the PHONES jack with a standard stereo
plug (ø6.3 mm,
1
/4 inch).
No sound is output from the speakers while the headphones are
plugged in.
Sound adjustment during recording
The VOLUME control has no effect on recording, while the BBE
affects recording.
SOUND
