1. Unscrew and save the two screws holding the current
module in place.
2. Pull the module out of the SAT module bay.
3. Disconnect the ribbon cable.
4. Select the desired position of any jumpers on the SAT
module (i.e.high pass filter).
5. Connect the ribbon cable to the ribbon cable connector on
the new module.
6. Slide the SAT module into the SAT module bay.
7. Replace the two mounting screws.
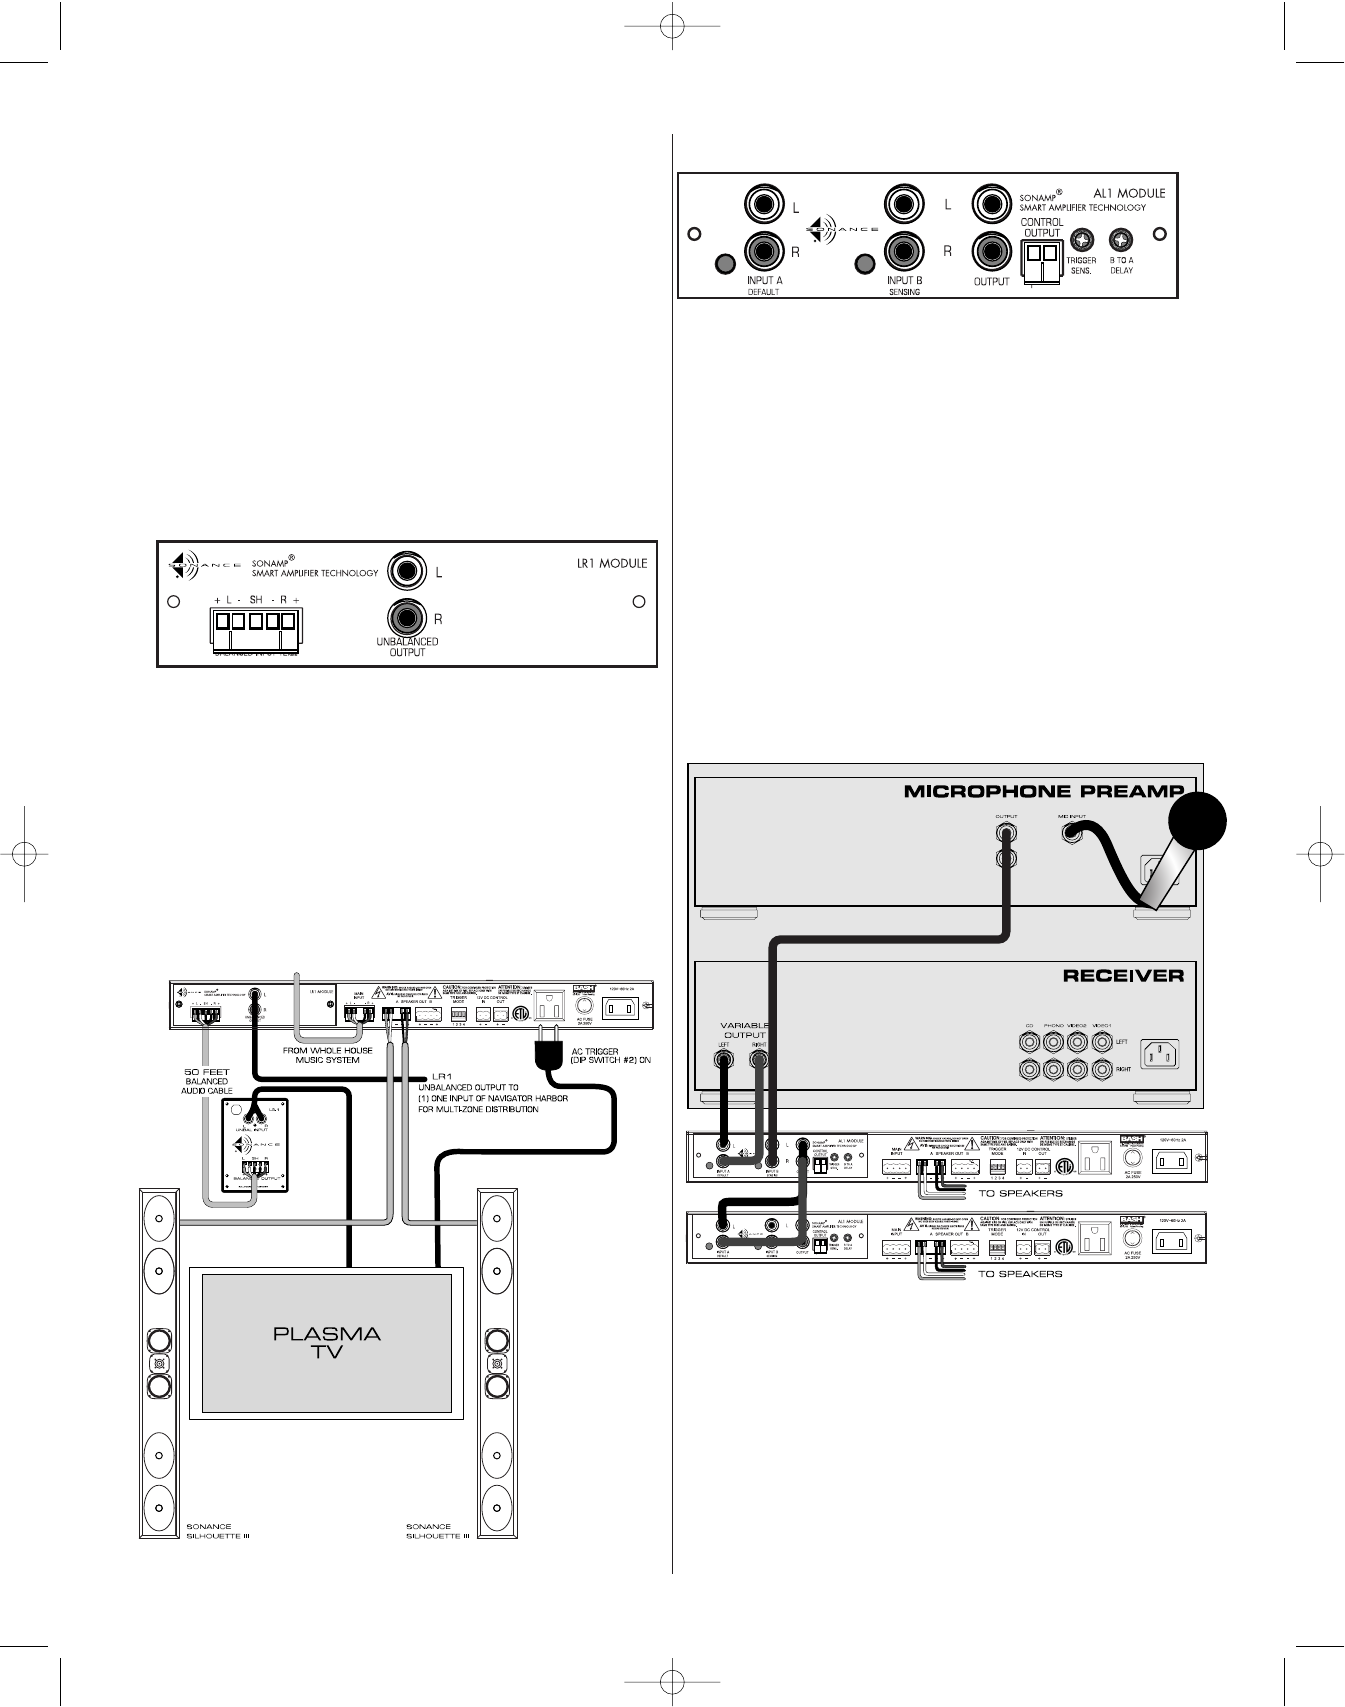
The following diagrams explain how each SAT module can be
used with the ASAP2. SAT modules such as the LR1, AL1, and
ASL1(all sold separately) are available. Contact your Sonance-
Authorized installer or dealer for more information.
LR1 Module (sold separately):
The LR1 – Balanced Line Receiver Module (sold separately) features a
circuit that cancels out noise on long audio runs, usually greater than
thirty feet.This module has an input impedance of10KΩand is perfectly
matched with the Sonance LS1 Balanced Line Sender.The LR1 Module
provides unbalanced stereo output jacks to feed the signal to other
amplifiers.The output is set at unity gain.The following diagram shows
a clean-looking Plasma TV/ In-Wall Speaker installation by using the
Sonamp ASAP2 with the LR1 module at the equipment rack,
with the plasma AC triggered by the ASAP2.Simply swap out the
SAT module with the LR1 module, and connect the equipment
as shown in Figure below.
AL1 Module (sold separately):
The AL1 – Automatic Line Level Switcher Module (sold
separately) has a default input as well as a sensing input.When
signal is detected at the sensing input, that signal is fed to the
amplifier as well as the output jacks.At the same time a 12VDC
control signal is present on the removable screw connector.
The sensing input has a sensitivity control as well as a delay
adjustment which controls the time the module waits after the
sensing jack signal subsides before switching back to the default
input. The following diagram shows a ASAP2 amplifier with the
AL1 module in a restaurant installation. The default input is
connected to the house restaurant audio and the sensing input
monitors to the paging microphone. The output is feeding a
second ASAP2 for two source & whole house switching. Simply
swap out the Basic SAT module with the AL1 module,and connect
the equipment as shown in the figure below.
MAINTAINING YOUR SONAMP ASAP2
The Sonamp ASAP2 requires no periodic maintenance and has no
user serviceable parts inside.Do not remove the top cover to avoid
risk of electric shock.To keep it clean use only a soft cloth and never
use any solvents or abrasives.Fingerprints may be removed with a
soft cloth moistened only with a few drops of water.
33-2381 asap2 manual.qxd 4/29/02 1:13 PM Page 5


