E-10
Using the Radio Data System (RDS) (continued)
Using the Auto Station Programme
Memory (ASPM)
■
Whilst in the ASPM operation mode, the tuner will
automatically search for new RDS stations. Up to 40
stations can be stored.
If you have already stored some stations in memory, the
number of new stations you can store will be less.
Press the TUNER button on the remote control or
FUNCTION button repeatedly on the main unit to
select TUNER function.
Press and hold down the RDS ASPM button on the
remote control for at least 3 seconds.
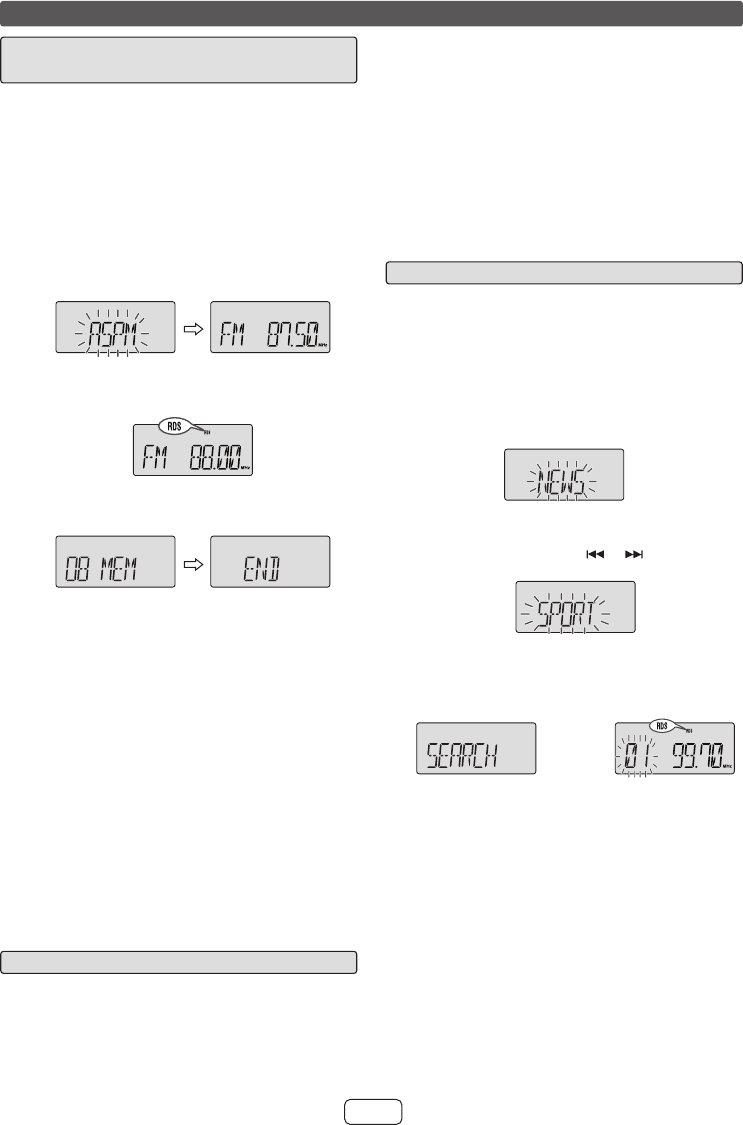
1. After “ASPM” has fl ashed for about 4 seconds,
scanning will start (87.50 - 108.00 MHz).
2. When an RDS station is found, “RDS” will appear
for a short time and the station will be stored in
memory.
3. After scanning, the number of stations stored in
memory will be displayed for 4 seconds, and then
“END” will appear for 4 seconds.
To stop the ASPM operation before it is complete:
Press the RDS ASPM button whilst it is scanning for
stations. The stations which are already stored in memory
will be kept there.
Notes:
If the same station is broadcasting on different
frequencies, the strongest frequency will be stored in
memory.
Any station which has the same frequency as the one
stored in memory will not be stored.
If 40 stations have already been stored in memory, the
scan will be aborted. If you want to redo the ASPM
operation, erase the preset memory.
If no station have been stored in memory, “00 MEM”
and “END” will appear for about 4 seconds.
If the RDS signals are very weak, station names may
not be stored in memory.
The same station name can be stored in different
channels.
In a certain area or during certain time periods, the
station names may temporarily be different.
1
2
●
●
●
●
●
●
●
To recall stations in memory■
To specify programmed types and select stations
(PTY search):
You can search a station by specifying the programme type
(news, sports, traffi c programme, etc.) from the stations in
memory.
Press the TUNER button on the remote control or
FUNCTION button on the main unit repeatly to select
TUNER function.
Press the RDS PTY button on the remote control.
Selected PTY code (blinking) will appear for about 6
seconds.
Within 6 seconds, press the
or button to select
the PTY code.
Each time the button is pressed, the PTY code will
appear.
Whilst the selected PTY code is displayed (within 6
seconds), press the RDS PTY button again.
The unit searches the all preset stations and stops
when it fi nds a station of the selected category
then tunes into the stations. The RDS indicator
lights up.
If no programme is found in the all preset stations,
“NO FOUND” appear on the display and returns to
the previous station.
Notes:
If the display has stopped fl ashing, start again from
step 2. If the unit fi nds a desired programme type,
the corresponding channel number will lit for about
4 seconds, and then the station name will remain it.
If you want to listen to the same programme type
of another station, press the RDS PTY button and
start again from step 2. The unit will look for the next
station.
1
2
3
4
●
●
●
●
Notes for RDS operation■
If any of the following events occur, it does not mean
that the unit is faulty:
“PS”, “NO PS” and a station name appear alternately,
and the unit does not operate properly.
If a particular station is not broadcasting properly or a
station is conducting tests, the RDS reception function
may not work properly.
●
●
When you receive an RDS station whose signal is too
weak, information like the station name may not be
displayed.
“NO PS”, “NO PTY” or “NO RT” will fl ash for about
5 seconds, and then the frequency will be displayed.
Notes for radio text:
The fi rst 8 characters of the radio text will appear for
4 seconds and then they will scroll across the display.
If you tune in to an RDS station which is not
broadcasting any radio text, “NO RT” will be displayed
when you switch to the radio text position.
Whilst radio text data is received or when the text
contents change, “RT” will be displayed.
●
●
●
●
●
XL-UH1H_XL-UH05H_EN (A5).indd 10XL-UH1H_XL-UH05H_EN (A5).indd 10 6/9/2010 9:23:42 PM6/9/2010 9:23:42 PM


