5
Bluetooth one touch connection via NFC
This audio system supports NFC-enabled device with Android
4.1, Jelly Bean and higher.
NFC tag set up■
The NFC tags can be placed anywhere convenient to you.
The velcro tapes supplied will help to secure the tags onto
the desired location.
Caution:
Make sure that the NFC tag is placed on a fl at and level
surface.
If you choose not to use the velcro tape, do not place
the NFC tag near metal surface to avoid connection
interference during tagging.
Keep all small parts away from children as they may be
accidentally swallowed.
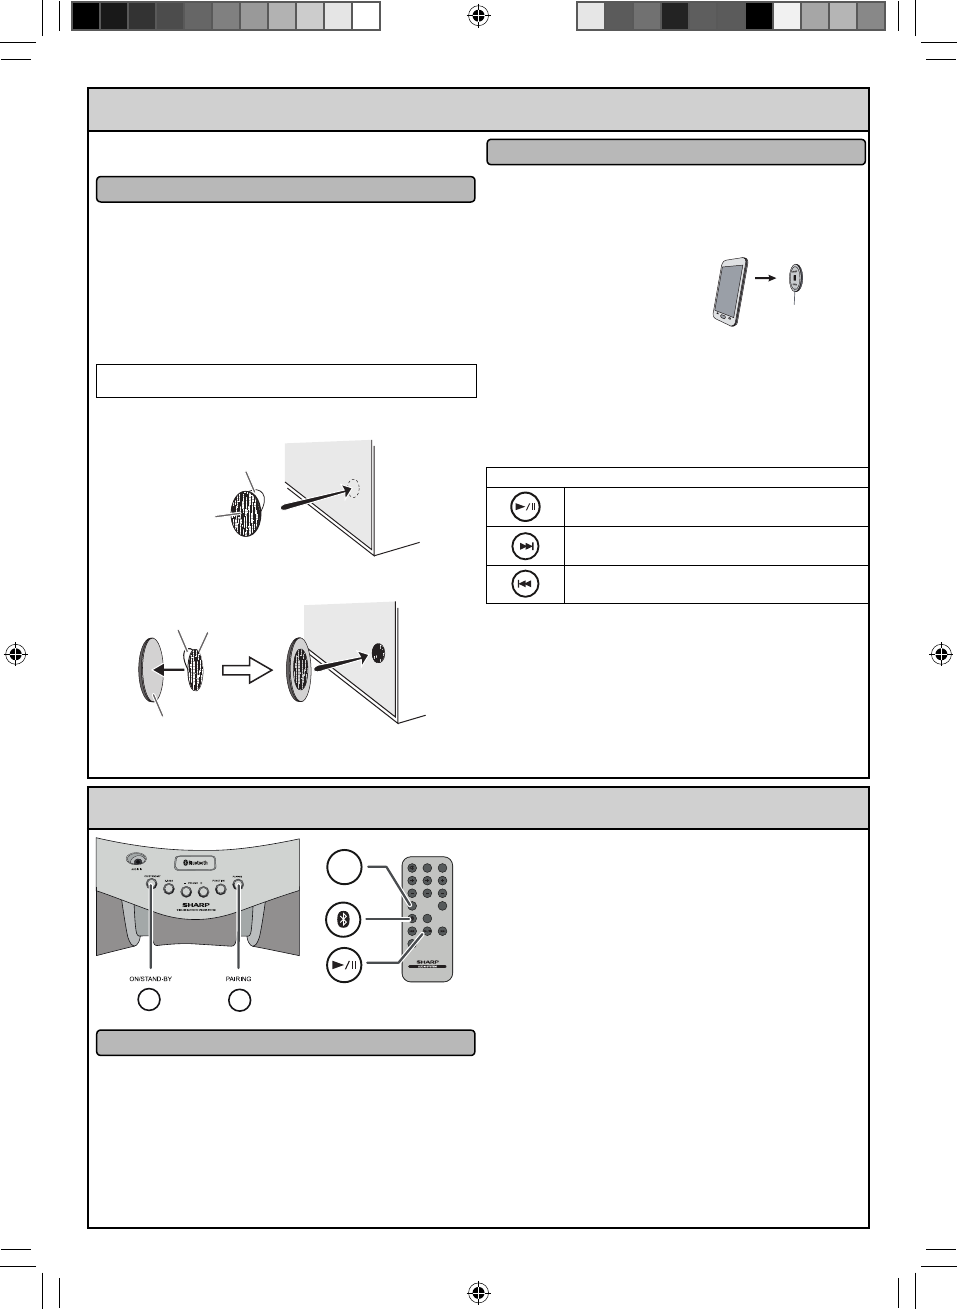
Peel the separator off the velcro tape (loop type) and
stick it on a desired surface.
Separator
Velcro
tape
(loop type)
Peel the separator off the velcro tape (hook type) and stick it to the
rear of the NFC tag. Then place the tag onto the desired location.
Separator
rear view of the NFC tag
Velcro tape
(hook type)
●
●
1
2
NFC connection for audio playback■
Check that:
Your device (smartphone/tablet) has an NFC function.
NFC function on your device is enabled.
Screen lock function of the device is off.
This unit is not in Eco mode.
Your device must be within 10 metres from the unit.
Touch your device
to the supplied NFC tag.
A pop-up window asking whether to proceed with the Bluetooth
connection appears on the device. Select <YES>.
The ‘connected’ message appears when the connection is
complete.
Playback will start automatically, otherwise press play (on re-
mote control or source device).
Sound will be heard from the speakers of this unit via audio
streaming.
Your device must be within 10 metres from the unit.
Various Bluetooth operation buttons (remote control only)
Press the button to play or pause.
Press the button to skip up.
Press and hold to fast forward.
Press the button to skip down.
Press and hold to fast reverse.
Notes:
To disconnect, simply touch your device to the tag again.
Regardless of which tag you used to establish Bluetooth
connection with this product, tapping your device to any
of the NFC tags again, will disconnect the Bluetooth con-
nection.
To listen to audio via Bluetooth connectivity without NFC
tag - refer “Pairing with other Bluetooth source devices”
on page 7.
It takes about 6-8 seconds for a Bluetooth enabled device
(eg. smartphone) to establish Bluetooth connection with
this unit via NFC or manual connection.
●
●
●
●
●
1
2
●
3
●
●
●
●
●
●
NFC tag
6
Listening to Bluetooth enabled devices
MUTE
ON/
STAND-BY
TREBLE
AUDIO IN
BASS
PAIRING
VOL
X-BASS
BLUETOOTH
DIMMER
RRMCGA343AWSA
ECO MODE
PAIRING
BLUETOOTH
GX-BT3
Pairing with other Bluetooth source devices
■
Press the ON/STAND-BY button to turn the power on.1
Press the BLUETOOTH button on the remote control or
FUNCTION button repeatedly on the main unit to select
Bluetooth function. (Pairing indicator blinks.)
2
Press and hold the PAIRING button for 3 seconds or more.
PAIRING indicator blinks quickly. The unit is now in pair-
ing mode and is ready to be paired with other Bluetooth
source device.
3
Perform pairing procedure on the source device to detect this
unit. “SHARP GX-BT3” will appear in the detected devices
list (if available) in the source device. (Refer the source device
operating manual for details).
Notes:
Place the devices to be paired within 1 metre (3 feet) of
each other when pairing.
Some source devices are unable to display lists of detect-
ed devices. To pair this unit with the source device, refer to
the source device operating manual for details.
4
●
●
Select “SHARP GX-BT3” from the source list. If Passcode* is
required, enter “0000”.
* Passcode may be called PIN Code, Passkey, PIN number
or Password.
5
Pairing indicator (blue) will stop blinking once the unit is suc-
cessfully paired with the source device. (Pairing information
is now memorised in the unit.)
Some audio source devices may connect with the unit au-
tomatically after pairing is completed, otherwise follow the
instructions in the source device operating manual to start
connection.
6
Press the play button on remote control or source device to
start Bluetooth streaming playback.
7
GX-BT3_QG.indd 2GX-BT3_QG.indd 2 2013-09-17 09:04:252013-09-17 09:04:25
