


GB
5
GB
4
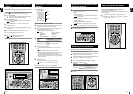
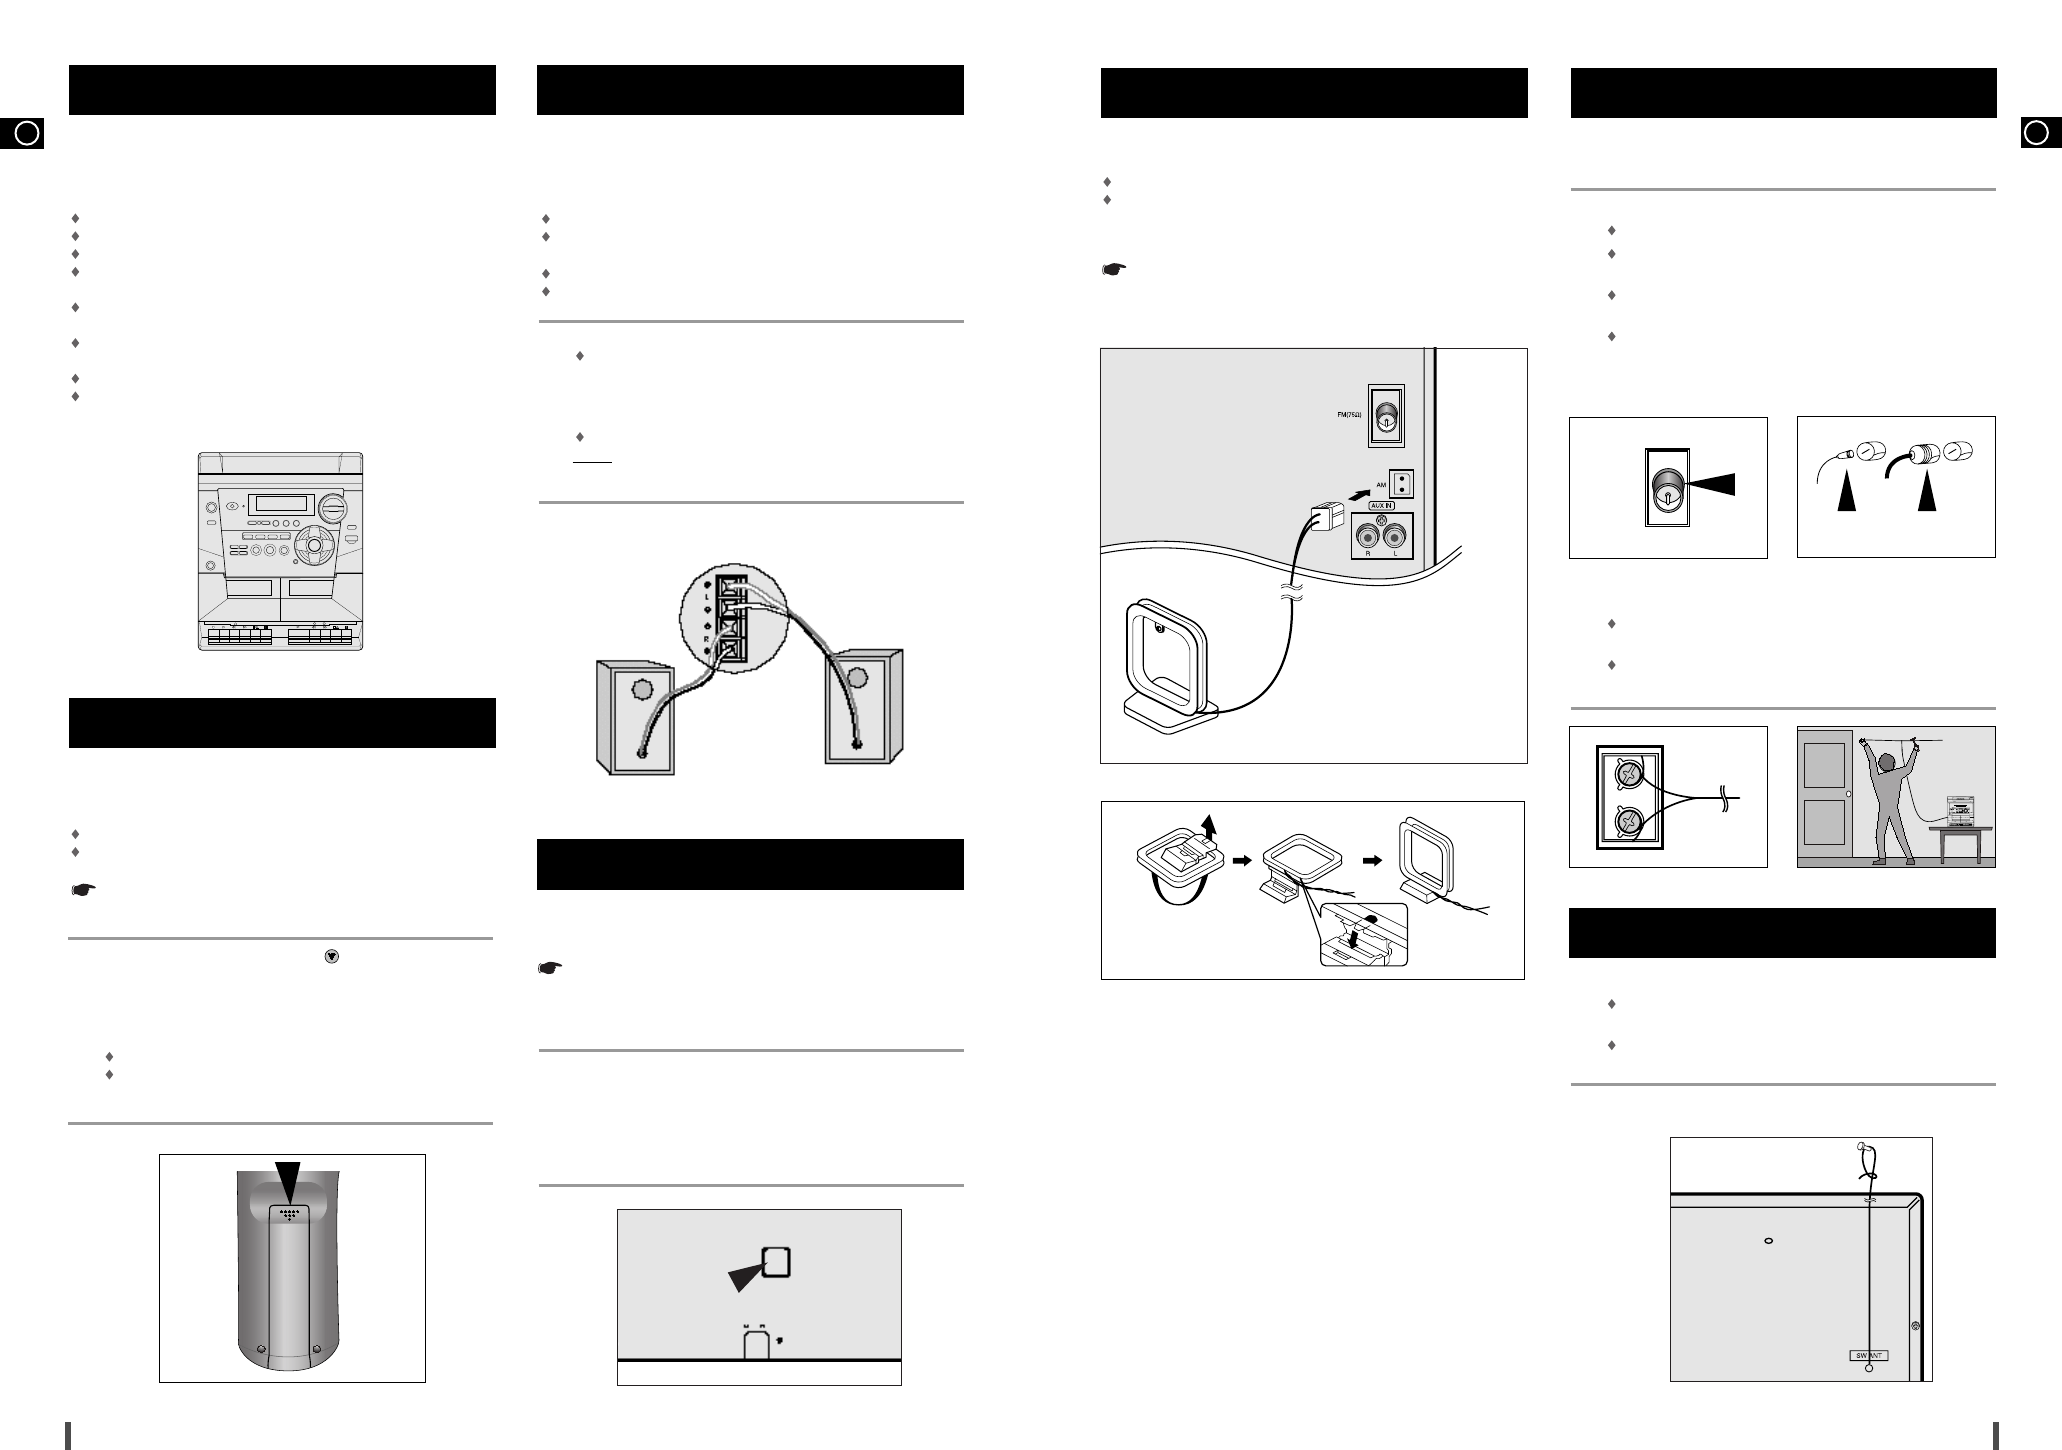
The AM aerial (for long and medium waves) can be:
Placed on a stable surface
Fixed to the wall
The AM aerial connector terminals are located on the rear of the system and
are marked AM.
To avoid noise interference, check that the loudspeaker wires do
not run close to the aerial wires.
Always keep them at least 2 inches (5 cm) away.
There are two types of aerial, (depending on option chosen).
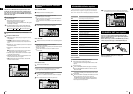
How to connect a COAXIAL TYPE aerial.
Connect a 75Ω antenna to the FM antenna terminal.
Plug the connector on the FM aerial supplied into the coaxial socket
(75Ω) marked FM on the rear of the system.
Follow the instructions given on Page 10 to tune into a radio station,
and determine the best position for the aerial.
If reception is poor, you may need to install an outdoor aerial.
To do so, connect an outdoor FM aerial to the FM socket on the rear
of the system using a 75Ω coaxial cable (not supplied).
How to connect a SCREW TYPE aerial.
The FM aerial connector terminals are located on the rear of the
system and marked FM (75Ω).
Spread the T.form FM aerial out and attach the ends to a wall,
in the position providing the best reception.
How to connect a WIRE TYPE aerial.
Spread the SW aerial out and attach the ends to a wall, in the position
providing the best reception.
If reception is poor (e.g. distance from transmitter too great, walls
blocking the radio waves, etc.), install an outdoor aerial.
Connecting the AM (MW) Aerial
Connecting the FM Aerial
Connecting the SW Aerial (option)
1
1
2
FM FM
FM AERIAL
(supplied)
75Ω COAXIAL CABLE
(not supplied)
To take full advantage of your new mini-compact system, follow
these installation instructions before connecting the unit.
Install the system on a flat, stable surface.
Never place this unit on carpeting.
Never place this unit in an outdoor area.
Maintain an open space of approximately 4 inches (10 cm) on the
sides and rear of the system, for ventilation purposes.
Make sure that you have enough room to open the compact disc
compartment easily.
Place the loudspeakers at a reasonable distance on either side of
the system to ensure good stereo sound.
Direct the loudspeakers towards the listening area.
For optimum performance, make sure that both speakers are placed
at an equal distance above the floor.
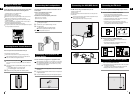
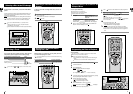
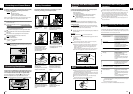
Insert or replace remote control batteries when you:
Purchase the mini-compact system
Find that the remote control is no longer operating correctly
When replacing the batteries, use a new set of batteries and
never mix alkaline and manganese batteries.
Place your thumb on the position marked on the battery compartment
cover (rear of the remote control) and push the cover in the direction of
the arrow.
Insert two AAA, LR03 or equivalent batteries, taking care to respect
the polarities:
+ on the battery against + on the remote control
– on the battery against - on the remote control
Replace the cover by sliding it back until it clicks into position.
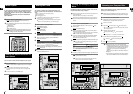
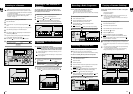
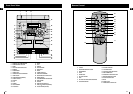
The loudspeaker connector terminals are located on the rear
of the system.
There are four terminals on the system:
Two for the left speaker (marked L)
Two for the right speaker (marked R)
To achieve the correct sound quality, connect the:
Red wire to the + terminals
Black wire to the - terminals
To connect a wire to a terminal, push the tab as far as it will go:
To the right on the system
Insert the wire, up to the plastic sheathing, in the hole.
Push the tab back:
To the left on the system, until it clicks into place
Result:
The wire is pinched and held firmly in place.
Repeat the operation for each wire.
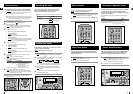
The main lead must be plugged into an appropriate socket.
Before plugging your system into a main socket, you must check
the voltage setting (OPTIONAL). If the voltage of the socket does
not correspond to the setting on the rear of the unit, you may
seriously damage your system.
Check the position of the voltage selector on the rear of the system
(OPTIONAL).
Plug the main lead (marked AC CORD on the rear of the system) into
an appropriate socket.
Press the POWER button to switch your mini-component system on.
Where to Install Your
Mini-Compact System
Inserting Remote Control Batteries
Connecting the Loudspeakers
Connecting Your System to the
Power Supply
1
2
3
option
1
2
3
4
1
2
3
(IMPEDANCE 4Ω)