GB
13 14
CONNECTIONS
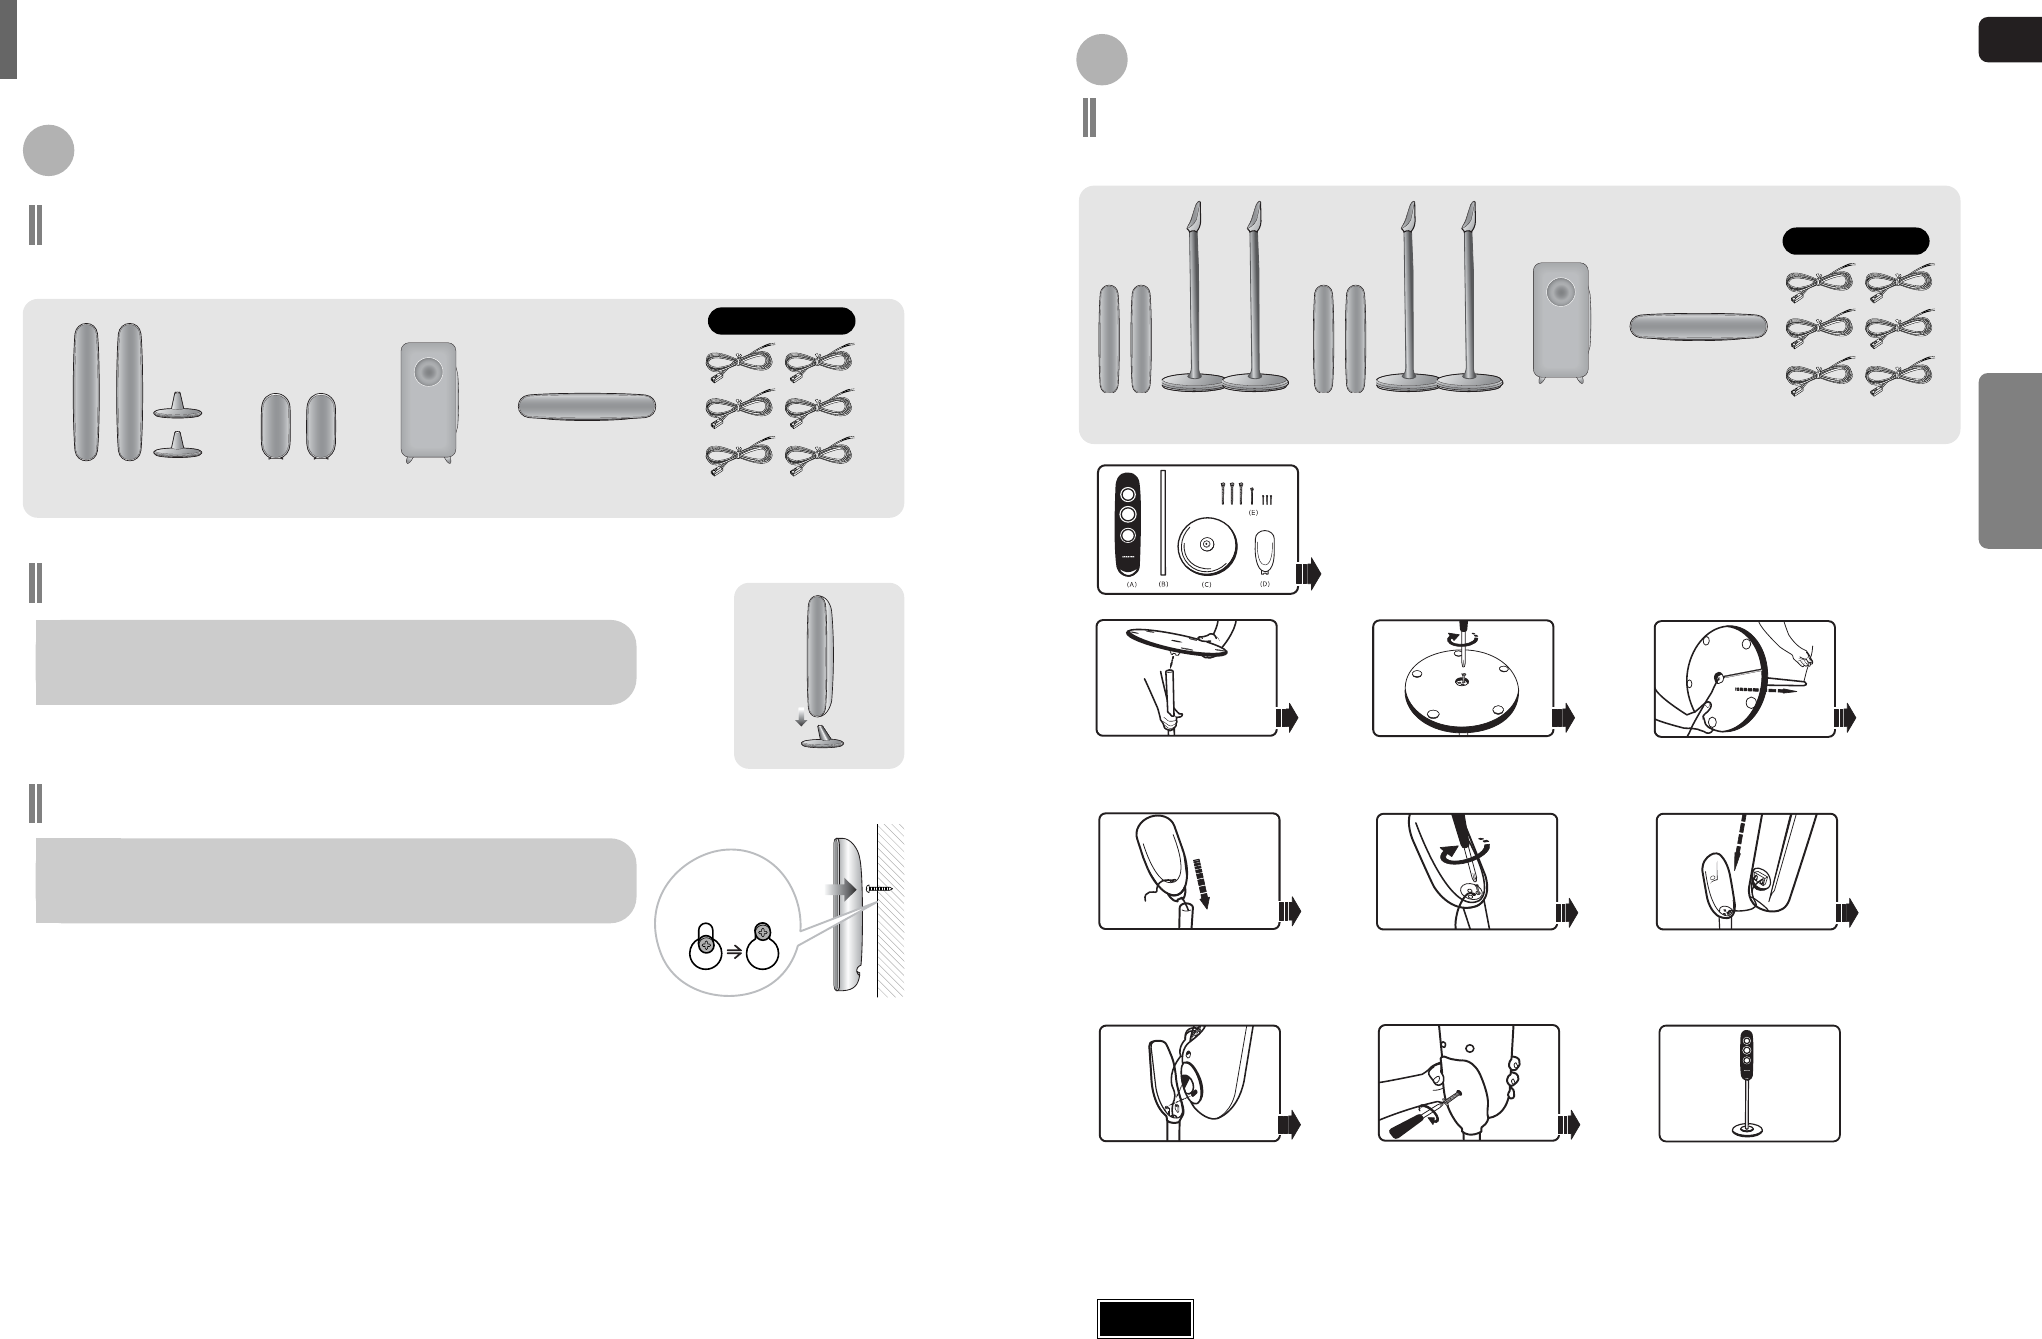
Speaker Accessories
Connecting the Speakers
Please confirm that all the following contents are included in the package.
Front Speaker (2EA) Rear Speaker (2EA) Subwoofer Speaker Center Speaker Speaker Cable (6EA)
Assembling the Speakers
Speaker Packages
Set the front speaker on the front stand.
To mount the speakers on the wall
Drive a screw into the wall for each speaker and
then hook the front speaker over them.
Hook the speakers so
that the screws are in the
position of the figure.
HT-XQ100/HT-XQ100W
Speaker Accessories
Please confirm that all the following contents are included in the package.
Front Speaker (2EA)
Assemble the (B) Aluminum Bar and the
(C) Stand Base as the figure shows.
Fasten the screws (small-size) with a screw
driver.
* You have to fasten the screws in all the
three holes.
Fasten the screws (big size) with a screw driver.
* You have to fasten the screws in all the
three holes.
Connect the speaker cable to the (A) Speaker
paying attention to the polarity of the speaker cable.
* The cable marked with black line is to be
connected to (-).
Have the speaker cable pass through the
Stand Base and Aluminum Bar.
Have the speaker cable pass through the
(D) Speaker Support and
assemble the Speaker Support and the
Aluminum Bar.
Rear Speaker (2EA) Subwoofer Speaker
Components
(A) Speaker
(B) Aluminum Bar
(C) Stand Base
(D) Speaker Support
(E) Screws (3 Types of Big, Mid and Small)
Center Speaker Speaker Cable (6EA)
Speaker Packages
HT-TXQ100
Fasten the screws (mid-size) with a screw
driver onto the rear side of the Speaker
Support as the figure shows.
This is the successfully assembled speaker.
Assemble the other speaker according to the
same procedures.
Line up the groove of the Speaker Support and
the projection of the Speaker and assemble
the Speaker and the (D) Speaker Support by
pressing them until the Speaker is fixed as the
figure shows.
* If you press too hard, the projection might be
damaged. Take care when you assemble them.
•
Make sure that the TALLBOY type speaker should be installed on the flat and stable area.
Otherwise it may fall down due to external shock.
Caution
01_XQ100/TXQ100_GB 2006.5.22 9:04 AM Page 16


