


9
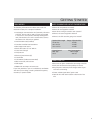
PUNCHDOWN TERMINALS
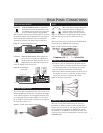
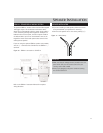
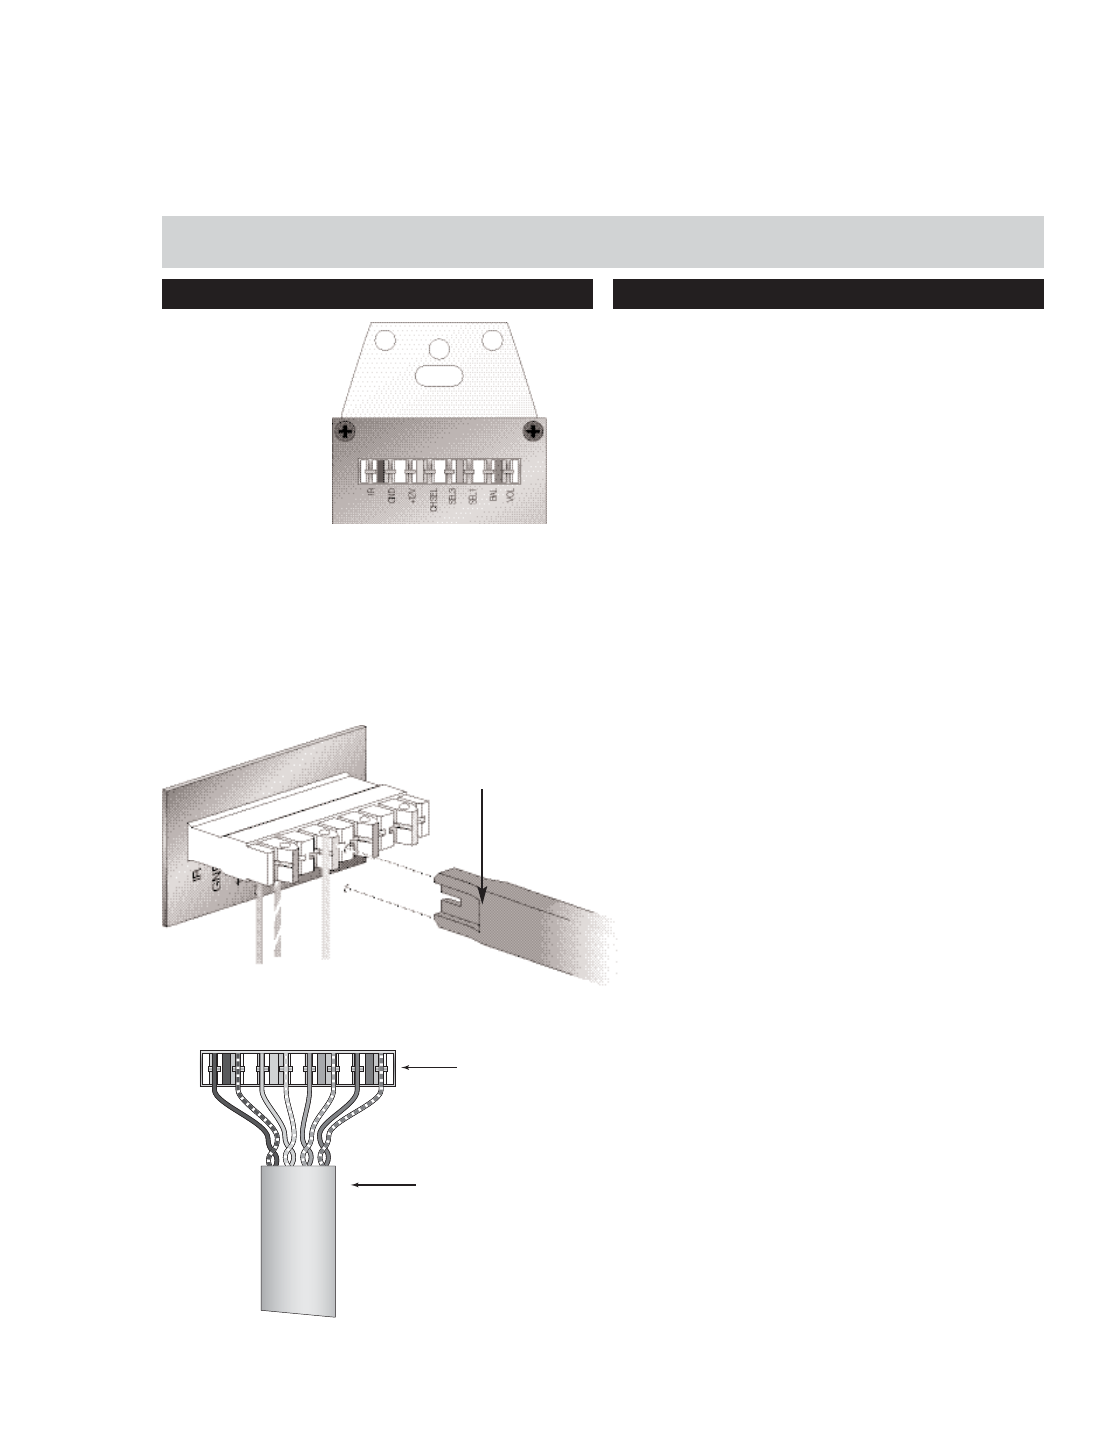
Figure 11 – Punchdown
Terminal on CAi keypad
The CAi Keypads come with 110 punchdown terminals. These
terminals are quick, easy to install and provide a strong con-
nection. Punchdown terminals require the use of a punch-
down tool. One has been provided with this kit.
Press wires into punchdown terminal with punchdown tool
as shown in Figure 12.
Figure 12 – Punching Down Wires
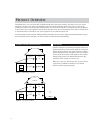
INSTALLING THE KEYPADS
•The best infrared remote performance is achieved with
the keypad away from any direct sunlight. Also consider
convenience when choosing a location.
•Choose a place that is easily seen from the position where
a person is most likely to be located.
•Check whether or not you can route the wire to the loca-
tion you have chosen.
•Purchase retro-fit plastic junction boxes (min. 18 cubic
inches) or p-rings and cut in the boxes using a key-hole
saw or sheetrock knife/hand saw.
•If you are installing the optional DSC keypad you will
need to use a double-gang electrical box. If you are
installing both the optional DSC and DAN keypad you
will need to install a triple-gang electrical box.
•If you feel uncomfortable cutting into your walls and
running wire through the walls, seek help from a profes-
sional installer or an electrician.
•Route the wire to the junction box from the CAi location.
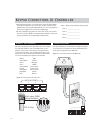
•If using 22 AWG wire, connect each wire to the correct
position 1 thru 8 using the included punchdown tool.
Refer to List 5.
•If using CAT-5 wire, connect each wire to its correspon-
ding color labeled on the punchdown terminal.
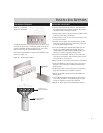
•Mount the keypad in the junction box and attach the
Decora plate.
•The CA-KP.2 keypad has source labels for your conven-
ience. Insert the label in the keypad keeping the input
number in sequence with the source selected.
•Repeat the above steps until all keypads are installed.
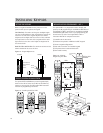
INSTALLING KEYPADS
IR
GND
+12V
CH SE
L
SEL3
SEL1
BAL
VOL
CAT-5 or 8-conductor
22 AWG wire
Connector on
CA-KP.2 or CA-LCD.2
BROWN
GREEN
ORANGE
BLUE
Punchdown
Tool