5
Connecting the Perseus to multi channel sources:
The Home Theater input is to the far left of the unit. It is sometimes desirable to
combine two channel music systems with multi channel home theater systems. In
such cases it is common to share speakers and amps between systems. The
Perseus would then be used with two channel sources such as CD Players,
Turntables, and Tuners etc. A separate Processor or Multi Channel Preamp would
be used with multi channel sources such as DVD movies. The Peseus HT IN input
allows the Processor output to be routed directly to the power amps, effectively
bypassing the Perseus, without having to unplug interconnects. The front two
main channel outputs from the Processor would be connected to the Perseus HT
IN input.
Connecting the Perseus to an amplifier:
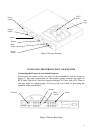
The outputs are arranged to the left of the input jacks. The variable outputs are
controlled by the volume control and should be connected to the power amplifier
or sub-woofer. The fixed output is not controlled by the volume control and is
used for tape recording.
Connecting the Perseus to power outlet:
Connect the IEC end of the detachable power cord to the preamplifier, and plug
the opposite end into corresponding outlet. It is recommended that both the
Perseus and your power amplifier are plugged into the same wall outlet if possible
(perhaps using a power outlet strip). This is to avoid creating a ground loop.
Connecting the Perseus to a turntable:
Connect the output of the turntable, via RCA jacks, directly to the Perseus
through the phono input. The phono section in the Perseus can be configured to
amplify the vast majority of phono cartridges. Cartridge loading (resistance and
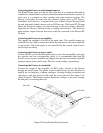
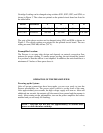
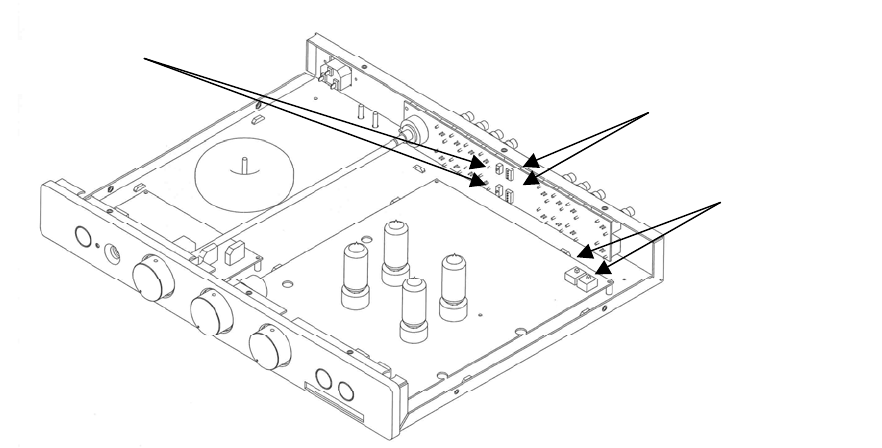
capacitance) and gain are accessible with the cover removed. See figure 3 for
switch locations. The Perseus contains hazardous voltages so be sure to unplug
the unit prior to removing the cover.
Figure 3 Perseus Internal Switch Location
SW1,SW2
SW3,SW4
SW5,SW6


