4
Connecting Cronus to source components:
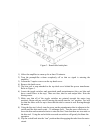
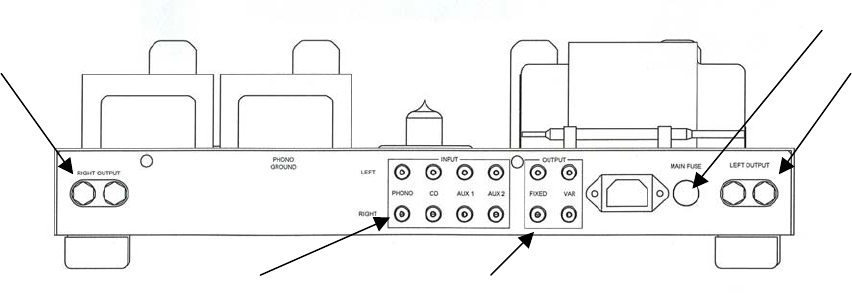
The input connections to the Cronus are made via RCA jacks on the rear of the
amplifier. See figure 2. Be sure to use high quality interconnect cables – they do make a
difference
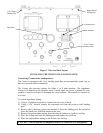
Figure 1. Rear panel layout
Connecting Cronus to a turntable:
The phono section provided in the Cronus is suitable for a wide variety of cartridges.
Best results will be obtained with moving magnet (mm) and high output moving coil
(mc) cartridges. The cartridge loading is preset at 47K ohms with 150pF of capacitance.
Connecting Cronus to headphones :
The headphone jack is located on the front faceplate of the preamplifier, as shown in
figure1. The Cronus headphone jack provides for a ¼” or 6mm headphone connector. If
you have headphones with a different size connector, you can use a suitable adapter. It is
normal for a small amount of sound to come out of the loudspeakers when the
headphones are plugged in.
Connecting Cronus to the power outlet:
Connect the IEC send of the detachable power cord provided to the amplifier, and plug
the opposite end into corresponding outlet. It is recommended that both Cronus’ and all
sources (CD, tuner, etc.) are plugged into the same wall outlet if possible (perhaps using
a power outlet strip). This is to avoid creating a ground loop.
Amplifier Location:
The Cronus is an open tube design and depends on natural convection flow patterns for
proper cooling. To ensure proper cooling, the unit should be located in a position so that
the airflow is not impeded. In addition, the unit should not be placed in an enclosed
shelf, and should have a minimum of 6 inches of free space above it.
Right Channel
Binding Post
Left Channel
Binding Post
Main Fuse
RCA
Inputs
Variable and
Fixed Outputs


