


5
PREPARATION
Caution: Make all the necessary connections before you plug in or
turn on the receiver.
POSITIONING SPEAKERS
Speaker (not supplied) placement can make a noticeable difference
in your system’s sound. The guidelines in this section will help you
choose the best locations. After you use your receiver for a while, you
might want to try different locations for your speakers.
Bass response depends largely on speaker location. For strong bass,
place the speakers in the corners of the room. If you want even
stronger bass, place the speakers directly on the floor. If the bass is
too strong, move the speakers slightly away from the corners of the
room, or raise them 6 to 18 inches off the floor. You can buy speaker
stands at your local RadioShack store.
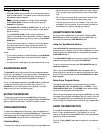
The distance between the speakers should be about the same as the
distance between the normal listening point and the point halfway
between the speakers. If you place the speakers too close together,
you reduce the stereo separation. If you place them too far apart, you
reduce the bass effect and create a hole in the middle of the sound.
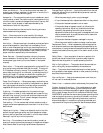
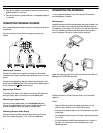
Most speakers have a tweeter dispersion angle of about 60 degrees.
Ideally, your listening position should be just inside the overlap area
of the tweeter dispersion. You can angle the speakers toward you for
better stereo effect.
CONNECTING SPEAKERS
Follow these guidelines when you select and connect speakers.
• Only connect speakers that are rated at between 8 and 16 ohms.
• Be sure you properly connect all speakers.
• Do not connect two pairs of speakers to a single set of terminals
(A or B) at the same time. When you use two pairs of speakers,
connect one pair to the
A SPEAKERS terminals and the other
pair to the
B SPEAKERS terminals.
• RCA and other high-quality speakers have color-coded speaker
terminals (red for positive polarity and black for negative
polarity). Use these color-coded terminals as a guide to help you
properly connect the speakers to the receiver.
Use 16-gauge (or larger) speaker wire for all speaker connections,
and consider possible speaker locations before you decide how much
speaker wire you need.
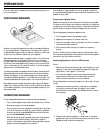
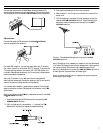
Preparing the Speaker Wires
Speaker wire consists of two conductors (individual wires) encased
in insulation and is usually color-coded or marked with a ridge along
one side so you can identify each conductor. Use these markings as a
guide to help you properly connect the speakers to your receiver.
Follow these steps to prepare the speaker wires.
1. Cut the speaker wires to the necessary length.
2. Separate the wires about 4 inches on each end.
3. Using a wire stripper, carefully strip about 3/4 inch of insulation
from the end of each conductor.
4. Twist the end of each conductor to secure any loose wire
strands.
Caution: Twisting the end of each conductor helps prevent a short
circuit because stray speaker wire strands do not touch other speaker
terminals or any other receiver terminals.
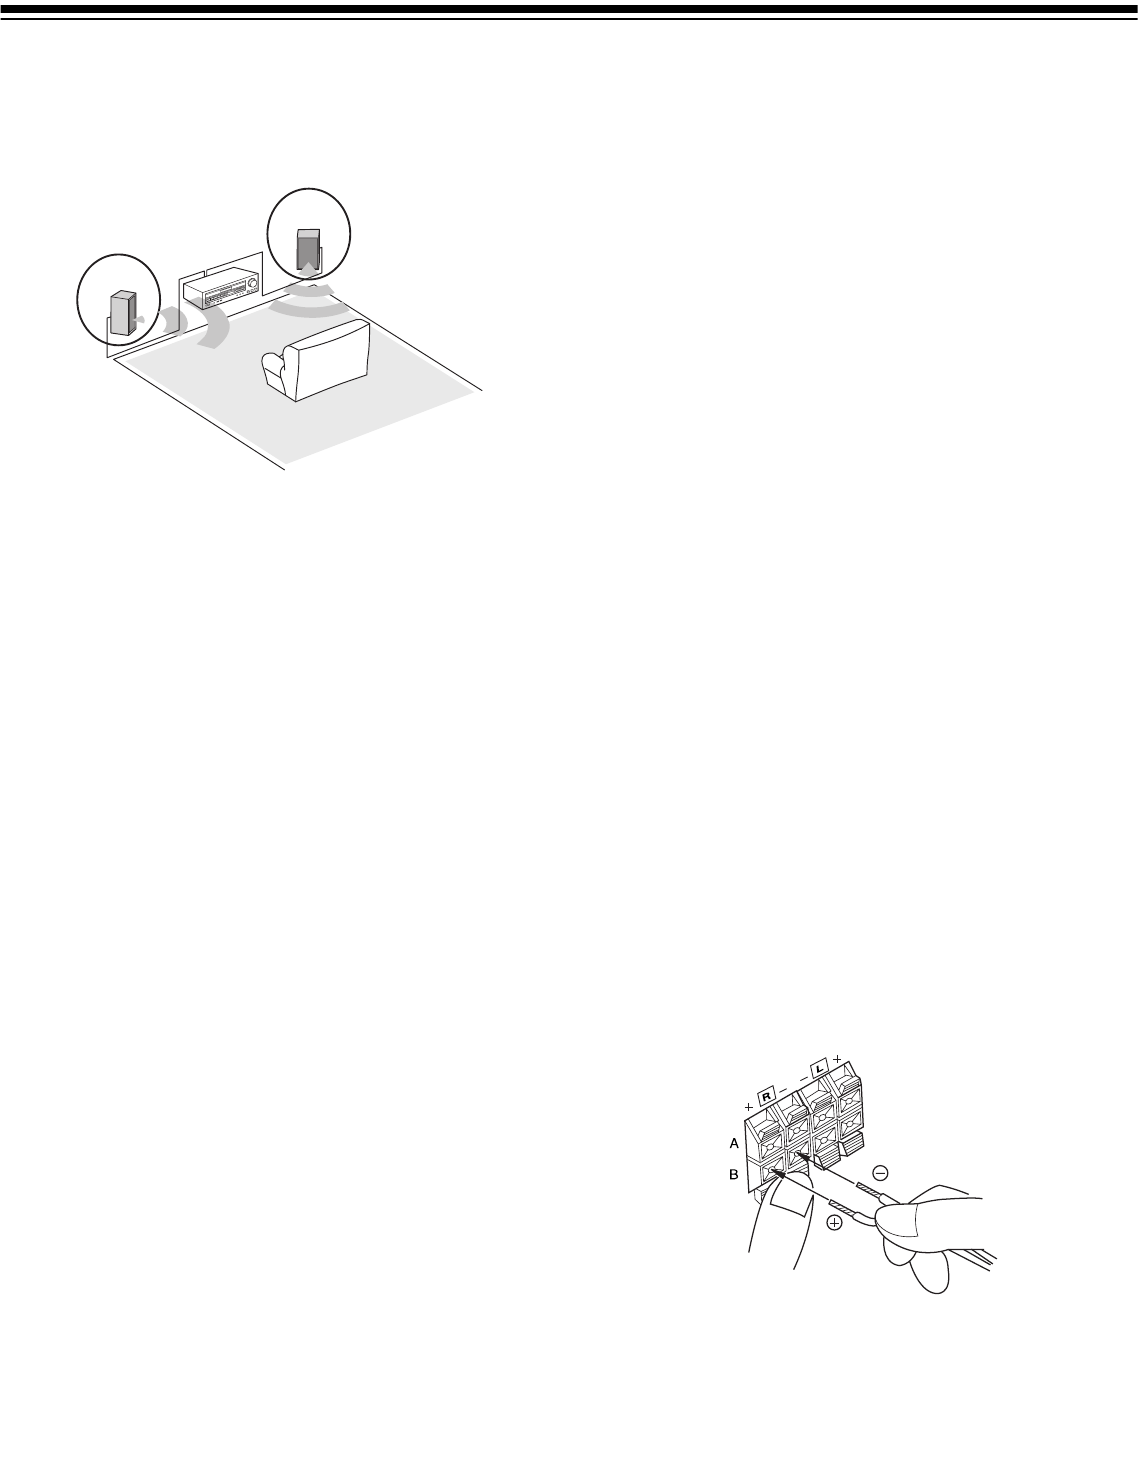
Connecting Speakers to the A and B Terminals
Notes:
• Be sure you connect the receiver’s right and left positive (+) and
negative (–) terminals to the speaker’s corresponding right and
left positive (+) and negative (–) terminals.
• Fully insert the speaker wires to ensure a good connection.
Leave extra wire at the back of the receiver so you do not
disconnect the wires when you move the receiver.
Follow these steps to connect each speaker (A right or left or B right
or left).
1. Press open the receiver’s positive (+) red lever for the speaker
you want to connect and insert the ridged or color-coded
conductor’s end into the small hole. Release the lever to secure
the conductor.
2. Press open the receiver’s negative (–) black lever for the same
speaker and insert the other conductor’s end into the small hole.
Release the lever to secure the conductor.