


8
DUBBING A CASSETTE TAPE
1. Insert a prerecorded cassette tape into
DECK 1
, and a
blank tape for recording into
DECK 2
to dub a tape on one
side.
2. Press
DUBBING
.
The RECORD and DUBBING indicators light, and both
PLAY direction indicators / of
DECK 2
flash.
3. Press
PLAY
or to select the direction of the
cassette tape for
DECK 2
.
The indicators in the selected buttons stop blinking and
the other indicators turn off.
The indicator of
DECK 1
lights.
4. Press the
STOP
button on
DECK 2
to stop dubbing.
Both decks stop.
Note: If the original tape was recorded using Dolby NR, the
copy also has Dolby NR, regardless of the position of the
DOLBY
NR
switch. If the tape you copy does not have Dolby
NR, you cannot add it to the tape you record.
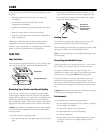
Changing a Cassette Tape in DECK 1 During
Dubbing
If you press
STOP
on
DECK 1
during dubbing,
DECK 1
stops
and
DECK 2
records 4 seconds of blank tape then goes into the
pause mode. During this time, you can change the cassette tape
in
DECK 1
. Press then press the
PLAY
button
of
DECK 1
to resume dubbing.
AUTO DUBBING A CASSETTE TAPE
It is convenient to use this function when dubbing an entire
cassette tape from the beginning.
1. Insert a prerecorded cassette tape into
DECK 1
and a
blank tape for recording into
DECK 2
.
2. Press
AUTO DUB
.
The cassette tapes of
DECK 1
and
DECK 2
rewind
automatically to the beginning after you press
AUTO DUB
.
When rewinding is complete, Auto Dubbing begins.
One side of a cassette tape is recorded from the beginning
to the end automatically regardless of the mode.
HI-SPEED DUBBING A CASSETTE TAPE
1. Insert a prerecorded cassette tape into
DECK 1
and a
blank tape for recording into
DECK 2
.
2. Press
HI-SPEED
.
3. Press
DUBBING
.
4. Press
PLAY
or to select the direction of the
cassette tape for
DECK 2
.
The indicators in the selected buttons stop blinking and
the other indicators turn off.
5. Press
STOP
on
DECK 2
to stop dubbing.
Both decks stop.
RECORD
REC/
PAU SE