


2.1 Wooden Woofer System S21114
INTRODUCTION
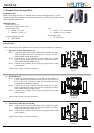
Thank you for using NEUTAC 2.1 Wooden Woofer System. This high-quality 2.1 system
amplified the optimum sound from your Video Game Consoles, CD, DVD/VCD, MP3, PC and
other compatible audio devices.
SPECIFICATION
Model Code: S21114
Normal Power Output (Total): 22W
Speaker Driver Unit:
• Woofer: 3”4Ω10W;
• Satellite: 1”8Ω3W x 4
Frequency Response Range:
• 30Hz-20KHz
Size:
• Woofer 111 x 230 x 185mm
• Satellite 62 x 69 x 168mm
Power Supply Input:
• AC 230V/50Hz
CONNECTION
*Please make sure the system and the devices are Power off before establish any connection.
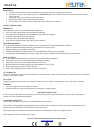
1. Playstation 1 and 2/ XBox/Game Cube
Step 1. Connect the game console to the VIDEO IN and AUDIO IN section,
which is located at the back of the woofer by using the 1To3 RCA
cable provided with the game console.
Step 2. Connect the TV to the VIDEO OUT and AUDIO OUT section,
which is located at the back of the woofer by using the 3To3 RCA
cable attached with the speaker system.
Step 3. Connect the two satellites to the woofer by using the built in cable
on the satellites.
*Please refer to Figure 1 for cable connection
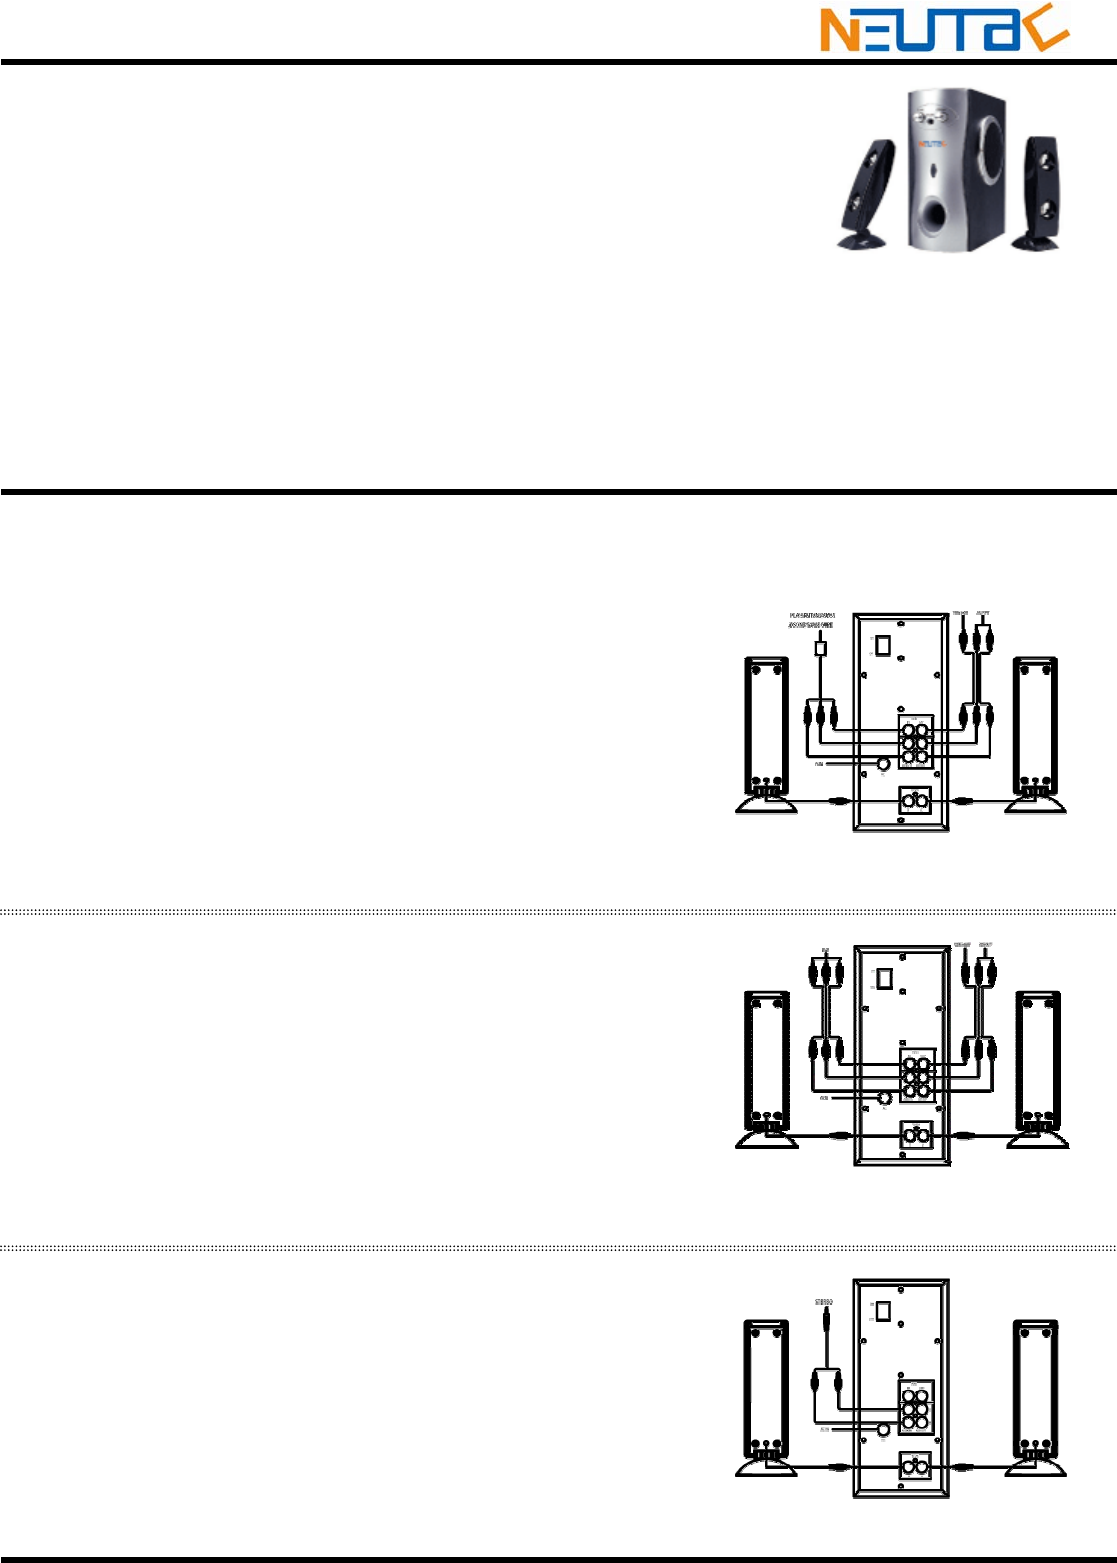
2. DVD/VCD Player
Step 1. Connect the DVD/VCD player to the VIDEO IN and AUDIO IN
section, which is located at the back of the woofer by using the 1To3
RCA / 2To3 RCA / 3To3 RCA cable. This cable may have been
provided with your DVD/VCD player.
Step 2. Connect the TV to the VIDEO OUT and AUDIO OUT section,
which is located at the back of the woofer by using the 3To3 RCA
cable attached with the speaker system.
Step 3. Connect the two satellites to the woofer by using the built in cable
on the satellites.
*Please refer to Figure 2 for cable connection
3. PC/CD Player/MP3 Player/Game Boy
Step 1. Connect the PC/CD Player/MP3 player to the AUDIO IN section,
which is located at the back of the woofer by using the 1To2 RCA
cable attached with the speaker system.
Step 2. Connect the two satellites to the woofer by using the built in cable
on the satellites.
*Please refer to Figure 3 for cable connection
MANUAL
Figure 2
Figure 3
Figure 1