


Loading discs
1. Press SOURCE repeatedly to
select CD mode.
2. Press OPEN/CLOSE or
to
open the drawer.
3. Insert up to fi ve discs with la-
bel face up. (Press DISC SKIP
to rotate the disc carrier.)
4. Press OPEN/CLOSE or
to
close the drawer. Loaded disc
position icon lights.
Selecting discs
Press DISC SKIP to skip discs.
Playing discs
• Press to begin or pause
playback, and
to stop
playback.
• Press
/ to select a
specifi c track.
Searching through a CD
Press and hold / to search
through a CD while it is playing.
Shuffl ing play order
Press SHUFFLE to turn on/off the
playing of tracks in random order.
Sampling tracks
Press INTRO to play the first 10
seconds of each track on the
current disc, all discs in the tray,
or turn INTRO mode off.
Play mode
Press PLAY MODE to cycle
between Repeat 1, Repeat 1 Disc,
Repeat All Discs, 1 Disc, and All
Discs.
• Press INFO
repeatedly to view
elapsed track time,
track remain time and
disc remain time during
playback.
• You may also press PLAY
MODE to select 1 disc or
all discs before activating
INTRO & SHUFFLE functions.
CD Playback CD Playback
-15-
You can program the CD player
to play up to any 32 tracks on the
CDs in the tray.
1. While the CD player is
stopped, press PROGRAM to
enter program mode. The sys-
tem displays the next available
program number: “- - P 01,”
with “- -” flashing, prompts
you for the first track in the
program list.
2. Press
/ to select a track
(Press DISC SKIP to select a
track from a different disc).
3. Immediately press PROGRAM
to assign the selected track to
the program number. You are
prompted for the next track in
the program list. (In CD pro-
gram mode, PROG icon will be
lit.)
Playing a program List
While in PROGRAM mode, press
.
Displaying the program List
1. While the CD player is
stopped, press PROGRAM to
enter PROGRAM mode.
2. Press PROGRAM repeatedly
to list each track assignment
in the program list.
Deleting program List
While in PROGRAM mode, press
and hold
for 3 seconds. The unit
displays the message “CLEAR”.
(dock adapter is not included
with this Audio System)
2. Insert your iPod Dock Adpater
into the dock until it sits firmly
in place.
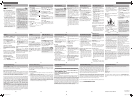
Removing an iPod Dock
Adapter
Remove the iPod Dock Adapter
as illustrated.
Listening to your iPod
Insert your iPod into the con-
nector in the dock.
1. Press
to begin or pause
playback, and STOP/
to stop
playback.
2. Press
/ to select a specifi c
CD Program CD Program
-16-
Compatible iPod Types
• iPod touch (1st generation )
8GB, 16GB, 32GB
• iPod touch (2nd generation )
8GB, 16GB, 32GB
• iPod classic 80GB,120GB,
160GB
• iPod 5th generation (video)
30GB, 60GB, 80GB
• iPod nano 4th generation
(video) 8GB, 16GB
• iPod nano 3rd generation
(video) 4GB, 8GB
• iPod nano (2nd generation)
2GB, 4GB, 8GB
• iPod nano (1st generation)
1GB, 2GB, 4GB
Note: also supports iPhone when
iPhone is set to “airplane mode".
Installing an iPod Dock
Adapter
1. Choose the iPod Dock Adapter
that fits your iPod, we recom-
mend using the adapter that
was supplied with your iPod.
iPod Playback
-17-
iPod Playback
-18-
• Your iPod will
be charged
automatically
(until fully charged) once it
is docked.
• iPod charging function is
inactive when the main unit
is on standby position and
powered off.
• To prevent interference to
AM radio signals, please
switch off the iPod while
listening to AM Radio.
Radio
Press SOURCE or TUNER on the
remote control to select TUNER.
Selecting tuner band
Press AUTO PROG•BAND on the
unit or TUNER on the remote
control to select between AM
and FM radio bands.
Tuning to a station
Press / to select frequencies.
Press and hold to start auto
searching for the next available
station.
Preset and tune modes
The tuner can be in either TUNER
or PRESET mode. When in PRESET
mode, the PROG indicator is on.
Presetting stations
Manually setting presets
1. Press
/ to access the
desired frequency.
2. Press PROGRAM button.
The most recently accessed
program location will be
displayed.
3. If a different program
location is preferred, press
/ to select the desired
preset number (1-32).
4. Press PROGRAM to store the
selected frequency at that
preset.
Auto preset programming (FM
only)
Press and hold AUTO
PROG•BAND for 2 seconds to
scan stations in the FM band. The
stations will then be stored as
preset channels. A maximum of
32 stations can be stored.
Beware of your preset channels
being erased accidentally because
the scanning and storing process
is automatic upon pressing and
holding the button for 2 seconds.
-19-
You can stop the automatic
scan by pressing TUNE+/TUNE-
button, but the erased stations
cannot be recovered.
Using presets
Press PRESET to access the
previous or next preset station.
The display first shows the preset
program number and after a few
seconds, the frequency will be
displayed. (e.g. P 01 is preset 1)
Suppressing stereo signal
Press FM ST. to select between
ST ON and ST OFF for stereo FM
stations.
Radio LINE IN/ AUX
Play external sound
through the speaker
system
Press SOURCE on the unit repeat-
edly to select LINE IN or AUX mode.
Or press LINE IN/AUX on the re-
mote control to change to LINE
IN mode from CD, TUNER or iPod
mode; press LINE IN/AUX again to
change to AUX mode.
Suggest using Ø3.5mm
LINE IN jack for mp3
player and AUX IN jacks
for auxiliary equipment such
as DVD, VCR or PC.
Troubleshooting Tips
System will not turn on
• Check power cord for a secure
connection.
• Unplug the unit for a mo-
ment, and then plug into
power source again.
• Check the outlet by plugging
in another device.
No sound
• Increase the volume setting.
• Check connection to speakers.
•
Check that you have selected
the appropriate function: CD,
TUNER, iPod, LINE IN/AUX.
• Make sure mute is off.
• Make sure headphones are
not plugged in.
Poor radio reception
• Check antenna connection.
• Move antenna.
• Turn off nearby electrical ap-
pliances, such as hair dryer,
vacuum cleaner, microwave,
fl uorescent lights.
CD does not play
• Check that CD is in the tray.
• Check that CD label is facing
up.
• Check that PAUSE mode is not
on.
• Check that CD function is se-
lected.
• Use CD lens cleaner.
• Clean the disc.
• Try another CD.
CD sound skips
• Clean the disc.
• Check disc for warping,
scratches, or other damage.
• Check if something is causing
the system to vibrate. If so,
move the system.
• Make sure the speakers are at
least 3 feet away or on a dif-
ferent surface from the main
unit.
CD button will not respond, or
does not change discs when
you press DISC SKIP
• Switch to another function
(TUNER, iPod, LINE IN/AUX)
and then back to CD.
-20-
-21-
-26-
-22-
-27-
Remote control does not work
• Check that the batteries are
properly installed.
• Replace weak batteries.
• Check the system is plugged
into power source.
• Point the remote directly at
the system’s front panel.
• Move closer to the system.
• Remove any obstacles be-
tween the remote and the
system.
iPod does not respond to the
speaker system
• Remove your iPod from
the dock and check for
obstruction on the connectors
in the dock and on your iPod.
• Make sure that your iPod
is working properly before
docking into the unit. Please
refer to your iPod manual for
details.
Troubleshooting Tips
Additional
Information
Disconnect the audio system from
the power source before per-
forming any maintenance.
Cleaning
Clean the exterior of the system
using a soft dust cloth.
CD Player
CAUTION! This system operates
with a laser. It must be opened
by only a qualified technician.
Handling CDs
• Do not touch the signal sur-
faces. Hold CDs by the edges,
or by one edge and the hole.
Do not affi x labels or adhesive
tapes to the label surfaces. Do
not scratch or damage the la-
bel. CDs rotate at high speeds
inside the player. Do not use
damaged (cracked or warped)
CDs.
Cleaning CDs
• Dirty CDs can cause poor
sound quality. Always keep
CDs clean by wiping them
gently with a soft cloth from
the inner edge toward the
outer perimeter.
•
If a CD becomes dirty, wet a
soft cloth in water, wring it
out well, wipe the dirt away
gently, and then remove any
water drops with a dry cloth.
• Do not use record cleaning
sprays or antistatic agents on
CDs. Also, never clean CDs
with benzene, thinner, or oth-
er volatile solvents which may
cause damage to disc surface.
CD Lens Care
When your CD lens gets dirty it
can also cause the system to out-
put poor sound quality. To clean
the lens you will need to pur-
chase a CD lens cleaner which can
maintain the output sound quali-
ty of your system. For instructions
on cleaning the CD lens, refer to
the ones accompanying the lens
cleaner.
Additional Information
Technical specifi cations
Power supply: 120V~60Hz
Dimensions ( W x D x H inches):
Unit size - 11.0 x 17.3 x 12.0
Main unit weight: 16.06 lbs
CD player: Response curve (+/-
2dB): 60Hz to 15 kHz
Rating Plate: Look for it at the
back of the set.
The descriptions and character-
istics given in this document are
given as a general indication and
not as a guarantee. In order to
provide the highest quality prod-
uct possible, we reserve the right
to make any improvement or
modification without prior notice.
The English version serves as the
final reference on all products
and operational details should
any discrepancies arise in other
languages.
Limited Warranty
-23-
-28-
-24-
-25-
AVC MULTIMEDIA (“AVC”) makes the following limited warranty.
This limited warranty extend to the original consumer purchaser and
is limited to non-commercial use of the product.
One Year Parts & Labor Warranty
AVC products purchased in the United States or Canada are warranted
to be free from defects in materials or workmanship for a period of
one year from the date of their original retail purchase. If the unit fails
to conform to this warranty, we will service the product using new or
refurbished parts and products, at AVC’s sole discretion.
During a period of one year from the effective warranty date, AVC will
provide, when needed, service labor to repair a manufacturing defect at
its designated Service Center. To obtain warranty service in the United
States or Canada, you must fi rst call our Customer Support Center
at 1-877-252-6873, during the hours listed in the box below.
The determination of service will be made by AVC Customer Support.
PLEASE DO NOT RETURN YOUR UNIT TO AVC WITHOUT PRIOR
AUTHORIZATION. New or remanufactured replacements for defective
parts or products will be used for repairs by AVC at its designated Service
Center for one year from the effective warranty date. Such replacement
parts or products are warranted for an additional one year from the
date of repair or replacement. The Customer will be required to ship
the unit to the Service Center indicated at the time Customer Support
is contacted to make the necessary repairs. The customer is responsible
for all transportation charges to the service facility.
Packaging and Shipping Instruction
When you send the product to the AVC service facility you must use
the original carton box and packing material or an equivalent as des-
ignated by AVC.
Your Responsibility
(1) You must retain the original sale receipt to provide proof of
purchase.
(2) These warranties are effective only if the product is purchased and
operated in the United States or Canada.
(3) Warranties extend only to defects in material or workmanship, and do
not extend to any product or parts which have been lost or discarded,
or damage to product or parts caused by misuse, accident, improper
operation or maintenance, or use in violation of instructions provided
with the product, or to product which has been altered or modifi ed
without authorization of AVC, or to products or parts thereof which
have had the serial number removed or changed.
Limited Warranty
Limited Warranty Limited Warranty Limited Warranty
Out of Warranty
In the event your product requires repair after the
limited warranty period has expired, please contact our
Customer Support Center at
1-877-252-6873 or
www.RCAav.com
Hours: Monday–Thursday: 9am–7pm, Friday: 9am–5pm,
Saturday: 9am–NOON Eastern time.
Important:
You are responsible for any transportation, shipping or insurance
relative to the return of product to our Product Returns Center.
All warranties implied by state law, including the implied warranties
of merchantability and fi tness for a particular purpose, are expressly
limited to the duration of the limited warranties set forth above. With
the exception of any warranties implied by state law as hereby limited,
the foregoing warranty is exclusive and in lieu of all other warranties,
guarantees, agreements and similar obligations of manufacturer or
seller with respect to the repair or replacement of any parts. In no event
shall AVC be liable for consequential or incidental damages.
No person, agent, distributor, dealer or company is authorized to
change, modify or extend the terms of these warranties in any manner
whatsoever. The time within action must be commenced to enforce
any obligation of AVC arising under the warranty or under any statute,
or law of the United States or Canada or any state thereof, is hereby
limited to one year from the date of purchase. This limitation does not
apply to implied warranties arising under state law.
This warranty gives you specifi c legal rights and you may also have other
rights, which may vary, from state to state. Some states do not allow
limitation on how long an implied warranty lasts, when an action may
be brought, or the exclusion or limitation of incidental or consequential
damages, so the above provisions may not apply to you.
For more information on other products and services, please visit our
web site at
www.RCAav.com
Important: Also keep your “Bill of Sale” as proof of purchase.
Model no. ...........................................................................................................
Product name .....................................................................................................
Type of set. .........................................................................................................
Serial no. .............................................................................................................
Invoice no. ..........................................................................................................
Date purchased ..................................................................................................
Dealer name .......................................................................................................
FOR SUPPORT, SERVICE AND REPAIR, PLEASE VISIT
www.RCAav.com
Specifi cations and external appearance are subject to change without
notice.
© 2009 AVC MULTIMEDIA
This unit is compatible
with CD-RW/ CD-R discs
for playback.
Notes on CD-R/RW Disc:
• Do not affi x any type of labels
to either side (recordable or
labeled side) of a CD-R/RW
disc as this may result in the
unit malfunctioning.
• To avoid damages to the
CD-R/RW disc, do not open
the disc compartment door
while the disc is being read.
• Do not load an unrecorded
CD-R/RW disc into the unit.
This may take a longer time
to read the disc.
• Playback capability for CD-
RW discs may vary due to
variations in the quality of the
CD-RW disc and the recorder
used to create the disc.
CD Playback
CD-R / RW
Please take care
when loading or
unloading discs in
the disc drawer. Read below
for details.
• Remove all discs from the
disc drawer before moving
or transporting the unit.
• Do not put discs in the
trays of the disc drawer
when they are still moving.
• Do not push or force the
rotation of the disc trays.
Always use the DISC SKIP
button.
• Do not put discs in any
unexposed disc trays.
Only put disc in tray
that is fully exposed.
• If an error occurs and the
disc drawer does not close,
empty all disc trays and try
again.
track. (You may also use the
control wheel and keys on
your iPod to operate it.)
3. Press and hold
/ to search
through a track while it is play-
ing.
4. Press MENU to display iPod
menu, press again to return to
previous menu.
5. Press
PRESET on the
remote control to navigate
iPod menu lists.
6. Press SELECT to pick item in
iPod menu list.
811-278691W010
Printed in China
RS2769iS English IB.indd 2RS2769iS English IB.indd 2 12/8/2009 3:45:31 PM12/8/2009 3:45:31 PM