4
INSTALLATION
Before installing the SF-1, disconnect the amplifier’s power cable from the AC mains.
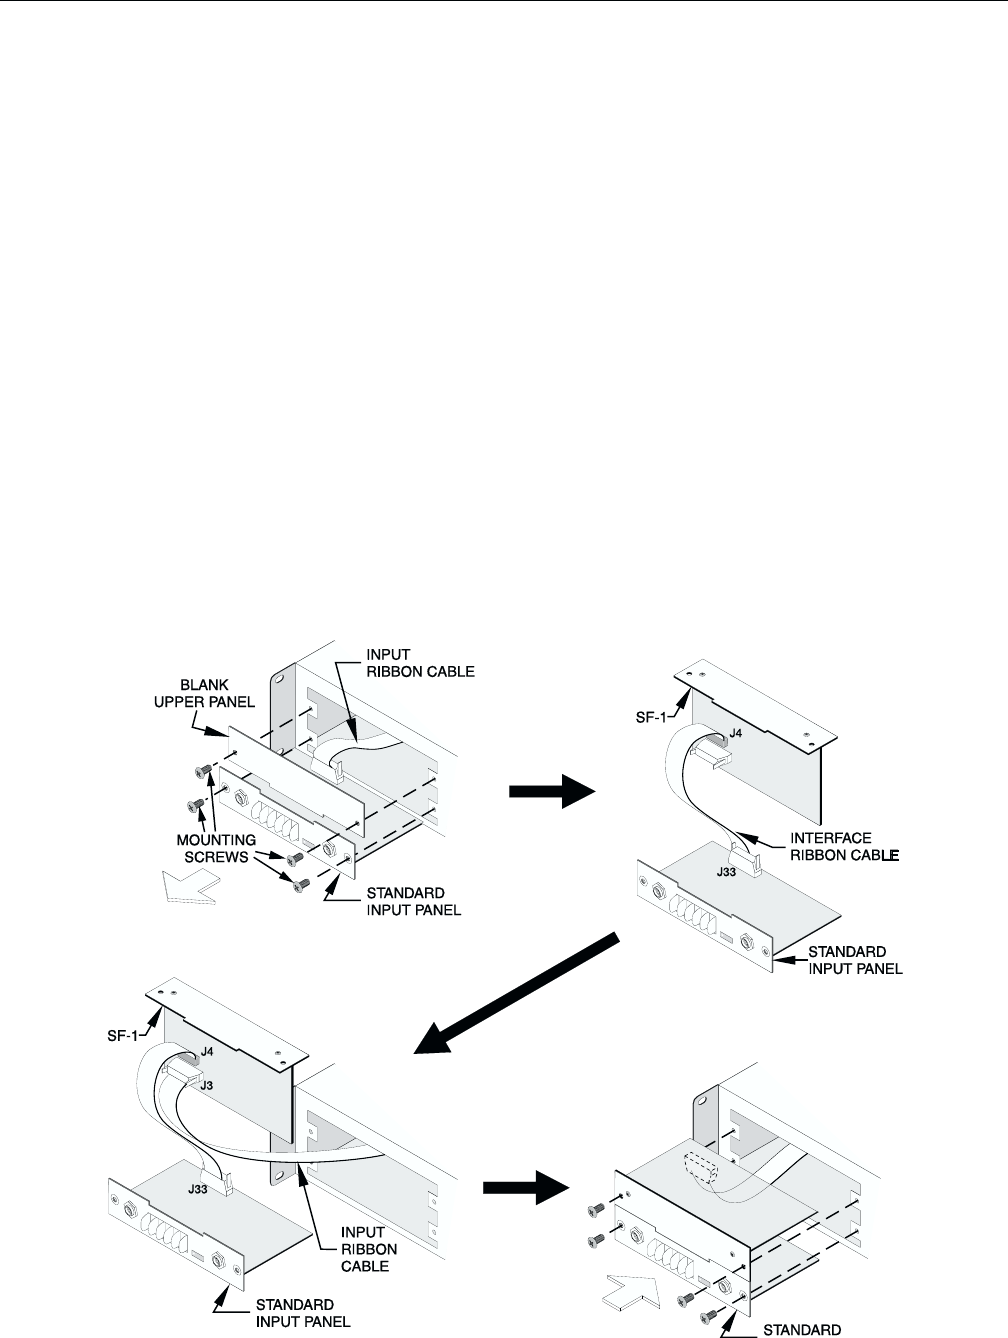
1. Position the amplifier so that the rear panel is facing you. Locate the input panel and the blank
accessory panel above it.
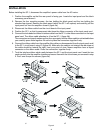
2. Remove the four mounting screws—the two holding the blank panel and the two holding the
standard input panel. Remove the blank panel (which the SF-1 will replace) and carefully pull the
input panel out from the amplifier chassis
(figure 2a)
.
3. Disconnect the ribbon cable from the circuit board of the input panel.
4. Position the SF-1 so that its component side faces the ribbon connector of the input panel card.
5. Connect the included short ribbon interface cable from the SF-1 to the ribbon connector on the input
panel card. The ribbon cable attaches to J4 on the SF-1
(figure 2b)
.
The connectors are keyed; make sure they line up properly and the ribbon cable is not twisted before
you carefully press them together. Be sure to press the connectors together firmly.
6. Connect the ribbon cable from the amplifier (the cable you disconnected from the input panel card)
to the SF-1 circuit board, using J3
(figure 2c)
. Make sure the cable is not twisted; the red stripe on
the cable should be toward the right, from your point of view. Newer amplifiers have a keyed
connector on the ribbon cable. Press the connectors together firmly.
7. Tuck the interface ribbon cable neatly between the SF-1 and the input panel card. Insert the two
cards carefully into the amplifier chassis and secure them with the four screws you removed in step
2. Don’t over-torque the screws
(figure 2d)
.
Figure 2
a
b
c
d


