


Use the Secondary Support Tab!
Loudspeakers can potentially generate substantial vibra-
tion. In addition to ensuring all hardware is properly
installed and secured, you must use the secondary support
tab on the enclosure to secure the loudspeaker to an appro-
priate structural support. This will minimize the chance of
the loudspeaker falling from the ceiling in the event the pri-
mary mount fails. Any cable or wire used as a secondary
support line must be strong enough to support several times
the weight of the loudspeaker. Do not use rope, string,
twine or other textile-based line in the secondary support
system as it is easily cut or burned. The secondary support
attachment point and any fasteners used on the building’s
structure must also be strong enough to support several
times the weight of the loudspeaker.
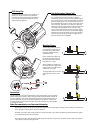
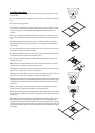
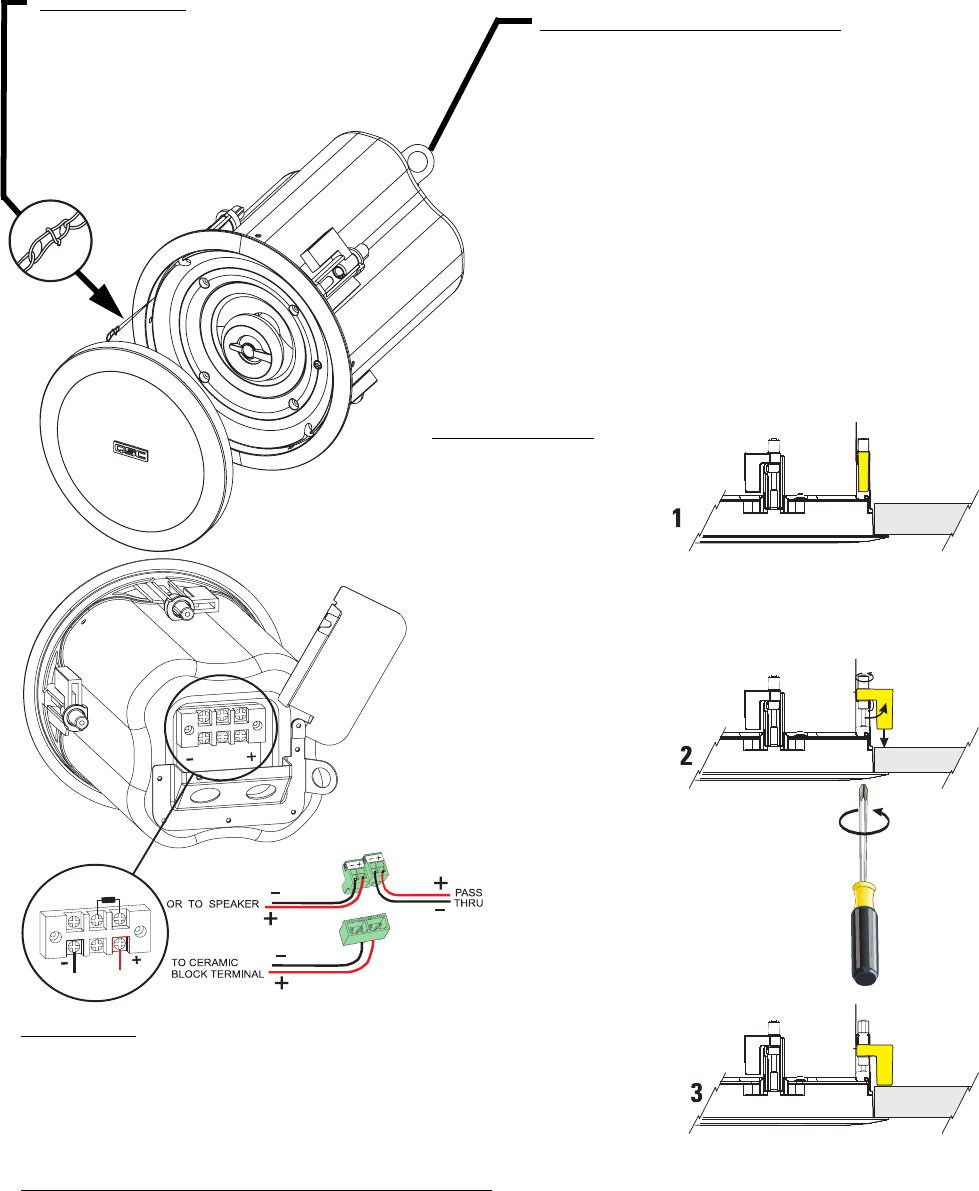
Mounting Clamps
The mounting clamps are part of
the assembly for simple use. Do
not install the grill until clamps
have been tightened and any
adjustments made.
Before inserting the cabinet into
the mounting cutout, make sure
the clamps are folded in against
the cabinet, see 1, right.
After the cabinet is installed into
the mounting cutout, tighten each
clamp’s screw using a #2 Phillips
screwdriver, see 2, right.
The clamp rotates 90° and is then
pulled tight by the screw, see 3,
right.
Grill Safety Clip
The cabinet and the grill both have a small loop of
plastic line. The grill’s loop has a clip attached.
Using the grill clip, attach the grill to the cabinet’s
loop. This will help prevent the grill from falling
should it become detached.
Other Recommendations and Important Information
•Grill removal: The grill can be removed by carefully prying around its outer edge or inserting a small, metal pin or hook into the
grill’s openings and pulling evenly around its perimeter.
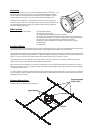
•If rattles or buzzing is heard during operation, it may be necessary to put vibration dampening material between the support
rails and the ceiling tiles and/or t-channels.
•The support rails have holes along their usable length to attach the C-ring bracket. This allows for the cutout to be placed in
many positions along the ceiling tile width.
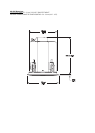
Connections
Connect signal wires to ceramic terminal block noting correct polarity or to the supplied
plastic terminal block assembly. When using the plastic terminal assembly connect the
four pin receptacle to the ceramic block observing polarity. Connect the signal wires to
the screw terminals of one of two pin plugs observing correct polarity. The other two
pin plugs can then be used as pass through to daisy chain the signal to another speaker
or it can be left unused.