


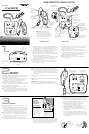
REMOTE
CHARGE
SPARE
CHARGE
BASE
POWER
TALK
TALK
VOLUME
BASE UNITREMOTE UNIT
Quick Disconnect™
for Headset
Listen
(Receiving)
Fine-Adjust
Volume Control
Remote
On-Off Button
and
Indicator
Push-to-
Talk
Button
Selector for
Momentary-or-
Locking PTT
Function
Battery
Pack
Battery-Charging
Contacts
Talk (Sending)
Fine-Adjust
Volume
Controls
PTT Indicator
(Green)
Remote Unit
Battery Charging
Indicator (Orange)
Spare
Battery Pack
Charging
Indicator
(Orange)
Base Unit
Power Indicator
(Green)
Charging Well for
Remote Unit
Charging Well for
Spare Battery Pack
Console
Interface Cable
AC Adapter
BOTTOM VIEW
OF BASE UNIT
1.5, 2.1,
2.3, 2.4
Talk (Sending)
Coarse-Adjust
Volume Control
Note: The factory
settings provide a
carbon-microphone
output level.
Listen (Receiving)
Coarse-Adjust
Volume Control
1
Setup
2
Battery Charging
& Management
3
Operation
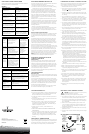
Charging Well for
Remote Unit
Charging Well for
Spare Battery Pack
REMOTE
CHARGE
SPARE
CHARGE
BASE
POWER
TALK
TALK
VOLUME
Push-to-Talk Headset Amplifier
Note: When the Battery Pack is
installed or changed, the On-Off
Indicator will begin to flash as soon
as the unit is ready for use. This may
require about 45 seconds while the
Remote Unit determines and selects
the most reliable radio channel.
1.1 Operating other devices in the same frequency band as the
CA12CD will reduce user density and range. In North America,
the CA12CD operates in the UPCS frequency band (1.92 to
1.93 GHz). In other regions, the CA12CD operates in the DECT
frequency band (1.88 to 1.90 GHz). Various versions of the
CA12CD are available for use in specific countries.
1.2 User density and range can vary widely due to such variables
as building layout and whether other devices are operating in
the same frequency band as the CA12CD.
In low-density installations (e.g., 5 units placed 10 feet apart),
the range can be greater than 100 feet. In high-density
installations (e.g., 30 units placed 18 inches apart), the range
could decrease to 10 feet.
1.3 Plug the modular connector on the Console Interface Cable
into the modular jack on the back of the Base Unit. Plug the
other end into your console.
1.4 Plug the AC Adapter into the wall outlet, and plug the round
power connector into the back of the Base Unit. The Base
Power Indicator will illuminate.
1.5 Slide the Battery Pack onto the Remote Unit. When the
Battery Pack is installed or changed, the On-Off Indicator will
begin to flash slowly as soon as the unit is ready for use. This
may require about 45 seconds while the Remote Unit
determines and selects the most reliable radio channel.
1.6 Attach a headset to the Remote Unit.
1.7 Place CA12CDs at least 12 inches away from CRT-type
computer monitors.
2.1 To attach the Battery Pack to the Remote Unit, simply slide
the Battery Pack onto the Remote Unit and snap it into
place. Do not force them together.
2.2 The Base Unit is equipped with two battery-charging wells.
The larger well allows charging of the battery while it is
attached to the Remote Unit. The smaller well allows
charging of a spare Battery Pack all by itself.
2.3 Insert the Remote Unit and the spare Battery Pack into their
respective charging wells. The Charging Indicators will flash
while the Battery Packs are charging.
2.4 When a Battery Pack is charged, its Charging Indicator will
stop blinking and glow steadily.
2.5 The On-Off Indicator on the Remote Unit will begin to flash
as soon as the unit is ready for use. This may require about
45 seconds while the Remote Unit determines and selects
the most reliable radio channel.
2.6 A fully charged Battery Pack will last for up to eight hours.
2.7 To maximize the life of the Battery Pack, turn the Remote Unit
off and place it into the charging well when not in use. Prior to
being used, Battery Packs must be charged for at least one
hour or until the Charging Indicator changes from blinking to
continuously on.
2.8 A completely depleted battery requires three hours to fully
charge.
Note: Always release (disengage) the PTT Button before swapping
Battery Packs.
Warning: Touching the battery-charging contacts or placing
objects other than the Battery Packs and Remote Unit in the
charging wells may adversely affect the operation of the CA12CD.
REMOTE
CHARGE
SPARE
CHARGE
BASE
POWER
TALK
TALK
VOLUME
USER GUIDE
Model CA12CD
. . . . . . . . . . . . . . . . . . . . . . . . . . . . . . . . . . . . . . . . . . . . . . . . . . . . . . . . . . . .
COMPONENTS OF MODEL CA12CD
Plug in Console
Interface Cable
here
Plug in
AC Adapter
here
BACK VIEW OF BASE UNIT
1.3, 1.4
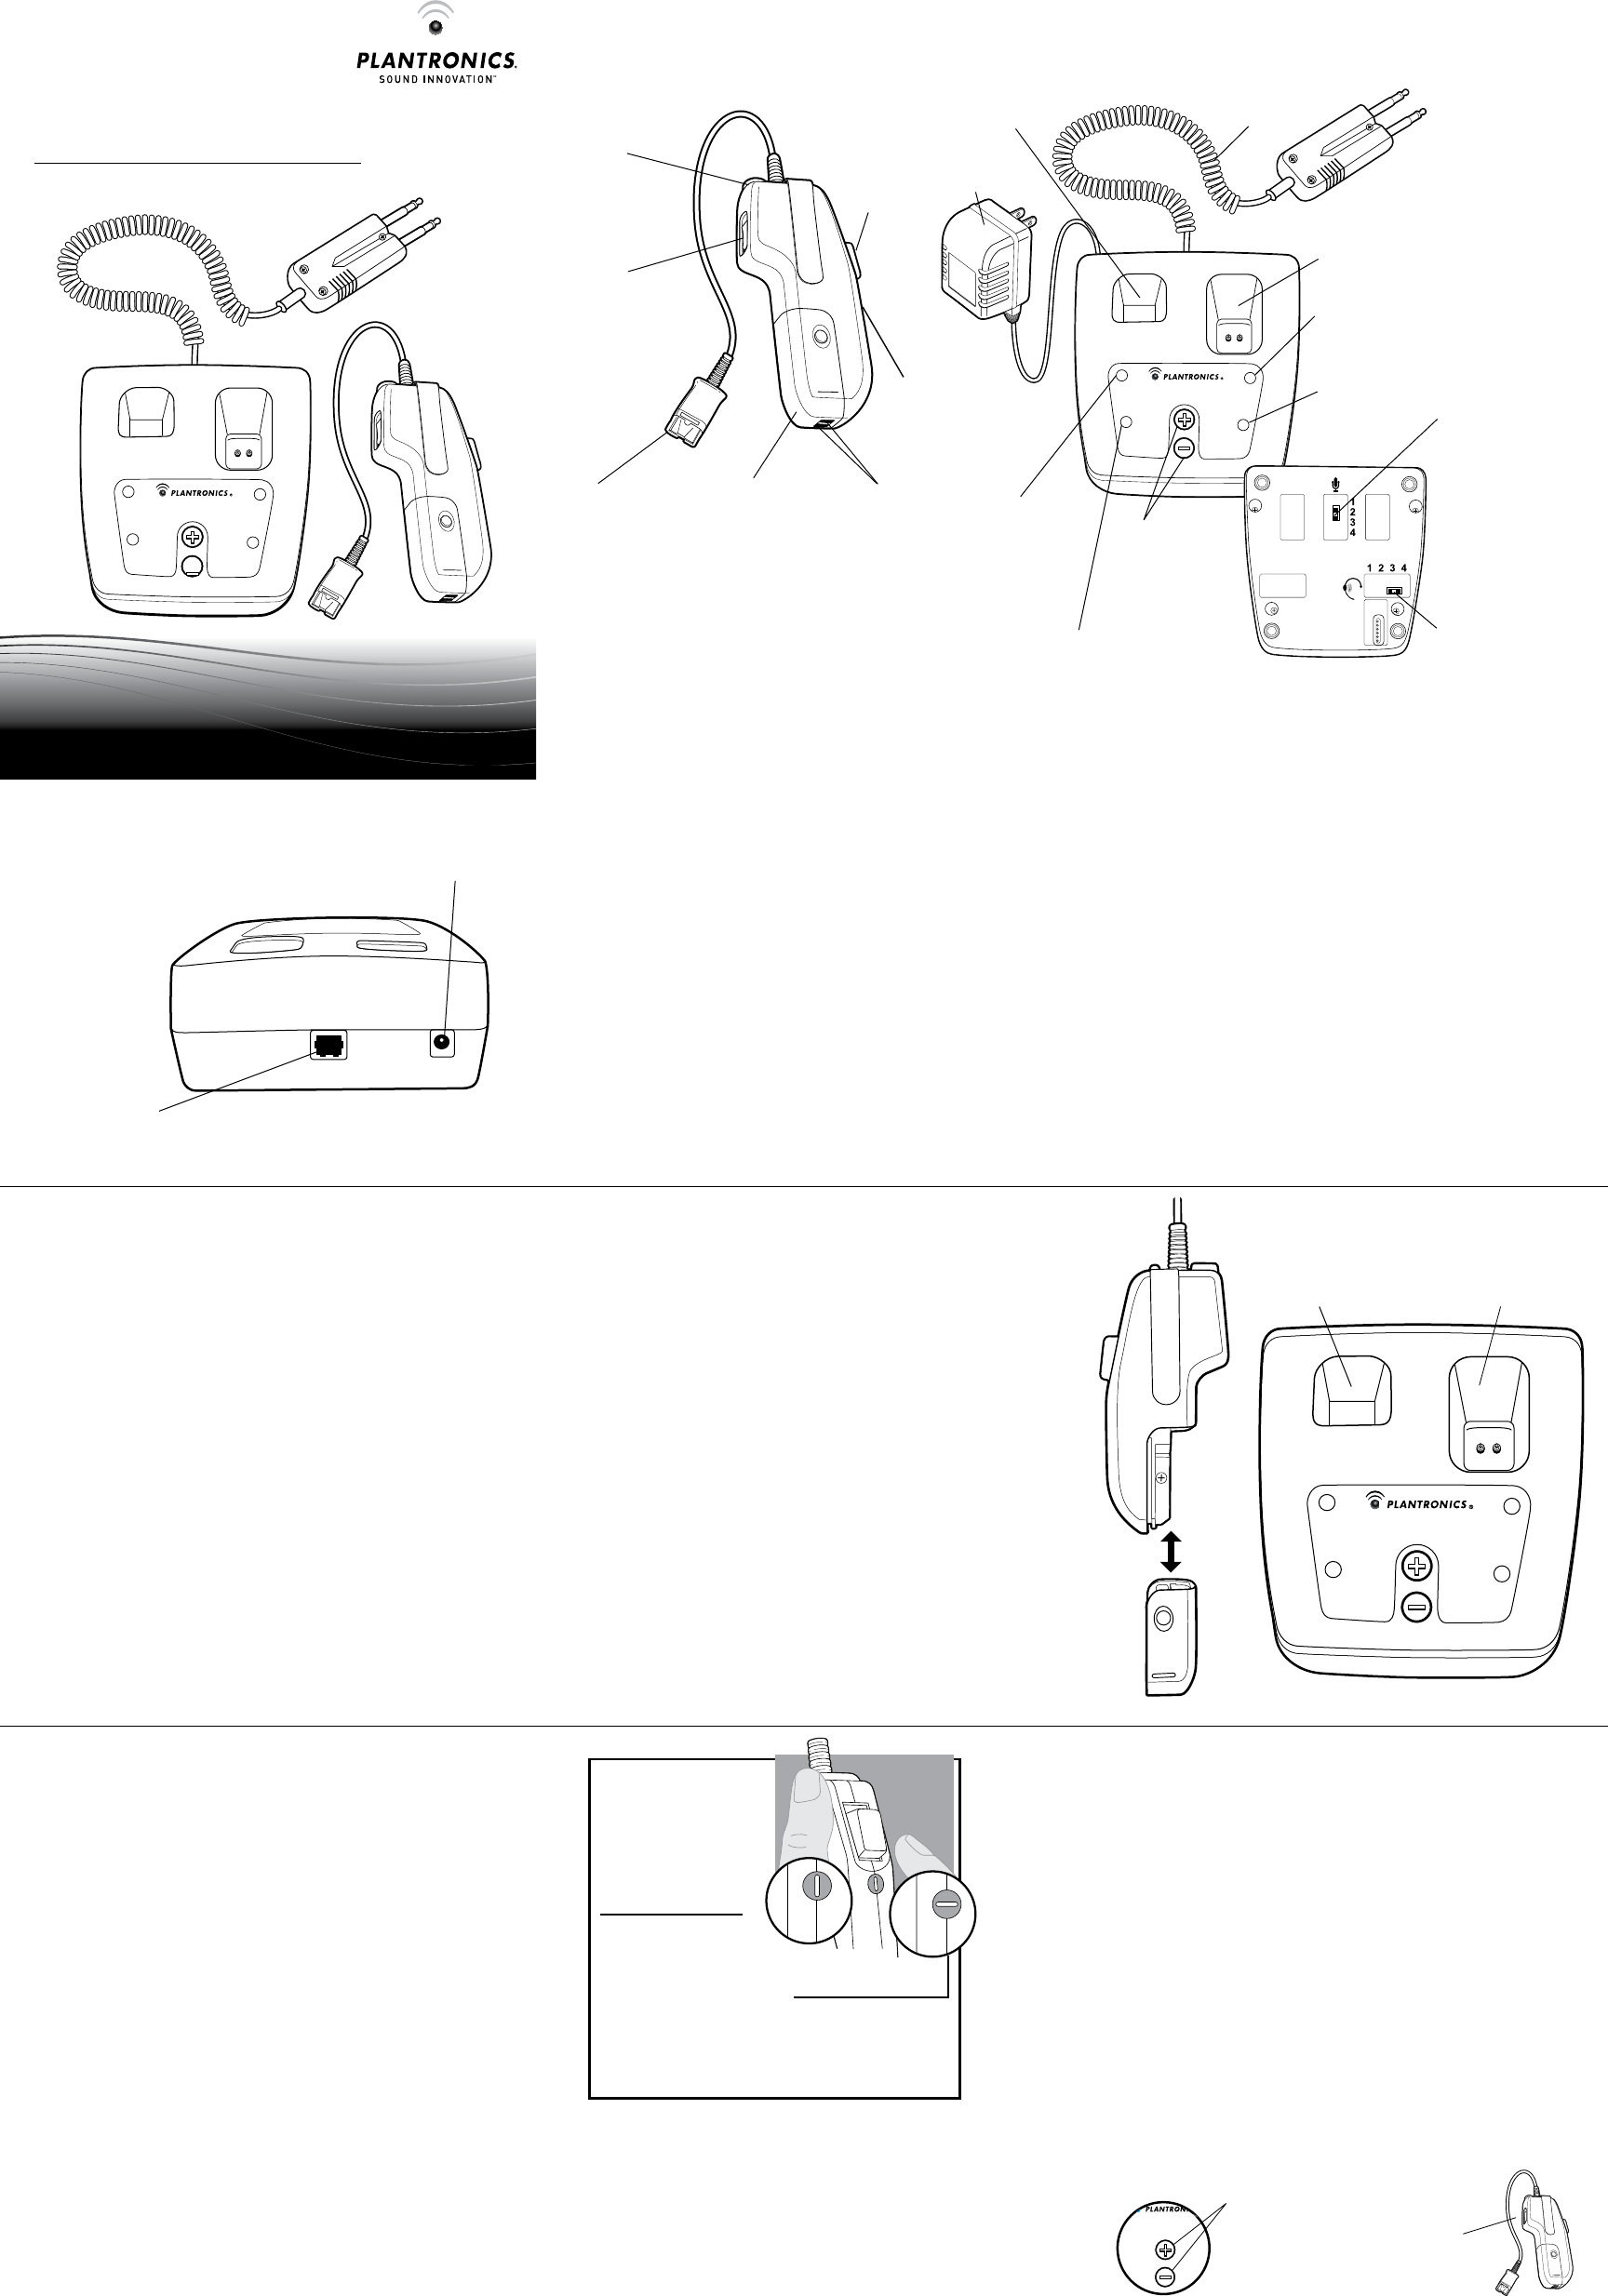
Nonlockable Position
Lockable Position
3.4
Turn the selector
horizontally. The Push-
to-Talk Button can be
depressed momentarily
when you wish to speak.
Note that the selector
slot is aligned vertically.
The Push-to-Talk Button
can be depressed
momentarily or locked
in the ON position by
first depressing then
sliding the button until
it locks.
How to select
the lockable
or nonlockable
switch position
3.1 To maximize user density, always turn the Remote Unit off
when not in use.
3.2 Press the On-Off Button located on top of the Remote Unit.
The green On-Off Indicator will begin to flash. If the battery
has just been installed, the Remote Unit will automatically
turn on and the On-Off Indicator will begin to flash. This
may require about 45 seconds. (Reference Section 1.5)
3.3 Depressing the Push-To-Talk (PTT) Button on the Remote
Unit will generate the “key” signal to your console or radio.
While the PTT Button is depressed, the green Talk Indicator
on the Base Unit will illuminate.
3.4 The operation of the PTT Button can be adjusted with a
screwdriver to be either lockable or non-lockable as shown.
3.5 To get the best audio performance from your CA12CD, please
use the guidelines on the separate card, Setting Model CA12CD
Audio Levels. Properly-adjusted audio levels are especially
important for avoiding sidetone echo, as well as for being able
to hear your callers and be heard clearly by them.
3.6 The Base Unit and the Remote Unit are paired with each other
at the factory in a process called subscription. If you replace
your Remote Unit, or if your Remote Unit loses its subscrip-
tion (shown by a rapidly flashing On-Off Indicator), you can
perform the subscription process as follows:
• Hold both of the Talk (Sending) Fine-Adjust Volume
Controls on the top of the Base Unit down.
• The Base Power Indicator will begin blinking.
• Hold the Remote Unit’s Listen (Receiving) Fine-Adjust
Volume Control in either the up or down position.
• The Remote Unit’s On-Off Indicator will turn on steadily
(no flashing).
• The Remote Unit will subscribe to the Base Unit, after
which the Base Power Indicator will return to the steadily
on state. The Remote Unit’s On-Off Indicator will go out for
a few seconds and then begin to flash slowly. Your CA12CD
is now ready to use.
Talk (Sending)
Fine-Adjust
Volume Controls
E
ER
TALK
VOLUME
Listen (Receiving)
Fine-Adjust
Volume Control