


Basic playback
20
En
03
03
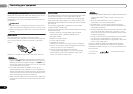
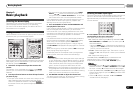
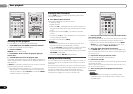
Searching for RDS programs
You can search for a program type listed above.
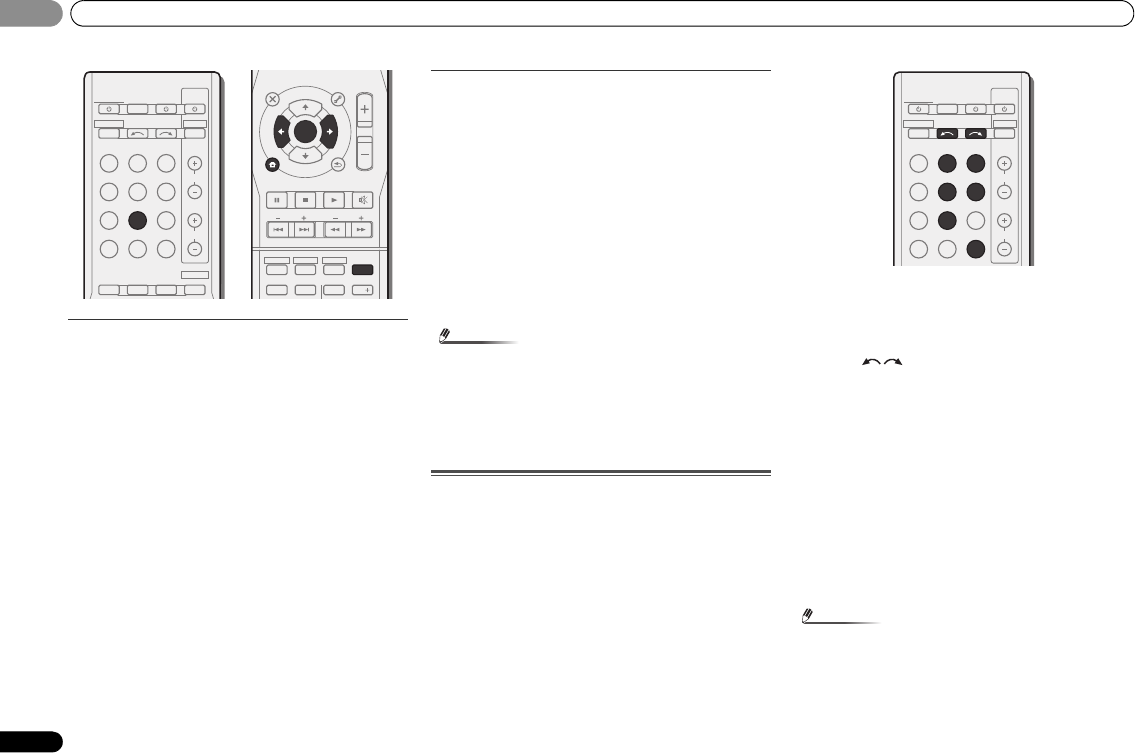
1 Press TUNER then press BAND to select the FM band.
• RDS is only possible in the FM band.
2 Press PTY SEARCH.
SEARCH shows in the display.
3 Press PRESET
/
to select the program type you
want to hear.
4 Press ENTER to search for the program type.
The system starts searching through the station presets for a
match, stopping when it was found one. Repeat to search for
other stations.
If NO PTY is displayed it means the tuner couldn’t find that
program type at the time of the search.
• RDS searches station presets only. If no stations have
been preset, or if the program type could not be found
among the station presets NO PTY is displayed. FINISH
means the search is complete.
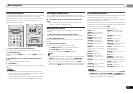
Displaying RDS information
Use the DISP button to display the different types of RDS
information available.
Press DISP for RDS information.
Each press changes the display as follows:
• Listening mode
•Master volume
• Radio Text (RT) – Messages sent by the radio station. For
example, a talk radio station may provide a phone number
as RT.
• Program Service Name (PS) – The name of the radio
station.
•Program Type (PTY) – This indicates the kind of program
currently being broadcast.
• Current tuner frequency (FREQ)
Note
• If any noise is picked up while displaying the RT scroll,
some characters may be displayed incorrectly.
• If you see NO TEXT in the RT display, it means no RT data
is sent from the broadcast station. The display will
automatically switch to the PS data display (if no PS data,
NO NAME is displayed).
• In the PTY display, NO PTY may be shown.
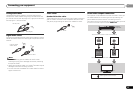
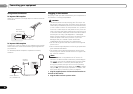
Making an audio recording
You can make an audio recording from the built-in tuner, or
from an audio source connected to the receiver (such as a
CD player).
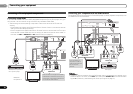
Only audio signals that were input to this receiver through a
analog audio inputs can be recorded. Signals that were input
through an HDMI cable or digital audio cable (optical /
coaxial) cannot be recorded (see Connecting other audio
components on page 15 for more on connections).
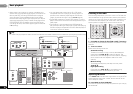
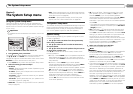
1 Press input function buttons to select the input function
you want to record.
The input of the receiver will switch over, and you will be able
to operate other components using the remote control.
• The input source can also be selected by using INPUT
SELECT buttons on the remote control, or by
using the front panel INPUT SELECTOR dial.
2 Select the audio input signal (if necessary).
Press SIGNAL SEL and select the analog inputs (A) for the
source component of which you want to record (see page 17
for more on this).
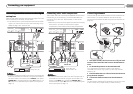
3 Prepare the source you want to record.
Tune to the radio station, load the CD etc.
4 Prepare the recorder.
Insert a blank tape, MD etc. into the recording device and set
the recording levels.
Refer to the instructions that came with the recorder if you
are unsure how to do this.
5 Start recording, then start playback of the source
component.
Note
• The receiver’s volume, balance, tone (bass, treble,
loudness), and surround effects have no effect on the
recorded signal.
INPUT SELECT
SOURCESLEEP
TV
CONTROL
INPUT
RECEIVER
ADV SURR
CH
VOL
RECEIVER
BD MENU
BD DVD TV
DVR/BDR
CD
CD-R
ADAPTER
TUNER
PORTABLE
PHASE
SIGNAL SELS.RETRIEVER
DTV/TV
1
4
ENTER
2
5
SB CH
DISP
3
6
CH
CH SELECT
MUTE
RETURN
AUDIO
PARAMETER
TUNER EDIT
TOOLS
MASTER
VOLUME
BAND
MENU
TRE
BASS
TOP
MENU
T
U
N
E
T
U
N
E
P
R
E
S
E
T
P
R
E
S
E
T
HDD DVD VCR
TEST TONE
HOME
MENU
SETUP
PTY SEARCH
AUTO/
DIRECT
ALC/
STANDARD
STEREO
INPUT SELECT
SOURCESLEEP
TV
CONTROL
INPUT
RECEIVER
CH
VOL
RECEIVER
BD DVD TV
DVR/BDR
CD
CD-R
ADAPTER
TUNER
PORTABLE
PHASE
SIGNAL SELS.RETRIEVER
DTV/TV