


4 Press EASY JOG/ENTER or ENTER on the remote control to
confirm.
➜ The display will ask you to reconfirm your selection.
5 Press EASY JOG/ENTER or ENTER on the remote control to
reconfirm.
6 Press STORE/MENU to return to the submenu or STOP 9 to
exit.
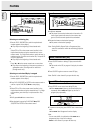
Text Memory Review/Erase Text Memory
1 Select the MEMORY VIEW submenu.
➜ MEMORY VIEW appears on the display.
2 Press EASY JOG/ENTER or ENTER on the remote control to
confirm.
3 Select the disc you wish to erase.
4 Press EASY JOG/ENTER or ENTER on the remote control to
confirm.
➜ ERASE MEMORY appears on the display.
5 Press EASY JOG/ENTER or ENTER on the remote control to
reconfirm.
6 Press the EASY JOG/ENTER key or ENTER on the remote
control to confirm the erasure of the text for that particular
disc.
7 Press STORE/MENU to return to the submenu or STOP 9 to
exit.
Note:
- If there are no discs in the memory, the message MEMORY
EMPTY appears on the display.
- When the text memory of your CDRecorder is full, the
message MEMORY FULL will appear, followed by
FINALIZE CD. If you want to add a CD to the list of
discs for which text is stored, you have to erase a disc from
this list or finalize another disc. (“for which text is stored”)
- MEMORY FULL/FINALIZE CD may also appear when
unfinalizing a CDRW disc for which text was stored (see
‘Unfinalizing CDRW discs’). The same action(s) should be
taken in order to obtain memory space.
Auto track increment
1 Select the AUTO TRACKING sub menu.
➜ AUTO TRACK appears on the display.
2 Press EASY JOG/ENTER or ENTER on the remote control to
confirm.
3 Select Auto track ON or OFF.
4 Press EASY JOG/ENTER or ENTER on the remote control to
confirm.
➜ ON or OFF appears for 2 seconds on the display.
•When ON is selected, track numbers will be automatically
incremented during recording.
•When OFF is selected, you can number the recorded tracks
yourself.
5 Press STORE/MENU to store settings and return to the
submenu or STOP 9 to exit.
Balance (Only active in Record/Standby mode)
1 Select the SET BALANCE submenu.
➜ SET BALANCE appears on the display.
2 Press EASY JOG/ENTER or ENTER on the remote control to
confirm.
➜ FE and L-128 R-128 appear on the display.
3 Adjust the internal and external recording balance by
turning the EASY JOG/ENTER key.
•Turn left: the figure left (F) counts up, right counts down.
•Turn right: the figure right (E) counts up, left counts
down.
4 Press EASY JOG/ENTER or ENTER on the remote control to
confirm.
5 Press STORE/MENU to store settings.
Note: The balance setting will not be stored.
REM
TRACK
REC
TIME
DIGITAL
OPTICAL
ANALOG
PROG
SHUFFLE
REPEAT
SCAN
I
I
CD
RW
CHANGER
SYNC MANUAL
RECORD
REMTOTAL
ALL
TRACK
TIME STEPTRACK
CD
RW
REM
TRACK
REC
TIME
DIGITAL
OPTICAL
ANALOG
PROG
SHUFFLE
REPEAT
SCAN
I
I
CD
RW
CHANGER
SYNC MANUAL
RECORD
REMTOTAL
ALL
TRACK
TIME STEPTRACK
CD
RW
123456789
10 11
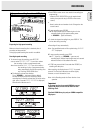
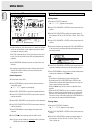
Recording settings
REM
TRACK
REC
TIME
DIGITAL
OPTICAL
ANALOG
PROG
SHUFFLE
REPEAT
SCAN
I
I
CD
RW
CHANGER
SYNC MANUAL
RECORD
REMTOTAL
ALL
TRACK
TIME STEPTRACK
CD
RW
123456789
10 11
REM
TRACK
REC
TIME
DIGITAL
OPTICAL
ANALOG
PROG
SHUFFLE
REPEAT
SCAN
I
I
CD
RW
CHANGER
SYNC MANUAL
RECORD
REMTOTAL
ALL
TRACK
TIME STEPTRACK
CD
RW
123456789
10 11
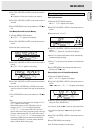
MENU MODE
English
27