


Pelco Manual C1978M (11/01) 3
DESCRIPTION
The NET101RK lets you mount several PelcoNet
™
systems in one location. The 19-inch
rack mount kit has the following features:
• Installation of up to eight PelcoNet systems
• Simple integration of PelcoNet systems into existing 19-inch racks
• Central plug-in power supply for all PelcoNet systems
• Installation of PelcoNet transmitters and receivers in one rack mount kit
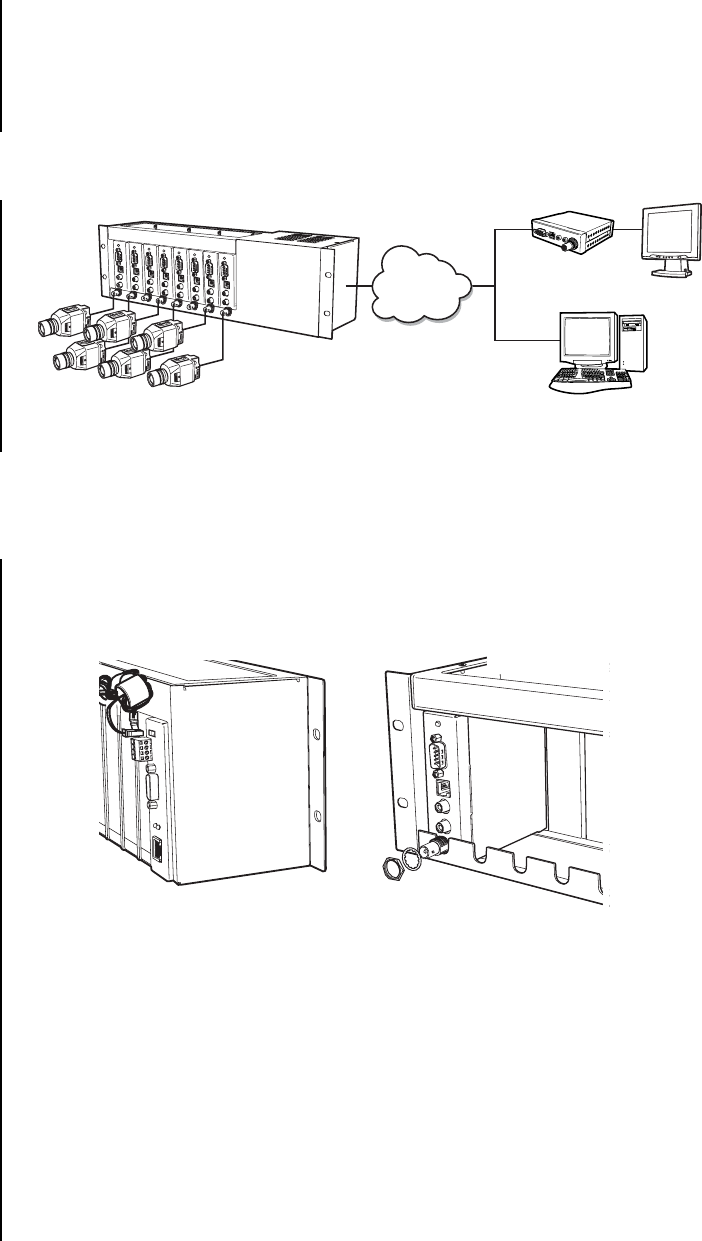
APPLICATIONS
Figure 1. PelcoNet Applications
INSTALLATION
The NET101RK contains the following parts:
• Mounting kit for 19-inch rack
• Power cord
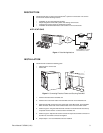
Figure 2. Connecting Electrical Power and Securing PelcoNet
1. Remove the feet from the PelcoNet unit.
2. Remove the nut and lock washer from the BNC connector on the PelcoNet unit.
3. Slide the PelcoNet unit through a bay at the back of the NET101RK. The PelcoNet’s
BNC connector should rest in the rounded cutout on the front of the NET101RK.
4. Refer to Figure 2. Plug the small electrical connector on the NET101RK into the top
receptacle marked “Power” on the back of the PelcoNet unit.
5. Refer to Figure 2. Slip the lock washer removed in step 2 onto the BNC connector. In-
stall the nut on the BNC connector and tighten.
6. Repeat steps 1-5 for each PelcoNet unit to be installed.
LAN
OR
WAN
RECEIVER
MONITOR
WEB BROWSER OR A VIDEO
CONFERENCING SYSTEM