


-7-
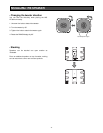
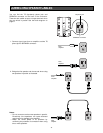
WIRING CONNECTOR AND CABLE
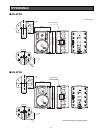
Cap
Cable clamp
Cable clamp
Loosen screws.
Push
Cable
Tighten the screw.
Solder here.
Push to the end.
Convex
Convex
Cocave
Cocave
Cap
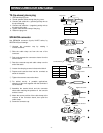
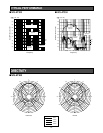
AMP OUT SPEAKON
+1 +
1 –
(Not used)
2 +
(Not used)
2 –
–
Tarminal block
Connector sleeve
Push
Plug Cover
Speaker Cable
Sleeve
Tip
AMP OUT Plug
+ Tip
– Sleeve
TS (tip-sleeve) phone plug
1. Unscrew the plug cover.
2. Thread speaker cables through the plug cover.
3. Connect and solder the + (positive) polarity wire to
the tip of the plug.
4. Connect and solder the – (negative) polarity wire to
the sleeve of the plug.
5. Tighten cable with the clamp of the plug.
6. Fasten the plug cover.
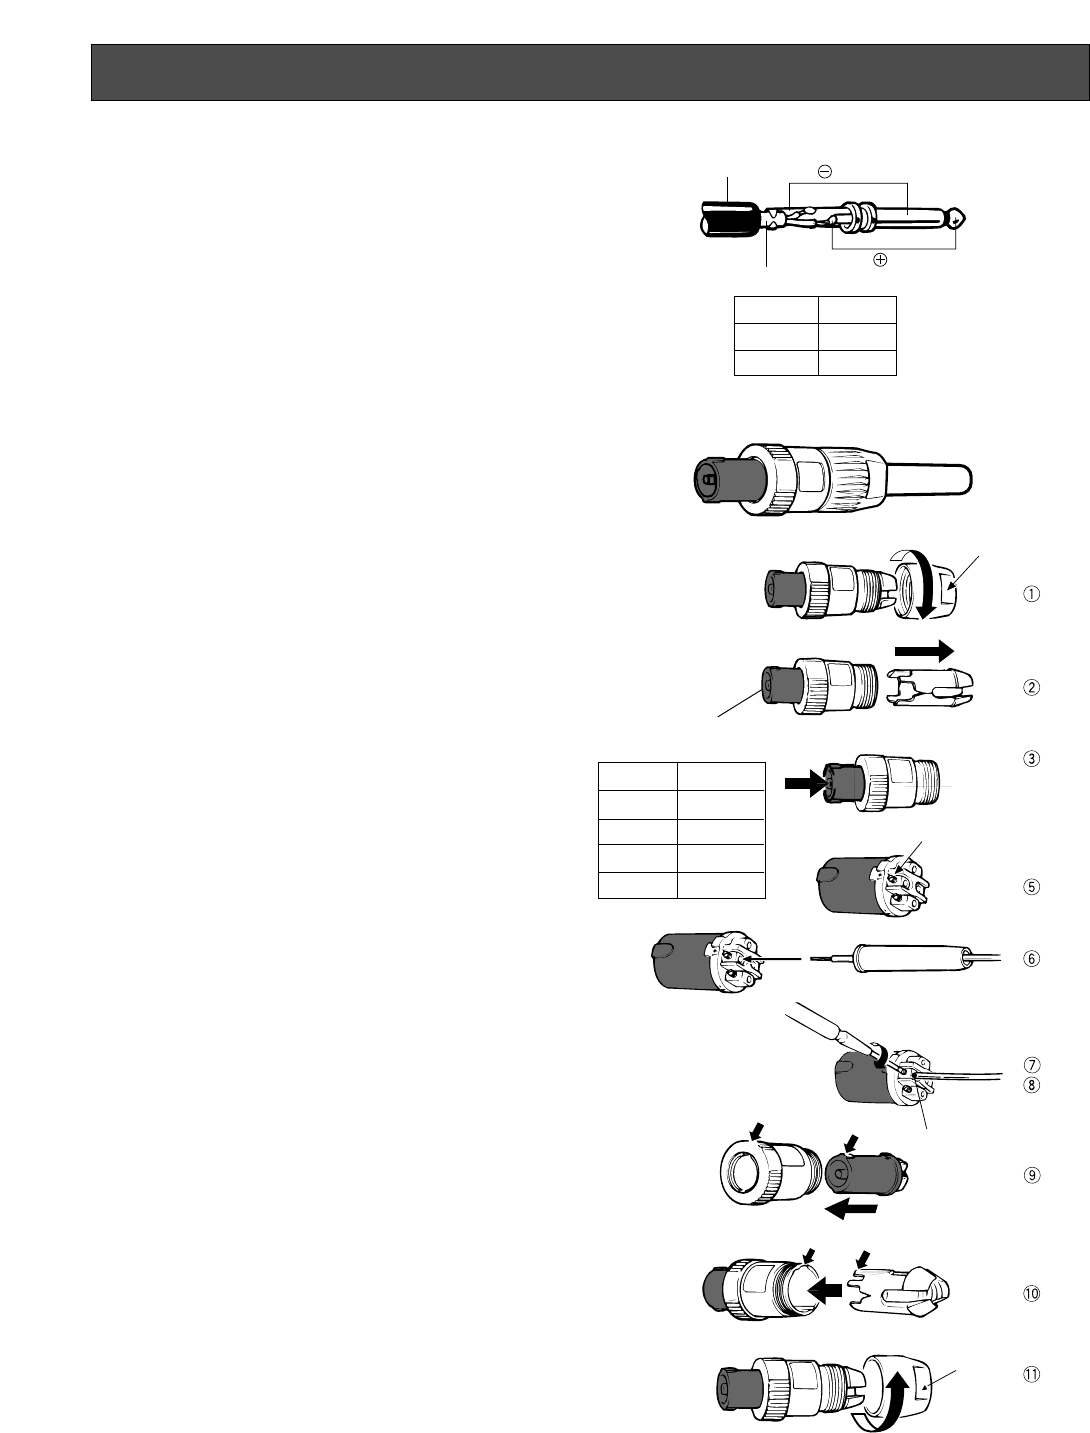
SPEAKON connector
Use SPEAKON connector (4-pole, NL4FC series, by
NEUTRIK AG) as followings.
q Unscrew the connector cap by rotating it
counterclockwise.
w Slide the cable clamp out from the rear of the
connector.
e Push and separate the connector sleeve from the
terminal block.
r Pass the connector cap and cable clamp over the
end of the cable.
t Loosen the clamping screws in the terminal block.
y Prepare and insert the wires into the terminals as
shown in the table.
u Tighten the screws to secure the wires.
i For added security in portable applications,
soldering of the wires together with the terminals is
recommended.
o Assemble the terminal block and the connector
sleeve after matching the positions of the concave
and the convex.
!0 Match the convex position of the cable clamp to the
concave of the connector sleeve, then push the
cable clamp.
!11 Screw the connector cap.