


3
RQT7978
Caution for AC Mains Lead/Table of contents
Caution for AC Mains Lead
(For United Kingdom, Saudi Arabia
and Kuwait)
(“EB” and “GS” area code models only)
For your safety, please read the following text carefully.
This appliance is supplied with a moulded three pin mains plug for
your safety and convenience.
A 5-ampere fuse is fitted in this plug.
Should the fuse need to be replaced please ensure that the
replacement fuse has a rating of 5-ampere and that it is approved by
ASTA or BSI to BS1362.
Check for the ASTA mark Ï or the BSI mark Ì on the body of the
fuse.
If the plug contains a removable fuse cover you must ensure that it is
refitted when the fuse is replaced.
If you lose the fuse cover the plug must not be used until a
replacement cover is obtained.
A replacement fuse cover can be purchased from your local dealer.
If a new plug is to be fitted please observe the wiring code as stated
below.
If in any doubt please consult a qualified electrician.
IMPORTANT
The wires in this mains lead are coloured in accordance with the
following code:
Blue: Neutral, Brown: Live.
As these colours may not correspond with the coloured markings
identifying the terminals in your plug, proceed as follows:
The wire which is coloured Blue must be connected to the terminal
which is marked with the letter N or coloured Black or Blue.
The wire which is coloured Brown must be connected to the terminal
which is marked with the letter L or coloured Brown or Red.
WARNING: DO NOT CONNECT EITHER WIRE TO THE
EARTH TERMINAL WHICH IS MARKED WITH THE
LETTER E, BY THE EARTH SYMBOL Ó OR COLOURED
GREEN OR GREEN/YELLOW.
THIS PLUG IS NOT WATERPROOF—KEEP DRY.
Before use
Remove the connector cover.
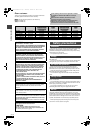
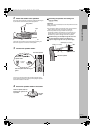
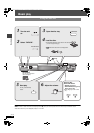
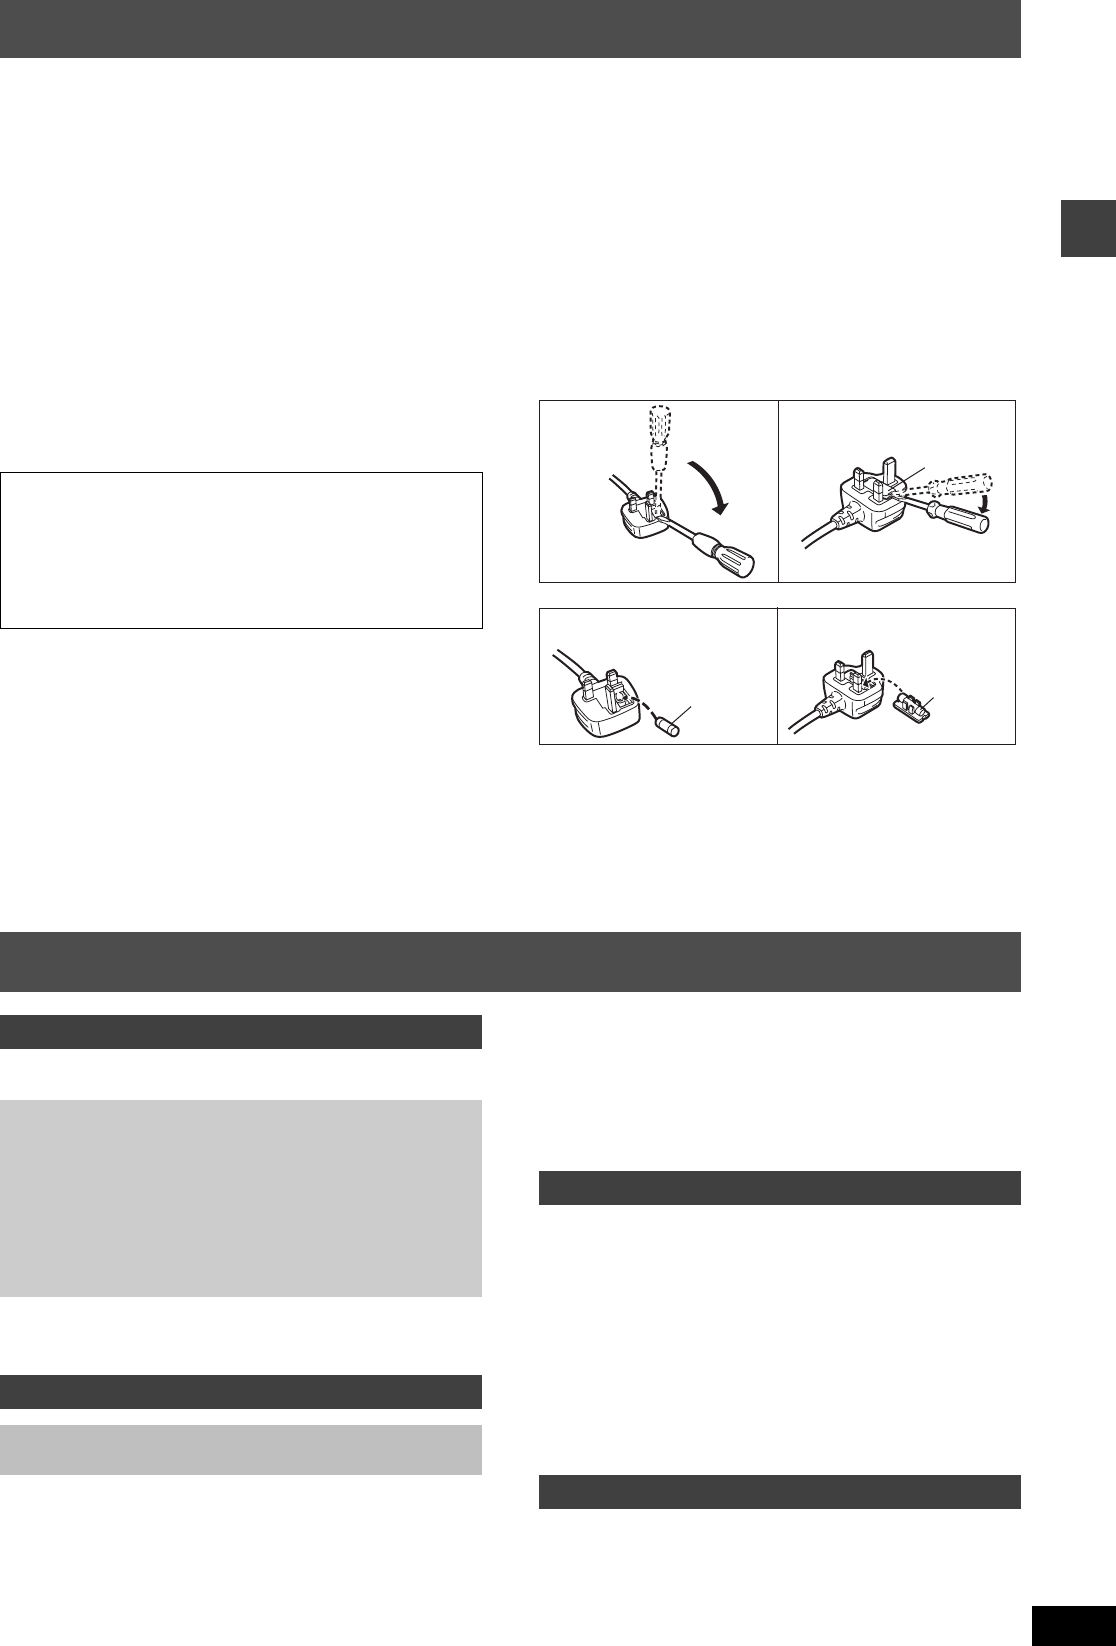
How to replace the fuse
The location of the fuse differ according to the type of AC mains plug
(figures A and B). Confirm the AC mains plug fitted and follow the
instructions below.
Illustrations may differ from actual AC mains plug.
1. Open the fuse cover with a screwdriver.
2. Replace the fuse and close or attach the fuse cover.
Safety precautions . . . . . . . . . . . . . . . . . . . . . . . . . . . . . . .3
Caution for AC Mains Lead . . . . . . . . . . . . . . . . . . . . . . . .3
Control reference guide . . . . . . . . . . . . . . . . . . . . . . . . . .10
Discs that can be played . . . . . . . . . . . . . . . . . . . . . . . . .11
Disc handling . . . . . . . . . . . . . . . . . . . . . . . . . . . . . . . . . .11
Convenient functions. . . . . . . . . . . . . . . . . . . . . . . . . . . .14
Displaying current playback condition (QUICK OSD)/
Reviewing titles to play (ADVANCED DISC REVIEW)/
Quick replay/Skipping 30 seconds forward/
Changing the zoom ratio/Changing soundtracks/
Changing subtitles/Angle selection and Still picture rotation/
advance/Changing play speed/
Repeat play/All group, Program and Random play
Using navigation menus . . . . . . . . . . . . . . . . . . . . . . . . 16
Playing data discs/Playing from the selected track in the CD/
Playing HighMAT
TM
discs/Playing RAM discs
Using on-screen menus . . . . . . . . . . . . . . . . . . . . . . . . . 18
Main menu/Other Settings
Changing the player settings. . . . . . . . . . . . . . . . . . . . . 20
Changing the delay time (Speaker Settings)
The radio . . . . . . . . . . . . . . . . . . . . . . . . . . . . . . . . . . . . . 22
Automatic presetting/Selecting the preset channels/
Manual tuning/RDS broadcasting/
Optional antenna connections
Sound field and sound quality. . . . . . . . . . . . . . . . . . . . 24
Sound Field Control/Super Surround/Center Focus/
Dolby Pro Logic II/Down-mixing/Enhancing the bass sound/
Subwoofer level/Speaker level adjustments
Operating other equipment . . . . . . . . . . . . . . . . . . . . . . 26
Operating the television and the video cassette recorder/
Operating the tape deck ([HT840] [HT880])
Other useful functions . . . . . . . . . . . . . . . . . . . . . . . . . . 28
Sleep timer/Muting/Using headphones/Enjoying Karaoke
Other speaker setup options . . . . . . . . . . . . . . . . . . . . . 29
Glossary. . . . . . . . . . . . . . . . . . . . . . . . . . . . . . . . . . . . . . 30
Maintenance . . . . . . . . . . . . . . . . . . . . . . . . . . . . . . . . . . 30
Language code list . . . . . . . . . . . . . . . . . . . . . . . . . . . . . 31
Specifications . . . . . . . . . . . . . . . . . . . . . . . . . . . . . . . . . 32
Troubleshooting guide. . . . . . . . . . . . . . . . . . . . . . . . . . 34
Accessories. . . . . . . . . . . . . . . . . . . . . . . . . . . . Back cover
CAUTION!
IF THE FITTED MOULDED PLUG IS UNSUITABLE FOR THE
SOCKET OUTLET IN YOUR HOME THEN THE FUSE SHOULD
BE REMOVED AND THE PLUG CUT OFF AND DISPOSED OF
SAFELY.
THERE IS A DANGER OF SEVERE ELECTRICAL SHOCK IF
THE CUT OFF PLUG IS INSERTED INTO ANY 13-AMPERE
SOCKET.
Fuse cover
Figure A
Figure B
Fuse
(5 ampere)
Fuse
(5 ampere)
Figure A
Figure B
Table of contents
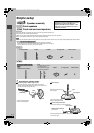
Getting started
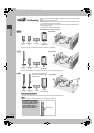
Simple setup
STEP 1 Speaker assembly . . . . . . . . . . . . . . . . . . . . . 4
STEP 2 Positioning. . . . . . . . . . . . . . . . . . . . . . . . . . . 6
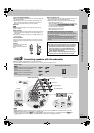
STEP 3 Connecting speakers
with the subwoofer . . . . . . . . . . . . . . . . . . . 7
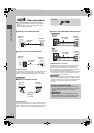
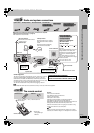
STEP 4 Video connections. . . . . . . . . . . . . . . . . . . . . 8
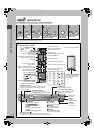
STEP 5 Radio and system connections . . . . . . . . . 9
STEP 6 The remote control . . . . . . . . . . . . . . . . . . . . 9
STEP 7 QUICK SETUP . . . . . . . . . . . . . . . . . . . . . . . 10
Disc operations
Basic play. . . . . . . . . . . . . . . . . . . . . . . . . . . . . . . . . 12
Using the main unit/Using the remote control
Other operations
Reference
HT530_880_840En.book Page 3 Wednesday, December 22, 2004 9:58 PM