3
4
3
12 4
VIDEO IN
AUDIO OUT
L
R
AV IN
OPTICAL
OUT
LAN
AV
OUT
OPT
VIDEO
OUT
AUX
L
R
(ARC)
5
2
1
3
Ω
6
Ω
6
Ω
FRONTCENTERSUBWOOFER
R L
6
4
3
3
Ω
SURROUND
R L
OPTICAL
21
DIGITAL AUDIO IN
FM ANT
(
75
Ω
)
CANCEL
VOL
1 2 3
4 5 6
7 8
0
9
BD/SD
iPod
EXT-IN
MUTE
RADIO
ABC
DEF
JKL
MNO
TUV
GHI
QRS
P
XYZ
W
@.
_,
VOL
TV
INPUT
R6/LR6, AA
5
6Ω
ENTER
LAN
(
10BASE-T/
100BASE-TX
)
OK
RETURN
Smart setup
Would you like to start smart setup?
Voulez-vous amorcer le Réglage intelligent ?
¿Quiere empezar la Smart Setup?
No/Non/No
Yes/Oui/Sí
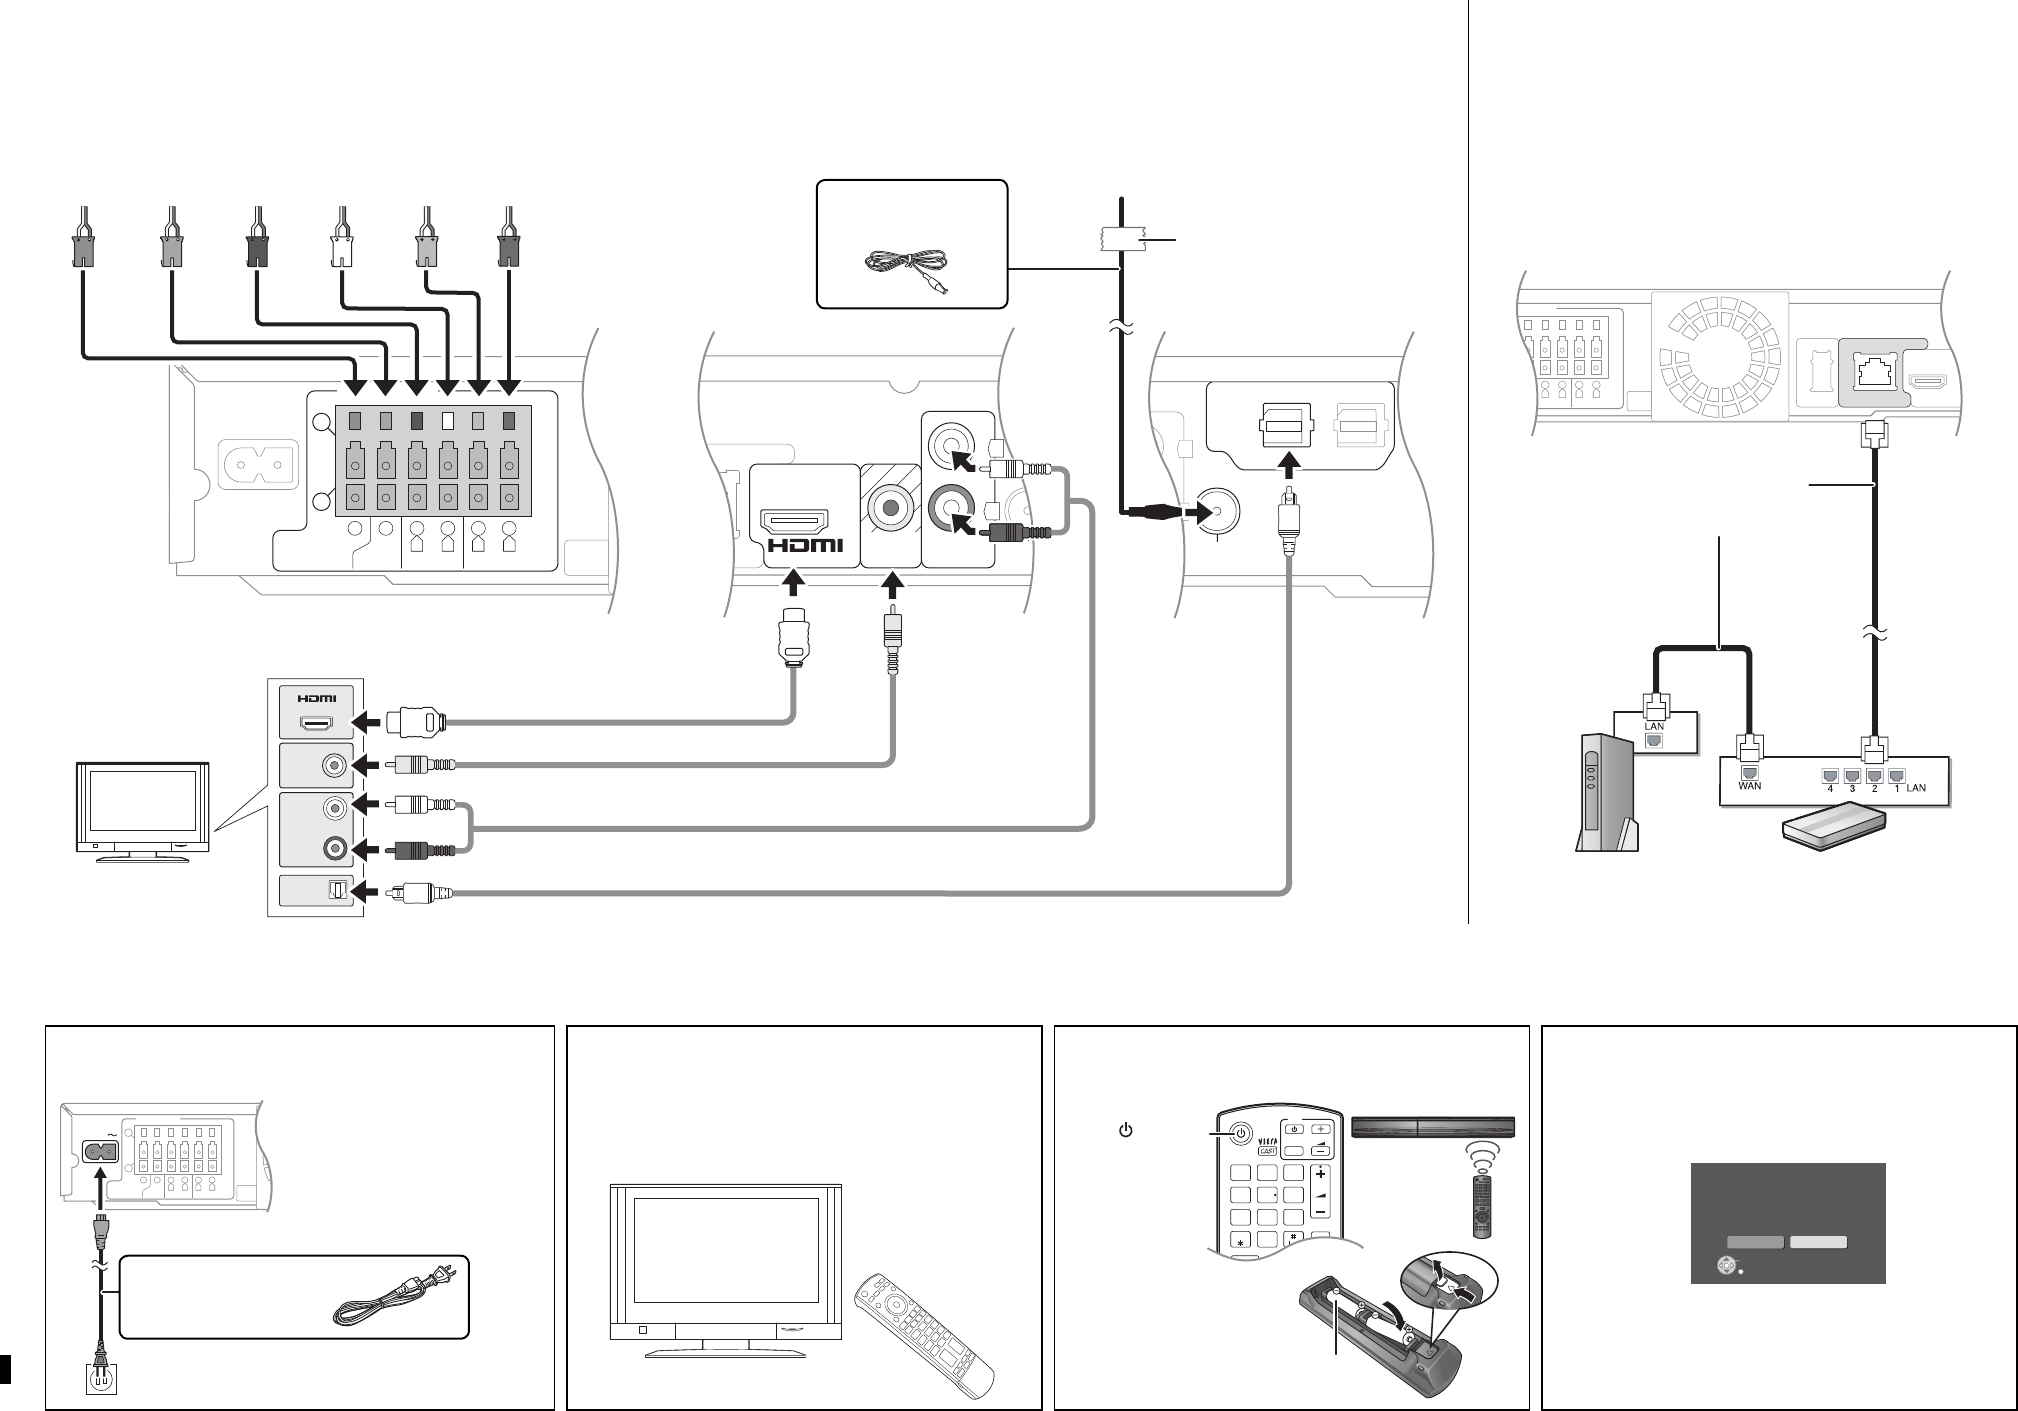
Connect the cables by color or by the numbers indicated in the illustration to
the appropriate terminals on the rear panel of the unit.
Main unit
Main unit’s speaker
terminals (rear panel)
PURPLE GREEN RED WHITE GRAY BLUE
Connect the cables
For detailed information, refer to the operating instructions.
FM indoor antenna
(included)
Adhesive tape
TV
Turn on the main unit
Connect the AC power supply
cord
Connect the AC power supply cord
to the main unit before connecting to
the household AC outlet.
AC power supply cord
(included)
To a household AC outlet
(AC 120 V, 60 Hz)
Turn on the TV
Turn on your TV and select the appropriate video input mode
(e.g., VIDEO 1, AV 1, HDMI, etc.) to suit the connections to this
unit.
Broadband Network Connections (Optional)
By connecting this unit to the network, you can use the BD-Live and
VIERA CAST features.
Main unit
Shielded LAN cable
(not included)
Modem (Broadband)
• Provided by ISP
Press [, ] to select [Yes/Oui/Sí].
*
2
If you want to restart the Smart setup:
Refer to “STEP 6: Smart setup / Easy setup” in the operating
instructions.
Broadband router, etc.
Other connection
Press [ ] to turn
on the main unit.
Installing batteries in the
remote control
The Smart setup starts
The on screen display will guide you through the steps.*
2
Turn on the main unit
Video cable*
1
(included)
HDMI cable (not included)
(Recommended for highest quality
picture)
Optical digital audio cable (not included)
Audio cable (not included)
Audio connection
For best quality audio,
use the HDMI cable (with
an ARC compatible TV)
or an optical digital audio
cable.
If your TV does not
support the above, use
the audio cable.
*
1
Make sure that this
video connection is
made to view photos/
videos from the iPod/
iPhone.


