NILES AUDIO CORPORATION – 1-800-BUY-HIFI
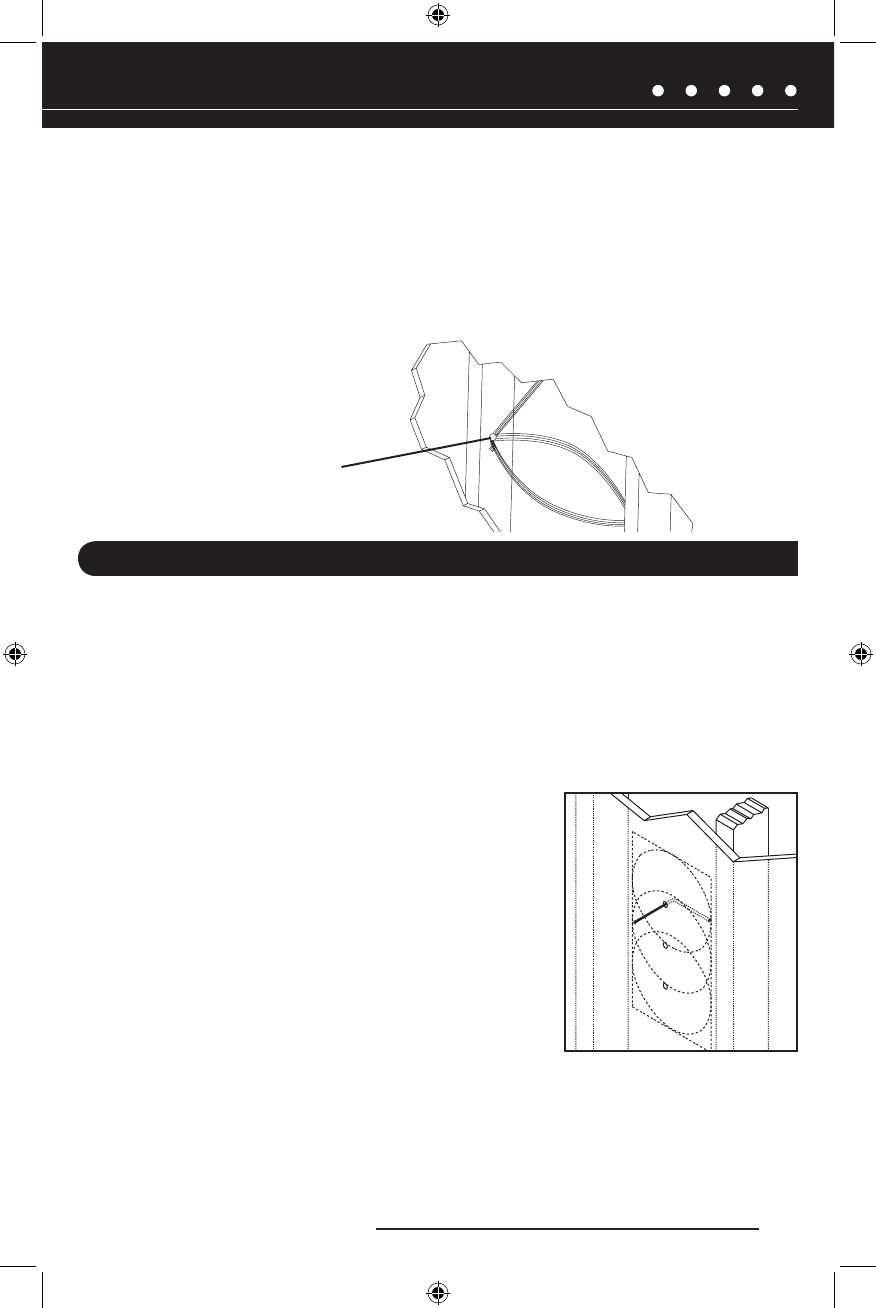
Figure 12. The loudspeaker
wire is looped and hung on
two nails attached to the joists,
securing it for future use. Be
sure to note the location on
house plans.
CONCEALING LOUDSPEAKER WIRE FOR A FUTURE
INSTALLATION
1. Attach the loudspeaker wire in a loop between the wall studs or ceiling joists and
carefully mark the exact location of the wire on a set of plans.
2.
Ask the general contractor to inform the drywall installers that the loudspeaker wire
loops are concealed for future installations, as shown in Figure 12
.
EXISTING CONSTRUCTION: INSTALLING A BRACKET
IMPORTANT: BEFORE YOU CUT INTO ANY WALL, REVIEW THE SECTIONS ON RUNNING WIRE AND
LOUDSPEAKER PLACEMENT STARTING ON PAGE 6. BE SURE NOT TO DRILL OR CUT THROUGH
EXISTING WIRES, PIPES, OR STRUCTURE. IF YOU FEEL ANY EXTRA RESISTANCE AS YOU ARE
DRILLING OR SAWING, STOP!
1. Locate studs or joists by using a stud sensor or by hand knocking. Do not place the
edge of the cutout directly next to a stud or joist, since the frame and bracket will
extend beyond the cutout.
2.
At the planned cutout site, drill a 1/8-inch pilot hole
just barely through the wall, about an inch below
the center of your proposed loudspeaker location.
NOTE: IN MOST HOMES, THE WALL THICKNESS IS 1/2 TO
5/8 INCH.
3. Cut a foot-long piece of coat hanger and bend it to
create a right angle. Poke the “L-shaped” wire into
the pilot hole and turn it in a complete circle, as
shown in
Figure 13.
15
Figure 13. Using a coat
hanger to check for obstructions
behind the wall loudspeaker site.
(CONTINUED ON NEXT PAGE)
DS00421ACN_HDFX.indd 17 5/6/05 5:05:23 PM


