


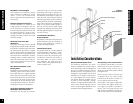
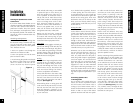

Installing the Speaker
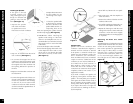
If the grille is already
installed, remove it by
using a bent paper clip or
the tip of a corkscrew and
pulling it away from the
frame (See Figure 13).
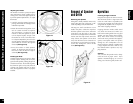
1. Separate the speaker
end of the two-conduc-
tor speaker-wire run to
free at least 2” of each conductor.
2. Strip 1/2” of insulation from the end of
each conductor. (See Figure 1)
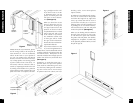
3. To connect the stripped end of one
conductor to the black terminal, push
down on the black terminal lever. Insert
the stripped end of the conductor into
the opening. Release the pressure on
the lever.
4. Repeat #3 with the other conductor and
the red terminal.
5. Connect the opposite ends of these con-
ductors to their respective amplifier ter-
minals. Pay attention to the markings
on the wire. If you are unsure which
conductor to insert into which terminal,
see the section titled “Speaker Phase” in
the owner’s manual.
6. Repeat these instructions
for each speaker you are
connecting to the ampli-
fier.
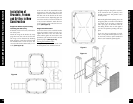
7. Place the speaker baffle
in the frame by inserting
the tabs at the base of the
speaker baffle into the cor-
responding holes in the
frame and pushing the speaker forward
until the snaps engage. (See Figure16)
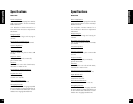
8. IMPORTANT: When installing the
speakers in the ceiling, or if the instal-
lation is in an earthquake zone, it is rec-
ommended that you utilize the enclosed
sheet metal screws to secure the baffle
to the frame.
a. Locate the dimples on the front baffle.
b. Place the self-tapping sheet metal screw
in the dimple and turn it with a screw
driver until it cuts through the baffle
and anchors securely in the frame.
(See Figure 17)
17
Installation of the Speaker and Grille for New or Existing Construction
Figure 16
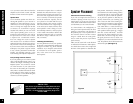
Speaker Phase
Speaker wire has two conductors. One
conductor is attached to the negative (-)
terminals and one conductor is attached
to the positive (+) terminals of both your
speaker and your amplifier. Usually, the
wire is marked for your convenience.
There are different ways wires are marked:
a stripe on one wire, a ribbed area of one
conductor you can only feel, different col-
ors of metal wire on each conductor, or
there might be a fabric strand or string
wound into one of the conductors. Of
course, there are some wires which appear
completely identical. Be careful, or you
might make a mistake.
If you make a mistake, one speaker will
be playing “out-of-phase” with the other
speaker. An out-of-phase pair of speakers
work against each other and the sound of
the two speakers playing together will be
lacking in bass and be “phasey” sounding.
If you suspect the sound is not right and
you cannot see any markings on the wire,
try this simple test:
1. Stand half way between the two speak-
ers.
2. Play some music with the amplifier or
radio set to Mono.
3. Listen to the richness of the bass and the
loudness of the sound.
4. Turn off the amplifier and reverse the con-
nections on one amplifier channel only.
5. Repeat the listening test with the same
setting of the volume control. When the
sound has a richer bass and is slightly
louder the speakers are working together
or “in-phase”.
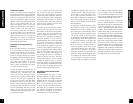
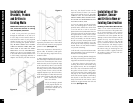
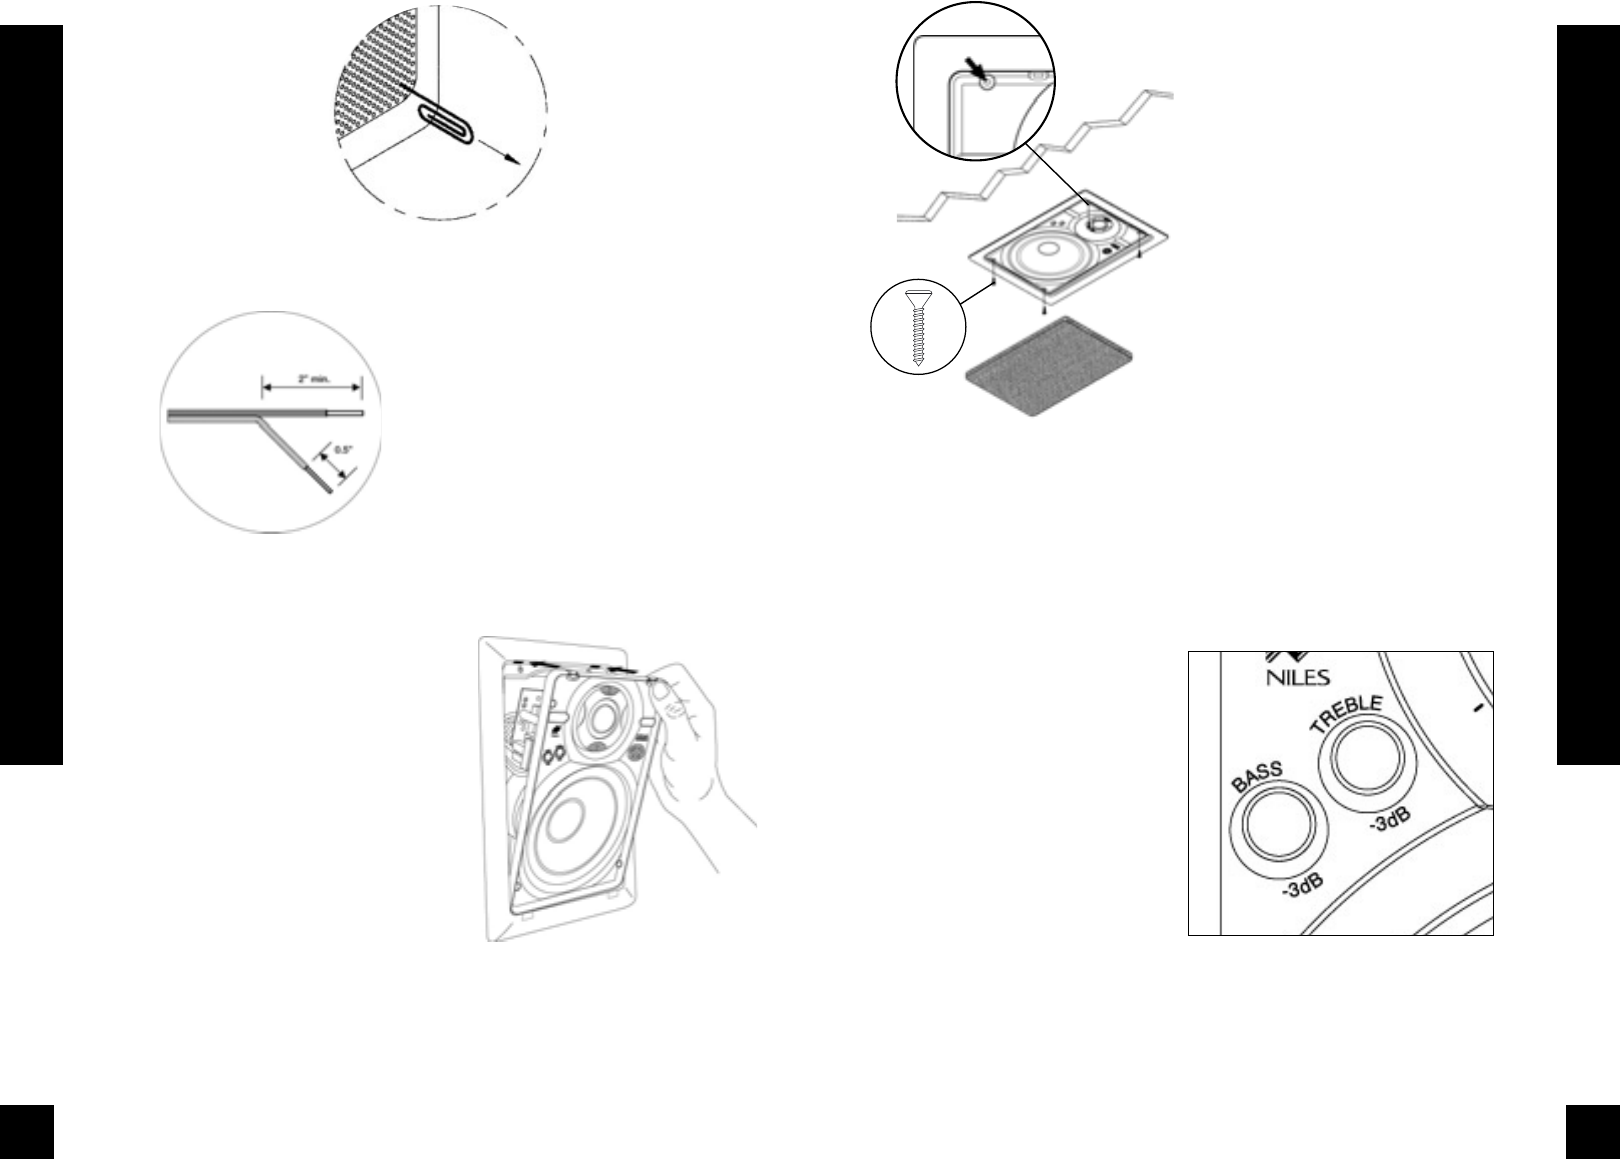
Adjusting the Bass and Treble
Controls
The PR Performance loudspeakers feature
separate baffle-mounted bass and treble
controls for fine tuning after installation.
Each control provides for approximately
3dB in steps of 1dB of Bass or Treble
reduction. This is useful if the speakers
are placed near boundaries (Bass Cut)
or in a room with highly reflective sur-
faces like glass or tile. (Treble Cut). (See
Figure 18)
18
Installation of the Speaker and Grille for New or Existing Construction
Figure 18
Figure 17
Figure 13
Figure 1