


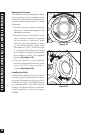
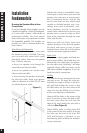

Installing the Speaker
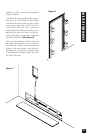
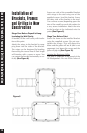
If the grille is already
installed, remove it by
using a bent paper clip or
the tip of a corkscrew and
pulling it away from the
frame
(See Figure 13).
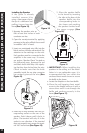
1. Separate the speaker wire so
that at least two inches of each
conductor are free.
2. Open the no-strip terminal by applying
pressure to the red and black levers until
an audible “click” is heard.
3. Insert one unstripped wire fully into the
black and one into the red terminal. Pay
attention to the markings on the wire.
Each speaker must be connected to the
amplifier in the same way. If unsure,
see section “Speaker Phase” located on
the following page. Squeeze the red
and black levers until they click signify-
ing that they have locked into the wire.
Check to make sure that the knife
assembly inside the no strip connector
has properly pierced the wire
(See
Figure 14)
.
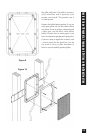
4. Insert the no strip terminal into the cor-
responding socket on the rear of the
speaker. Push it down until it locks in
place. The terminal will only fit in the
socket in one direction. If the terminal
does not properly seat, reverse the termi-
nal 180˚ and reinsert
(See Figure 15).
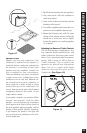
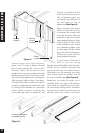
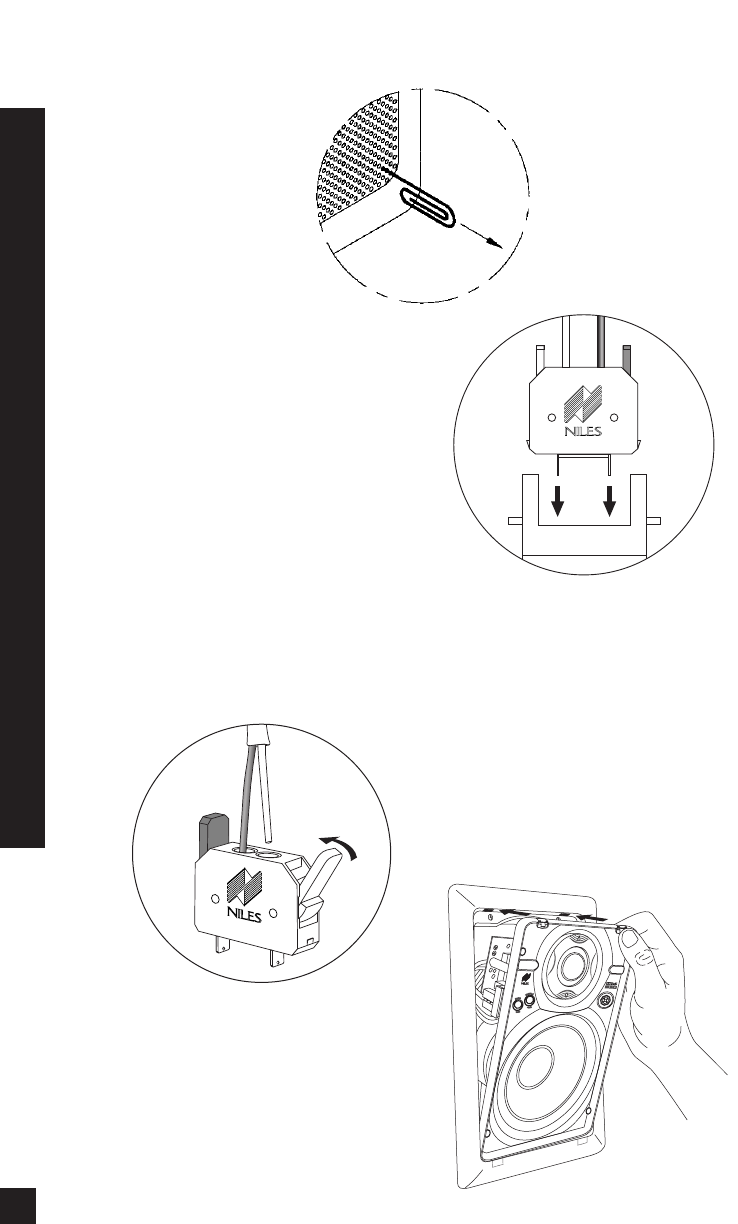
5. Place the speaker baffle
in the frame by inserting
the tabs at the base of the
speaker baffle into the
corresponding holes in
the frame and pushing
the speaker forward until
the snaps engage
(See
Figure 16)
.
6.
IMPORTANT: When installing the
speakers in the ceiling, or if the instal-
lation is in an earthquake zone, it is
recommended that you utilize the
enclosed sheet metal screws to secure
the baffle to the frame.
a. Locate the dimples on the front baffle.
b. Place the self-tapping sheet metal
screw in the dimple and turn it with a
screw driver until it cuts through the
baffle and anchors securely in the
frame
(See Figure 17).
17
Installation of the Speaker and Grille for New or Existing Construction
Figure 13
Figure 14
Figure 15
I
N
F
R
A
R
E
D
S
E
N
S
O
R
K
N
O
C
K
O
U
T
Figure 16