


8
FINISHING THE INSTALLATION
CONNECTING & INSTALLING THE LOUDSPEAKER
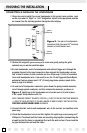
1. Please be sure to install the correct loudspeaker in the correct room position. Look
on the rear label for “Right” or “Left” designation. Install in the appropriate position
as viewed from the listening position facing the video display.
2. Remove the magnetic grille starting at a corner and gently pulling the grille
outwards as you work around the edges.
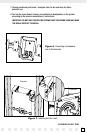
3. At each loudspeaker, route the loudspeaker and optional trigger wire through the
provided channel to the input connectors, then separate the loudspeaker wire so
that at least 2 inches of each conductor are free. Strip away 1/4 inch of insulation
from each loudspeaker wire. If you wish to use the 12 volt triggered Dipole/Bipole
automated feature, please insert 1/8” (3.5mm) plug above speaker inputs. Refer
back to page 5 for details.
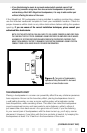
4. On each set of loudspeaker connectors, press down the spring-loaded connector,
insert the appropriate conductor, and then release the connector, as shown in
Figure 5. Gently tug on the loudspeaker wire to make sure it is held in place.
If not, repeat this procedure until it is.
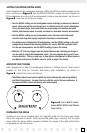
NOTE: OBSERVE CORRECT POLARITY: POSITIVE (+) GOES TO THE RED POST AND NEGATIVE
(–) GOES TO THE BLACK POST. IF YOU ARE UNSURE OF WIRE POLARITY, SEE THE SECTION,
CHECKING LOUDSPEAKER PHASE ON PAGE 9.
5. Connect the other end of each loudspeaker wire to the receiver (or amplifier) in the
same way.
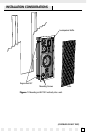
6. Check that loudspeaker is level and then tighten the eight large screws using a #2
Phillips bit. This should pull the frame and mounting dog together (sandwiching the
drywall) so that the frame is absolutely flush with the wall surface. There should be
no gaps between the wall and the frame.
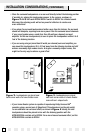
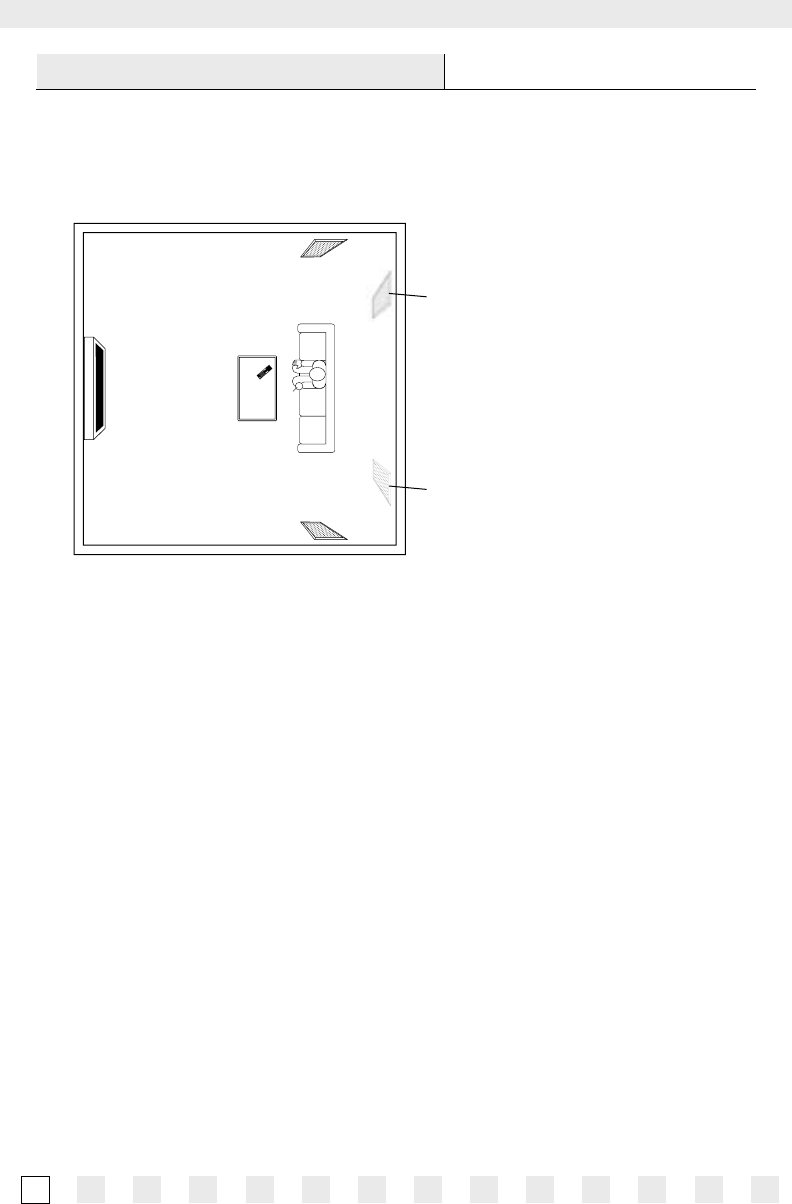
Figure 5. Two pairs of loudspeakers
reproduce Dolby Surround EX
®
surround
sound in a home theater room.
Rear
Right
Rear
Left
Right
Left
Optional
Placement
Optional
Placement