


Experimentation is the key to finding the best arrangement in your listening environment. Be patient, have fun, and remem-
ber that small changes in speaker position can sometimes have a significant effect on the sound. For example, moving
the speakers nearer to a room boundary (walls, corners) will tend to increase their bass output, but may result in “boomy”
or “muddy” sound. Conversely, placing the speakers farther away from room boundaries will tend to decrease their bass
output, but may result in greater articulation and better imaging.
In addition, room furnishings play an important role in absorbing and reflecting soundwaves. Midrange and high
frequencies in particular will be absorbed by soft furnishings such as sofas, carpets and curtains. A large number of these
soft furnishings will dull the sound, while a “live” room with few furnishings will brighten the sound. If you are willing to
spend some time fine-tuning the performance of your system, you will enjoy the benefits for years to come.
Speaker Stand and Shelf Mounting
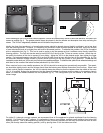
When used in the vertical (upright) orientation, the VS-2a may be placed on a rigid speaker stand. NHT offers a 26.5”
stand (OneStand) which is ideally suited for the VS-2a. Refer to the OneStand owner’s manual for detailed installation
instructions. Additionally, the VS-2a may be placed on a shelf or in a cabinet, however this placement may have a detri-
mental effect on the sound. For best results, place the speaker as far forward as possible to the front edge of the cabinet.
Wall Mount Bracket
Note: Whenever an object is affixed to a wall, you must take special care to mount it securely, to prevent it from
falling and causing possible injury. THE VS-2A MOUNTING BRACKET MUST BE ATTACHED TO STUDS, AS DRY-
WALL (SHEETROCK) ALONE CANNOT PROVIDE ADEQUATE SUPPORT. Make sure that the mounting bracket will
not interfere with electrical wiring, plumbing, etc. IF YOU ARE UNSURE ABOUT THE INSTALLATION OF THIS
MOUNTING BRACKET, CONSULT A PROFESSIONAL CONTRACTOR. Follow the mounting instructions carefully to
ensure proper installation.
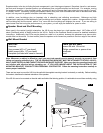
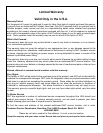
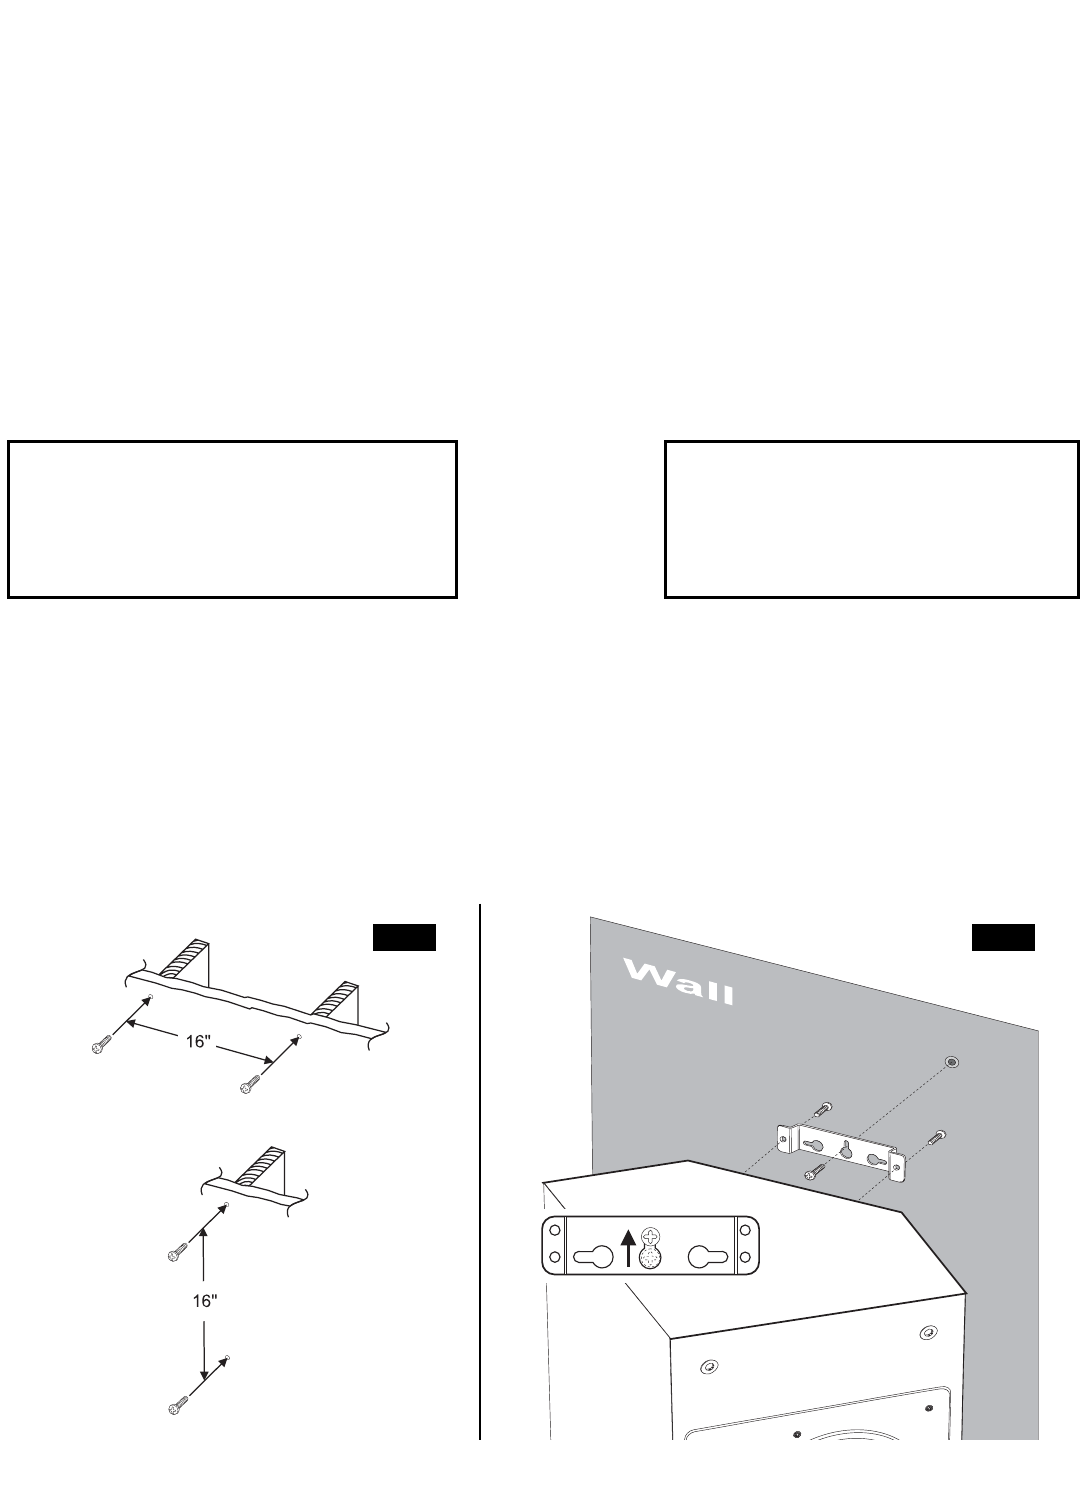
There are two ways to mount the VS-2a to the wall with the supplied mounting bracket: horizontally or vertically. Before installing
the bracket, determine the desired orientation of the speaker.
If the VS-2a’s are to be mounted on the side walls and behind the listening position, it is advisable to mount them vertically, using
4
Parts List:
2 brackets
2 long screws (#10 x 2” pan head)
4 short screws (#8 x 1/2” pan head)
1 template (included with owner’s manual)
Tools you will need:
power drill with 1/8-inch bit
Philips screwdriver or power driver
studfinder
level
fig. 6
fig. 5