phase settings on the same track. Do not attempt to evaluate the best sound while standing above the subwoofer or amplifier, as the
sound at the listening position will be significantly different.
Subwoofer Volume Control
The SA-3’s front panel VOLUME CONTROL allows you to adjust the volume of the subwoofer relative to the rest of the system. Many
listeners make the mistake of setting subwoofers too loud, which can cause excess bloat and loss of detail and musicality. A properly cal-
ibrated subwoofer blends in with the speakers and does not call attention to itself. Observe the following guidelines for volume setting:
Turn down the volume control of the SA-3 to its lowest position (counter-clockwise). Turn on your system, including the SA-3. Play
some music you are familiar with and set your receiver/preamplifier volume to a comfortable listening level. Slowly increase the volume
on the SA-3, listening for proper frequency balance. When the subwoofer output is balanced with the rest of the system, you will hear
improved bass extension, but you should be unaware that it is coming from the subwoofer!
From this point on, the volume control on your receiver/preamplifier will control the overall volume of your system, including the subwoofer.
The SA-3 and SW3S: The SW3P Powered Subwoofer System
A subwoofer’s performance in the context of your audio / video system is highly dependent upon its interaction with your front L & R
speakers. Since a subwoofer is designed only to provide low frequency response, it is important to connect it in a manner that ensures
seamless integration with your speakers.
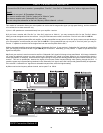
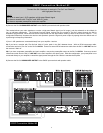
There are two possible connection methods outlined in this manual. The best method for you depends on the connection options avail-
able on your receiver or preamplifier. In general, Connection Method #2 (with high-pass filter loop) is always recommended, as it results
in increased dynamic range and reduced distortion. Addtionally, this configuration usually makes it easier to achieve smooth low fre-
quency response, as the subwoofer reproduces a different frequency range than the speakers.
1. If you have large (full-range) L & R speakers...
If your L & R speakers have generous bass response and you are adding a subwoofer, you have the option of sending the speakers a
high-pass filtered signal (Method #2). With the low bass information removed from the signal before it reaches the speakers, all low fre-
quencies are reproduced exclusively by the subwoofer. Start with a 65Hz high-pass setting.
If you want to run the L & R speakers full-range and use the subwoofer only to provide low bass reinforcement, use Connection Method
#1. Sending the speakers a full-range signal can sometimes make it difficult to integrate them with the subwoofer, as their combined
low frequency output can cause irregularities (peaks and dips) in the room’s low frequency response. In this case, the subwoofer’s low-
pass setting should be quite low and used only to fill in the lowest octave.
2. If you have small (bookshelf) L & R speakers...
If your L & R speakers are smaller bookshelf-type models with limited bass response, it is advisable to send them a high-pass filtered
signal (Method #2). With all low frequencies reproduced exclusively by the subwoofer, the L & R speakers receive a signal containing
only information that falls within their specified frequency response range. Use the 65, 80 or 100Hz high-pass setting, depending on the
main speakers’ rated low frequency limit.
Alternately, you can run the speakers full range and use the subwoofer to reproduce all the low bass frequencies below their response
capabilities (Methods #1). While simple, this configuration does not remove the burden of low frequencies from the L & R speakers and
may limit their output at higher volumes.
3. What connection options are available?
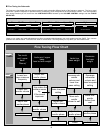
a) If you are using a separate preamplifier and main amplifier, both of the connection methods are available to you.
b) If you are using an integrated amplifier or receiver (hereafter called “receiver”) with “Pre-Out” and “Main-In” jacks, both of the con-
nection methods are available to you.
c) If you are using a receiver with “Pre-Out”, “Line Out” or “Subwoofer Out” jacks but no “Main-In” jacks, you may use Method #1.
d) If you are using a receiver with no “Pre-Out”, “Line Out” or “Subwoofer Out” jacks, there is no way to connect the SA-3 to your sys-
tem!
5


