


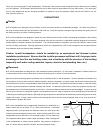
Painting
The frame and grille are painted in a matte white finish that may be
painted to match the wall. The baffle must be removed before
installing the paint shield. Keep in mind that the grille contains hun-
dreds of tiny holes that are essential to the sound of the speaker. Take
care not to clog these holes with paint.
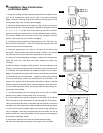
1. Remove the baffle from the frame by removing the six screws and
carefully separating the baffle from the frame.
2. Paint the frame and the grille at the same time using the same
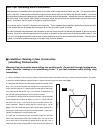
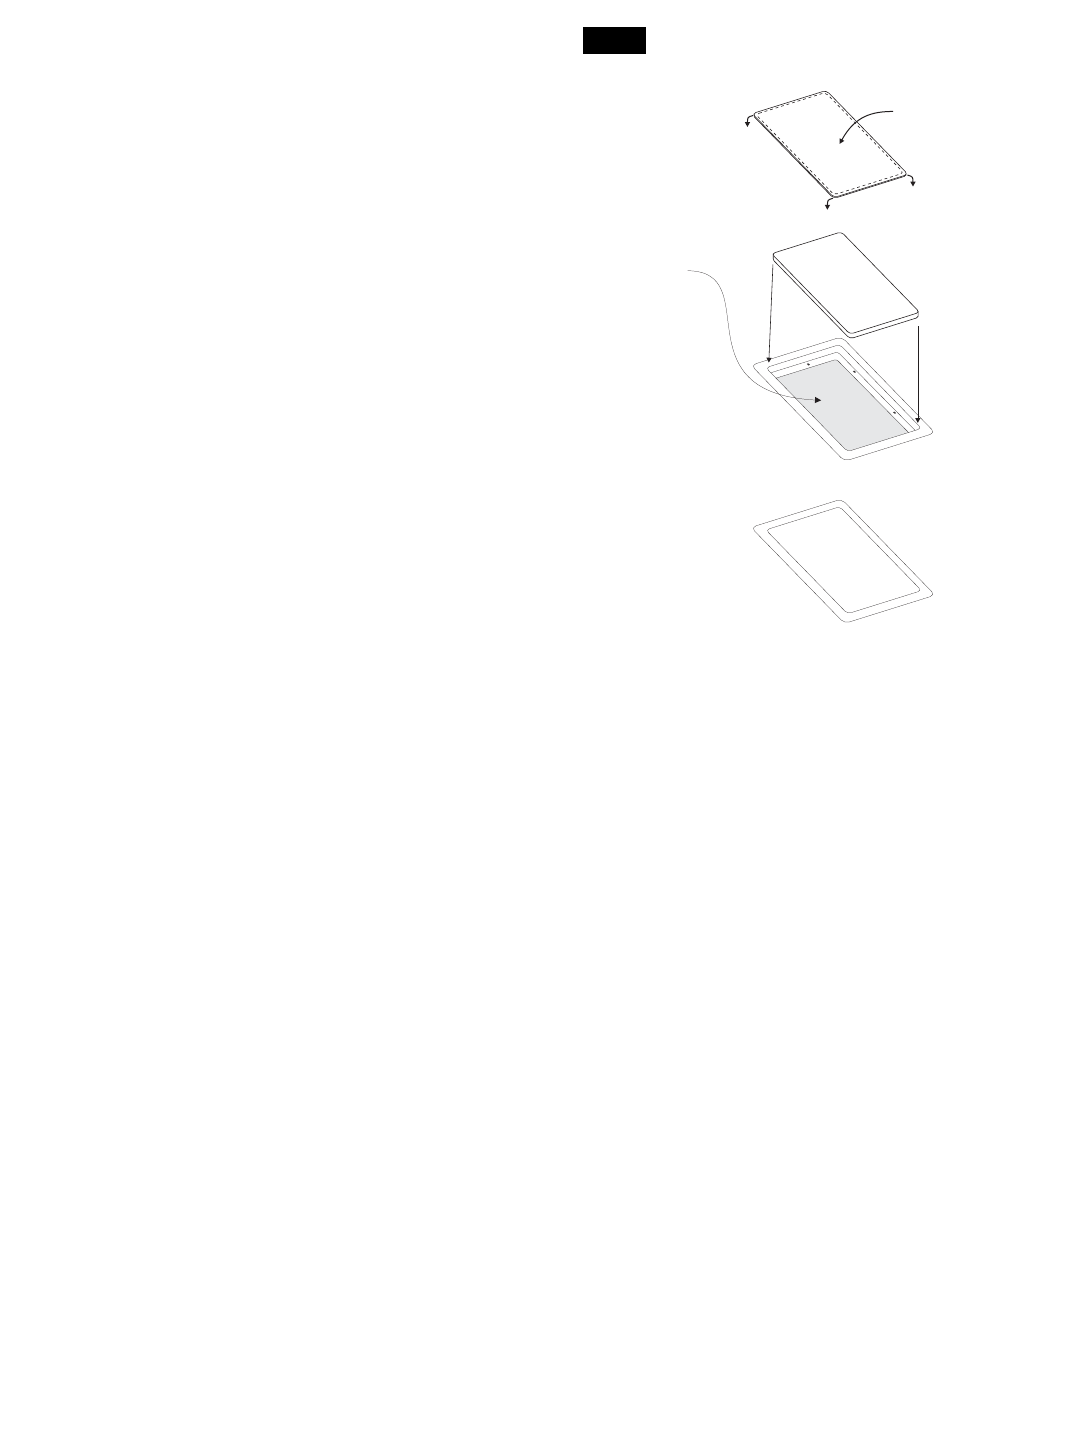
paint. Use the supplied paint shield (fig.9) to protect the hole from
overspray. Fold the corners down and insert the paint shield into the
grooves where the grille would attach. Be careful not to punch
through the round hole in the middle of the shield.
3. When using spray paint, apply two thin coats, making sure to let the
first coat dry completely before applying the second. This will avoid
runs. When using a compressor and spray gun, apply the paint using
its finest setting. Painting with a brush is not recommended, but when
necessary be sure to thin the paint so it does not cover the holes in
the grille. If paint does cover any of the grille holes, poke them out
with a paper clip.
4. Once painting is complete, remove the paint shield from the bezel by carefully punching out the round hole in the middle, and using
this hole to pull the shield free.
5. Reinstall the baffle. Do not attempt to paint the black baffle surface (which houses the drivers) behind the grille. Its black finish pre-
vents the speaker’s black drive units from being visible once the grille is attached.
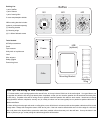
Connections
Before connecting speakers to your system, it is important that you turn off the power to your amplifier / receiver to avoid dam-
age to the equipment. Before installing the speaker, map out the wiring paths between the speakers and the amplifier. Make
sure that the speaker wire does not rest on sharp or pointed objects.
The NHT in-wall loudspeaker is compatible with virtually all quality amplifiers. Proper wiring of the speakers is essential to good sound.
At a minimum, 16AWG 2-conductor speaker wire is recommended for runs of 10 feet or less, with heavier special purpose speaker cable
used for longer runs. For best results, use equal length runs of wire for the left and right speakers. When permanently installing wire
inside walls, be sure to use wire that is rated for in-wall use and has special jacketing for fire prevention. In the U.S., the U.L.
standard is CL-2, CL-3 and CM wire, and in Canada the CSA standard is FT4 wire. The wire should be run in accordance with
National Electrical Code and any applicable local building codes. Prepare the wire by stripping 1/4” to 3/8” of insulation from the
ends and twisting the exposed wire strands tightly. The spring loaded binding posts on the back of the speaker will accept raw wire only.
Be sure to wire both the left and right speakers "in-phase." That is, the Positive
+ (red) terminal on the amplifier output must
be connected to the corresponding Positive
+ (red) terminal on the speaker. Likewise with the Negative - (black) terminals.
All speaker wire have some sort of marking along one or both conductors to help you make the correct connections. Incorrect speaker
phase is indicated by weak bass and the lack of a well-defined stereo image.
Fold down
outer ring
Place Inside
Frame
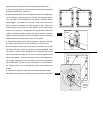
Remove
Baffle
Ready to
paint
Paint
Shield
fig.9